
Smudged printouts can be frustrating—especially when you're preparing important documents or printing high-quality images. Smearing ink not only looks unprofessional but may also indicate deeper issues with your printer’s functionality. One of the most common culprits behind smudged pages is misaligned or malfunctioning ink cartridges. Understanding the root causes and knowing how to properly align cartridges can save you time, ink, and repeated paper waste.
Printers rely on precise alignment between the printhead and ink cartridges to deposit ink accurately on paper. When this alignment fails, even slightly, it results in blurry text, streaks, overlapping colors, or faded sections. The good news is that most alignment problems are fixable with routine maintenance and a few simple steps. This guide breaks down the science behind smudging, walks you through diagnosing the issue, and provides a clear process for correcting cartridge alignment across different printer models.
Understanding Why Printers Smudge Pages
Before jumping into fixes, it's essential to identify what’s causing the smudging. While cartridge misalignment is a frequent cause, several other mechanical and environmental factors contribute to poor print quality.
Common Causes of Smudging
- Ink Smearing During Drying: Some inks take longer to dry, especially on glossy or coated paper. If paper exits the printer too quickly or is handled immediately, wet ink can transfer onto rollers or fingers.
- Damaged or Worn Printheads: Over time, printheads accumulate dried ink or debris, leading to inconsistent ink distribution.
- Low-Quality or Incompatible Ink Cartridges: Third-party or refilled cartridges may not deliver consistent flow or proper viscosity, increasing the risk of smears.
- Paper Type Mismatch: Using thick photo paper in a mode designed for plain paper—or vice versa—can affect how ink absorbs and dries.
- Printer Misalignment: Even a minor shift in cartridge position disrupts the precision needed for clean color registration, particularly in color printing.
- Dirty Internal Rollers: Paper feed rollers collect dust and residual ink over time, which can transfer smudges during printing.
How to Diagnose Smudging vs. Alignment Issues
Not all smudges stem from misaligned cartridges. It’s crucial to distinguish between general print defects and true alignment problems.
If your output shows:
- Consistent horizontal streaks or missing lines → Likely clogged nozzles.
- Blotches or random ink spots → Dirty internal components or leaking cartridges.
- Colors appearing slightly offset, text looking doubled, or faint ghosting → Classic signs of misalignment.
For example, if red text appears slightly to the left of black text, or if colored images look “fringed,” your cartridges need realignment. This occurs because each color cartridge must fire ink at exact coordinates. A deviation as small as 0.1 millimeters can distort the final image.
“Precise cartridge alignment isn’t just about aesthetics—it’s fundamental to how modern inkjet printers reproduce detail. Even slight misregistration degrades readability and color fidelity.” — Dr. Alan Reeves, Imaging Systems Engineer at HP Labs (Ret.)
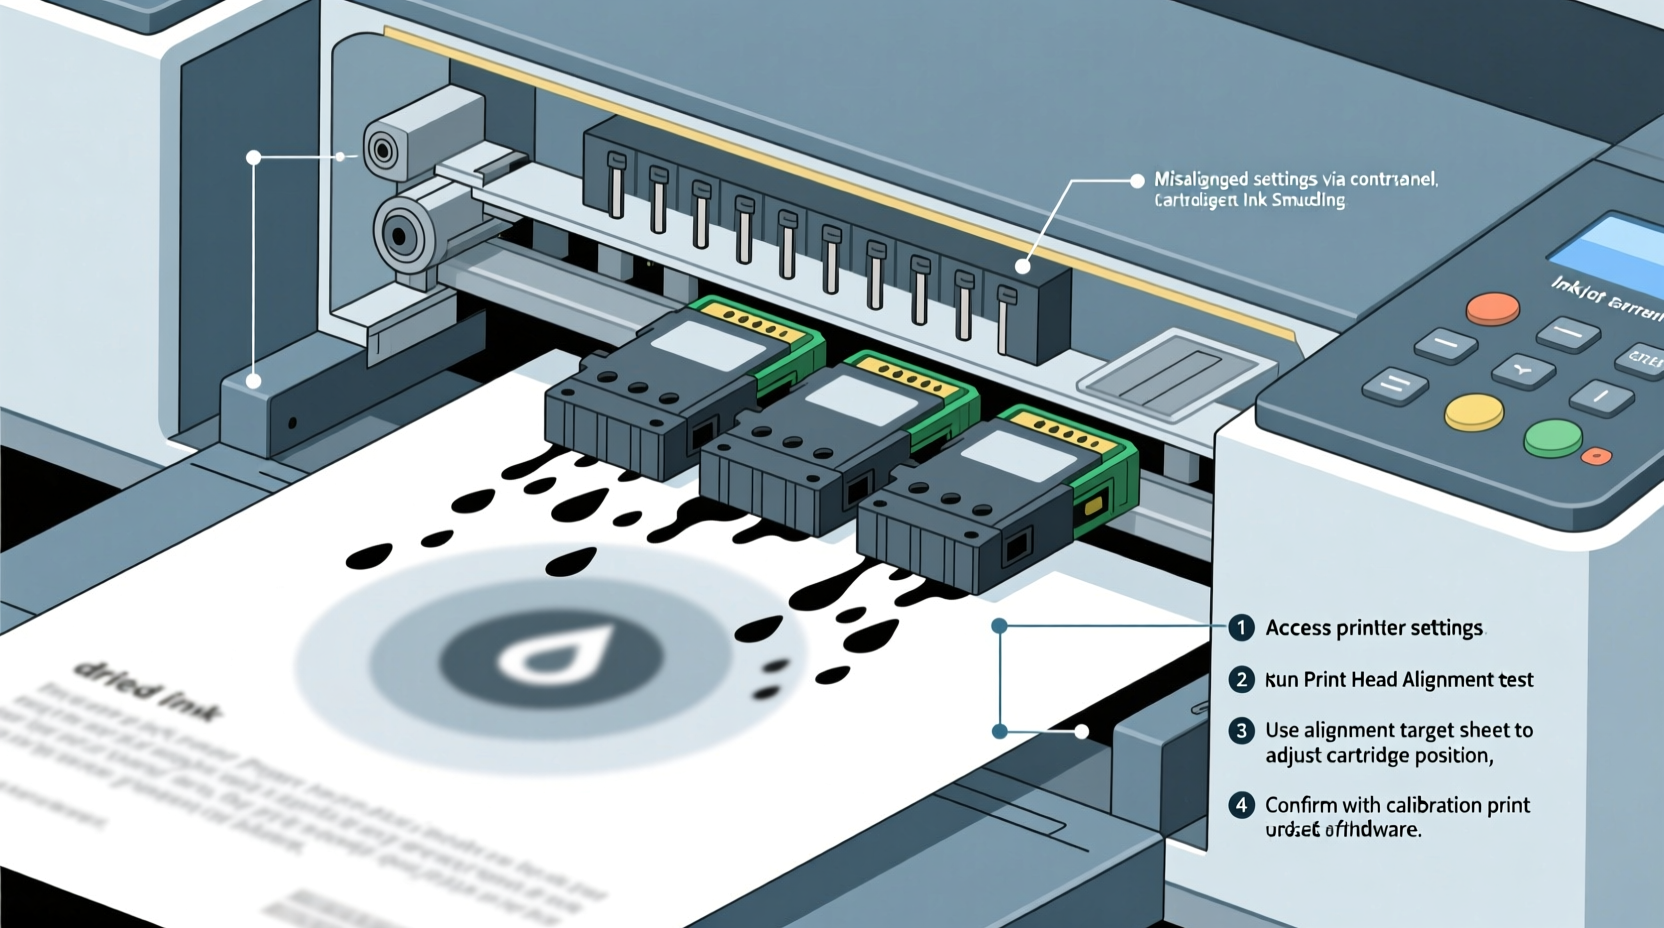
Step-by-Step Guide to Align Printer Cartridges
Aligning cartridges is a built-in function on most modern printers. The process varies slightly by brand, but the underlying principle remains the same: print a test pattern, analyze misalignment, and adjust digitally via software.
Step 1: Access Your Printer’s Maintenance Menu
Navigate to your printer settings:
- On Windows: Go to Settings > Devices > Printers & Scanners, select your printer, click Manage, then Printer Properties.
- On macOS: Open System Settings > Printers & Scanners, select your device, and click Options & Supplies.
- Alternatively, use the physical control panel on your printer. Look for “Maintenance,” “Tools,” or “Setup” options.
Step 2: Print an Alignment Page
Select “Align Printhead” or “Cartridge Alignment.” The printer will produce a sheet containing patterns of lines or grids in black and color.
Step 3: Analyze the Patterns
Examine the page under good lighting. Look for:
- Gaps or overlaps in vertical lines.
- Color fringes around black text.
- Wavy or uneven grid intersections.
Step 4: Input Adjustment Codes (If Manual)
Some older models require you to manually enter values based on which pattern looks clearest. For example:
| Pattern Set | Best Match Code |
|---|---|
| Set A – Option 3 | Enter \"3\" for horizontal alignment |
| Set B – Option 1 | Enter \"1\" for vertical alignment |
Step 5: Confirm and Re-Test
After adjustment, print another test page. Repeat if necessary until lines are sharp and colors align perfectly.
Brand-Specific Alignment Procedures
While the general method is similar, each manufacturer implements alignment differently.
| Brand | Alignment Path | Notes |
|---|---|---|
| HP | Settings > Tools > Align Cartridges | Uses automatic scanning on some models; others require manual code entry. |
| Canon | Press Setup > Maintenance > Auto Alignment | Most newer models self-align after printing a calibration page. |
| Epson | Printer Utility > Head Alignment | Offers both vertical and bidirectional alignment for precision. |
| Brother | Menu > Maintenance > Print Quality > Alignment | May prompt to clean rollers first if smudging persists. |
Note: Wireless printers often allow alignment through companion apps (e.g., HP Smart, Epson iPrint). These can simplify the process with guided prompts.
Preventative Maintenance Checklist
Regular upkeep prevents smudging and reduces the frequency of realignment. Follow this checklist monthly:
- ✅ Run printhead cleaning cycle if colors appear faded or streaky.
- ✅ Inspect cartridges for leaks or bulging seals.
- ✅ Clean paper feed rollers with a lint-free cloth dampened with water.
- ✅ Store unused cartridges upright in a cool, dark place to prevent drying.
- ✅ Use genuine or high-reliability compatible cartridges.
- ✅ Avoid leaving the printer idle for weeks without printing a test page.
- ✅ Keep firmware updated—manufacturers often release print quality improvements.
Real-World Example: Fixing a Home Office Smudging Issue
Sarah, a freelance graphic designer, noticed her client reports were coming out with faint pink shadows beside black headings. She initially assumed her magenta cartridge was leaking. After replacing it, the problem persisted.
She ran a nozzle check, which showed all colors firing normally. Then she printed an alignment page. The test revealed that the magenta cartridge was slightly shifted vertically. Following her Canon PIXMA’s auto-alignment wizard, she completed a two-step calibration. The next print was crisp, with perfect color registration.
The issue? The printer had been moved during a home renovation, jostling the internal mechanisms. Realignment—not hardware replacement—was the solution.
When to Seek Professional Help
While most alignment issues are user-fixable, certain symptoms suggest deeper problems:
- Repeated failed alignments despite correct procedure.
- Physical damage to the cartridge cradle or sliding rail.
- Continuous ink leakage even after cartridge replacement.
- No response from the printhead during diagnostics.
In such cases, internal components like the encoder strip (which guides printhead movement) may be dirty or broken. Attempting DIY repairs can void warranties. Contact the manufacturer or a certified technician instead.
Frequently Asked Questions
How often should I align my printer cartridges?
Only when you notice print quality issues or after installing new cartridges. Most users need alignment every 2–3 months, depending on usage. Frequent alignment isn’t harmful but isn’t necessary unless problems arise.
Can misaligned cartridges waste ink?
Yes. Misalignment forces the printer to compensate by firing extra droplets, leading to uneven ink consumption and premature cartridge depletion. Proper alignment ensures efficient ink use and extends cartridge life.
Why does my printer still smudge after alignment?
Alignment fixes positional errors, but smudging can also come from wet ink, low-quality paper, or dirty rollers. Try switching to fast-drying paper, allowing prints to dry fully, or cleaning the internal path with a roller cleaning sheet.
Final Thoughts: Crisp Prints Start with Precision
Smudged pages don’t have to be a constant annoyance. By understanding the mechanics behind ink delivery and taking proactive steps to maintain alignment, you regain control over your print quality. Whether you're printing contracts, school projects, or family photos, clarity matters.
The process of aligning cartridges is quick, free, and built into your printer’s design. Don’t wait for the problem to worsen—address misalignment at the first sign of fuzzy text or color drift. Combine this with regular cleaning and smart cartridge management, and your printer will deliver consistently sharp results for years.


 浙公网安备
33010002000092号
浙公网安备
33010002000092号 浙B2-20120091-4
Comments
No comments yet. Why don't you start the discussion?