
Cooking rice seems like one of the most basic kitchen tasks—yet for many home cooks, it ends in frustration: a pot of fluffy grains on top, but a stubborn layer of charred rice stuck to the bottom. This common issue not only ruins meals but can also damage pots and create a mess that’s difficult to clean. The good news? Burnt rice is almost always preventable. With a few adjustments to your technique, equipment, and heat control, you can consistently achieve perfectly cooked rice without scorching.
The root causes range from incorrect heat settings to using the wrong type of pot or inaccurate water-to-rice ratios. Understanding these factors—and how they interact—is key to solving the problem once and for all.
Understanding Why Rice Burns on the Stovetop
Rice burns when direct heat exceeds what the liquid in the pot can absorb and distribute evenly. Once the water evaporates or reaches its boiling point, the temperature at the base of the pot spikes rapidly. If there's insufficient moisture or poor heat distribution, the rice grains touching the bottom overheat and caramelize beyond edibility into carbonization—what we recognize as burning.
Several interrelated factors contribute to this:
- Excessive heat: High flames continue heating the pot after water has boiled off.
- Pot material: Thin or warped pans conduct heat unevenly, creating hot spots.
- Incorrect water ratio: Too little water means premature evaporation, leaving rice exposed to dry heat.
- Lid management: Removing the lid too often releases steam needed to gently finish cooking.
- Stirring (or lack thereof): Stirring during cooking can break grains and release excess starch, increasing stickiness and scorch risk.
As food scientist Dr. Harold McGee explains,
“Water acts as both a solvent and a temperature buffer in cooking. When it’s gone, the system shifts abruptly from moist to dry heat—which is exactly when burning begins.” — Dr. Harold McGee, On Food and Cooking
Step-by-Step Guide to Prevent Burnt Rice Every Time
Follow this reliable stovetop method to eliminate burnt rice. This process works with white long-grain rice such as basmati or jasmine, though minor adjustments may be needed for short-grain or brown varieties.
- Rinse the rice thoroughly: Place 1 cup of rice in a bowl, cover with cold water, and swirl. Drain and repeat 3–4 times until the water runs mostly clear. This removes surface starch that causes clumping and sticking.
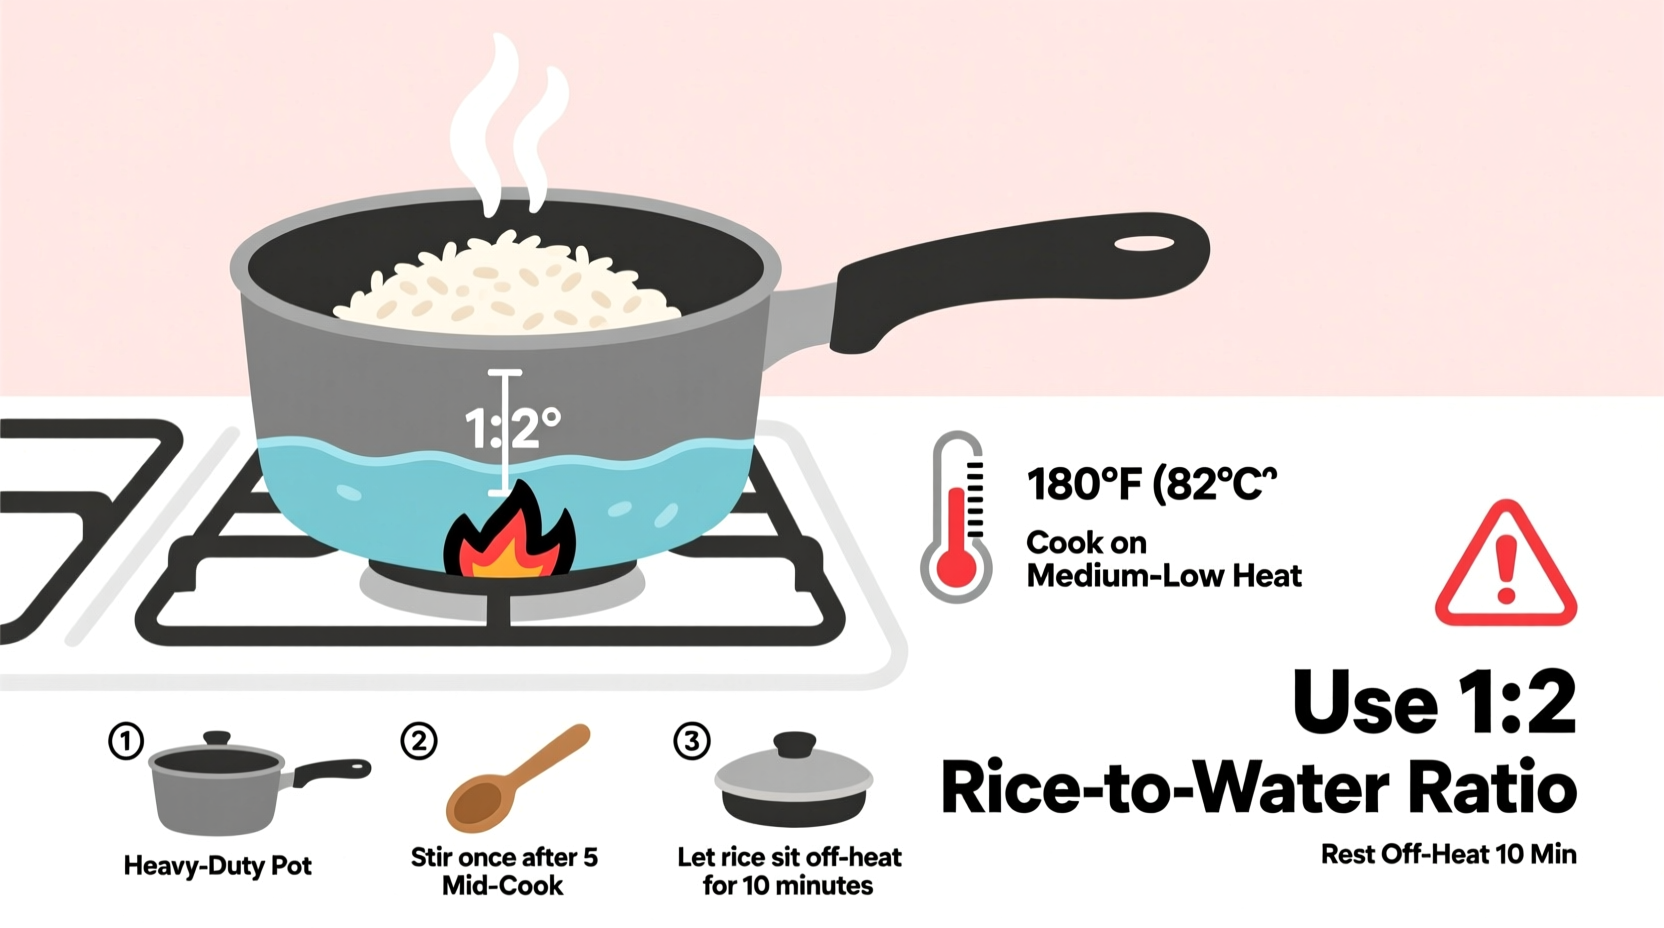
- Use the correct water-to-rice ratio: For most white rice, use a 2:1 ratio (2 cups water per 1 cup rice). Adjust slightly based on variety—short-grain may need less; aged basmati might need more.
- Choose the right pot: Use a heavy-bottomed saucepan with a tight-fitting lid. Stainless steel with an aluminum core or enameled cast iron distributes heat evenly and reduces hot spots.
- Bring to a boil over medium-high heat: Add rice and water to the pot, bring to a rolling boil uncovered. Do not stir.
- Reduce heat immediately: As soon as it boils, lower the flame to the lowest possible setting. You should see gentle simmering, not vigorous bubbling.
- Cover and cook undisturbed: Place the lid on tightly and cook for 15–18 minutes. Do not lift the lid—steam is essential for even cooking.
- Remove from heat and rest: After cooking, turn off the burner and let the pot sit, covered, for 10 minutes. This allows residual steam to finish fluffing the rice and equalizes moisture.
- Fluff and serve: Gently fluff with a fork. Avoid metal utensils if using nonstick pots.
Common Mistakes That Lead to Burnt Rice
Even experienced cooks make small errors that sabotage their results. These habits are often overlooked but directly lead to scorched rice:
| Mistake | Why It Causes Burning | Solution |
|---|---|---|
| Using a thin or warped pot | Creates uneven heat distribution and hot zones at the center | Invest in a heavy-bottomed pot designed for even conduction |
| Leaving the lid off or peeking frequently | Loses steam and drops internal temperature, requiring longer cook time and risking dry-out | Cook undisturbed; trust the timing |
| Not rinsing the rice | Excess starch increases stickiness and promotes adhesion to the pan | Rinse until water runs clear |
| Overcooking past recommended time | Evaporates remaining moisture, exposing rice to direct heat | Set a timer and remove promptly |
| High heat after boiling | Causes rapid evaporation and overheating of the pot base | Drop to the lowest simmer immediately after boiling |
Real Example: Fixing a Habitual Burner
Sarah, a home cook in Portland, had struggled with burnt rice for years. She used a lightweight aluminum pot on an older gas stove with inconsistent burners. Her usual method was bringing rice to a boil, covering it, and leaving it on medium-low for 20 minutes. Despite following recipes, she consistently ended up scraping blackened rice from the bottom.
After switching to a tri-ply stainless steel saucepan with a tight lid and reducing the heat to the lowest possible setting immediately after boiling, her results transformed. She also started rinsing her rice and allowing it to rest off-heat for 10 minutes. Within one week, she achieved perfectly steamed rice with no sticking or burning—even on her finicky stove.
“I didn’t realize how much my pot mattered,” Sarah said. “Once I upgraded and stopped lifting the lid every few minutes, it just worked.”
Essential Tips and Tools for Success
Beyond technique, certain tools and practices significantly improve outcomes. Consider integrating these into your routine:
- Heat diffusers: Ideal for electric coils or powerful gas burners. They spread heat more evenly across the pot base.
- Oven method alternative: After bringing rice to a boil on the stove, transfer the covered pot to a 350°F (175°C) oven for 17 minutes. The ambient heat eliminates hot spots and ensures uniform cooking.
- Nonstick pots: Useful for beginners, but avoid high heat which can degrade the coating. Best for lower-temperature applications.
- Timer discipline: Set two timers—one for the end of cook time, another for resting completion—to avoid guesswork.
Checklist: How to Avoid Burnt Rice
Before you start cooking, run through this quick checklist:
- ✅ Rinse the rice until water runs clear
- ✅ Measure water accurately (typically 2:1 for white rice)
- ✅ Use a heavy-bottomed pot with a tight-fitting lid
- ✅ Start on medium-high, then reduce to the lowest possible simmer
- ✅ Cover and do not lift the lid during cooking
- ✅ Cook for 15–18 minutes (white rice), then remove from heat
- ✅ Let stand covered for 10 minutes before fluffing
Frequently Asked Questions
Can I fix rice that’s already starting to burn?
If you catch it early—when you hear crackling or smell faint scorching—immediately remove the pot from heat and place it on a cool surface or damp towel. Do not stir. Let it rest covered for 10–15 minutes. Often, the top portion remains edible. Scoop it out carefully, leaving the burnt layer behind. Avoid scraping the bottom into the serving dish.
Does soaking rice help prevent burning?
Soaking can reduce cooking time and promote even hydration, especially for denser types like brown or wild rice. Soak for 20–30 minutes before cooking, then drain and proceed with slightly less water. While not essential for white rice, it adds insurance against under-hydration and uneven cooking.
Why does restaurant rice never burn?
Restaurants typically use commercial rice cookers with precise thermal sensors and consistent heating elements. These appliances automatically regulate temperature and switch to “keep warm” mode when done. At home, replicating this consistency requires attention to pot quality, heat level, and timing—but it’s entirely achievable.
Final Thoughts: Mastering the Basics Leads to Perfect Results
Burnt rice isn’t a reflection of poor skill—it’s usually the result of subtle imbalances in heat, equipment, or method. By understanding how water, temperature, and cookware interact, you gain control over the process. The solution doesn’t require fancy gadgets or advanced techniques; it comes down to consistency, awareness, and a few thoughtful adjustments.
Perfect rice isn’t luck. It’s science applied with care. Whether you’re cooking for one or feeding a family, mastering this fundamental skill elevates every meal. Try the step-by-step method outlined here, invest in a solid pot, and resist the urge to peek. In no time, you’ll wonder why you ever struggled.


 浙公网安备
33010002000092号
浙公网安备
33010002000092号 浙B2-20120091-4
Comments
No comments yet. Why don't you start the discussion?