
If you’ve ever lifted the lid of your rice cooker only to find a charred, crusty layer stuck to the bottom, you’re not alone. This common kitchen frustration can ruin an otherwise perfect meal and leave you questioning whether your appliance is defective or if you're doing something wrong. The truth is, burnt rice at the base of your cooker is rarely due to a faulty unit — more often, it’s the result of small but correctable mistakes in preparation, water ratio, or maintenance. Understanding the root causes and applying precise fixes can restore your rice cooker to peak performance and deliver consistently fluffy, evenly cooked rice every time.
Understanding How Rice Cookers Work
Rice cookers operate on a simple yet intelligent principle: they heat water until it’s absorbed by the rice or evaporated, then automatically switch to “warm” mode when internal temperature rises above boiling point (100°C/212°F), signaling that most of the moisture has been absorbed. However, this system relies heavily on accurate water-to-rice ratios, proper sealing, and clean components. When any part of this balance is disrupted, overheating can occur, leading to scorching on the inner pot’s surface.
The non-stick coating inside modern rice cookers helps reduce sticking, but it doesn’t eliminate the risk of burning entirely — especially if food residue builds up over time or if too little water is used. Additionally, older models without fuzzy logic or microprocessors may lack precision in detecting doneness, increasing the likelihood of overcooking.
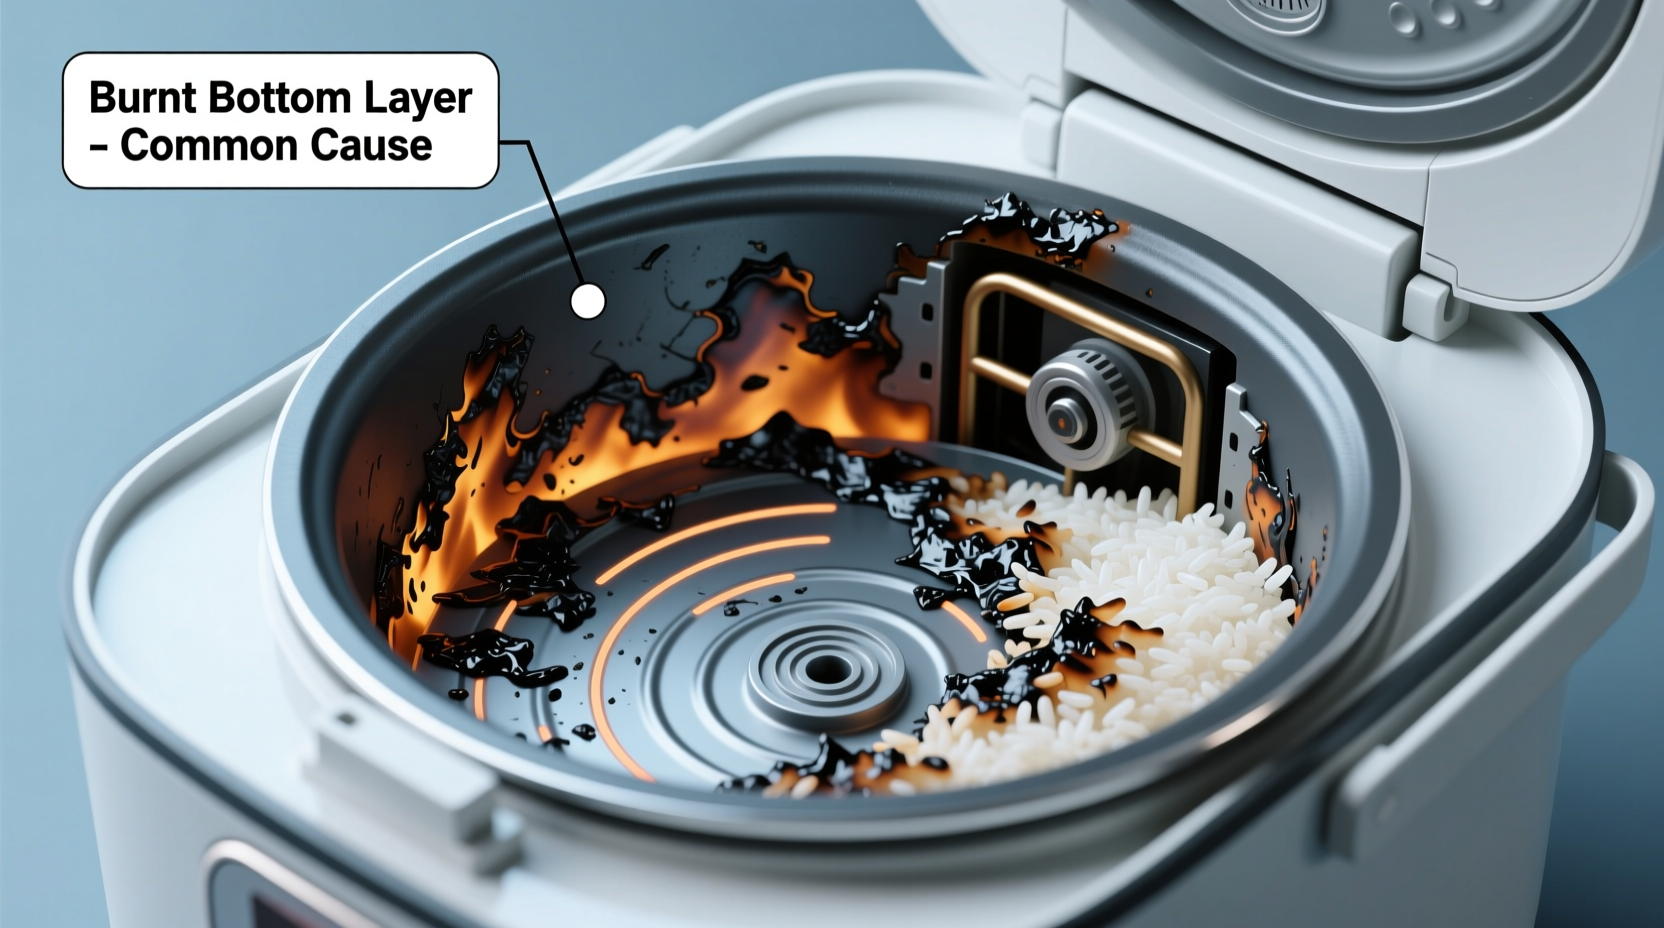
Common Causes of Burnt Rice in Rice Cookers
Burning doesn’t happen randomly. There are specific, identifiable reasons why your rice cooker might be charring the bottom layer. Identifying which factor applies to your situation is the first step toward solving the problem.
- Incorrect water-to-rice ratio: Too little water means all liquid evaporates before grains fully cook, leaving the remaining heat to burn the rice at the base.
- Old or damaged non-stick coating: Scratches or wear compromise the protective layer, allowing direct contact between rice and metal, which promotes sticking and burning.
- Residue buildup: Leftover starch, oil, or seasoning from previous uses creates hot spots and insulates parts of the pot, causing uneven cooking.
- Overfilling or underfilling: Exceeding capacity limits disrupts steam circulation; cooking very small amounts prevents proper thermostat response.
- Using the wrong rice type settings: Brown rice, wild rice, or sushi rice require different temperatures and durations than white rice. Using the default setting for all types leads to errors.
- Poor lid seal or trapped steam: If steam escapes improperly or condensation drips inconsistently, moisture distribution becomes irregular.
- Power fluctuations or voltage issues: Inconsistent electricity supply can cause erratic heating patterns, particularly in budget or older units.
“Many users assume their rice cooker is broken when it’s actually just responding to imbalanced inputs. A 1:1.5 water-to-rice ratio isn’t universal — it varies by grain size, age, and pre-rinsing.” — Dr. Lin Mei, Food Scientist & Appliance Testing Lab Director
Step-by-Step Fixes to Stop Rice from Burning
Follow this systematic approach to diagnose and resolve the issue permanently. These steps apply to most standard electric rice cookers, including brands like Zojirushi, Tiger, Cuckoo, and Instant Pot Duo models used in rice mode.
- Measure water precisely using the absorption method: For white rice, use 1¼ to 1½ cups of water per cup of uncooked rice. Adjust based on variety: jasmine needs less (1.25:1), brown rice requires more (1.75:1). Use the knuckle rule as a backup: after leveling rice in the pot, add water until it reaches your first knuckle when your fingertip touches the rice surface.
- Rinse rice thoroughly before cooking: Wash 2–4 times under cold water until runoff is clear. This removes excess surface starch that contributes to clumping and scorching.
- Clean the inner pot and heating plate regularly: After each use, wipe the exterior bottom of the pot and the heating plate inside the cooker with a damp cloth. Built-up debris reduces thermal conductivity and creates hot zones.
- Inspect the non-stick coating: Look for scratches, flaking, or discoloration. If visible damage exists, replace the pot — continued use risks chemical leaching and worsens sticking.
- Ensure the lid seals properly: Check the silicone gasket (if present) for cracks or misalignment. Clean it monthly with soapy water and reseat it firmly.
- Don’t open the lid during cooking: Releasing steam interrupts the pressure balance and forces the cooker to work harder to maintain temperature, increasing burn potential.
- Let rice rest after cooking: Allow 10–15 minutes in “keep warm” mode before fluffing. This equalizes moisture and makes removal easier without scraping.
- Use the correct setting: Select “Brown Rice,” “Sushi,” or “Multi-Grain” modes when appropriate. Avoid using “Quick Cook” for large batches, as rapid heating often sacrifices evenness.
Real Example: Fixing Chronic Burning in a 5-Year-Old Model
Sarah from Portland had been struggling with burnt rice for months using her mid-tier rice cooker. She assumed it was failing and considered replacement. Instead, she followed diagnostic steps: first, she rinsed her basmati rice — something she’d skipped previously. Next, she cleaned the heating plate and found a layer of hardened starch beneath the pot. After gentle scrubbing and recalibrating her water ratio from 1:1 to 1:1.3, the burning stopped completely. The final fix? Replacing the scratched inner pot she hadn’t realized was compromised. Her total cost: $22 for a new pot versus $70 for a new unit.
Do’s and Don’ts: Quick Reference Table
| Do | Don’t |
|---|---|
| Rinse rice until water runs clear | Skip rinsing to save time |
| Use measured cups (not random mugs) | Estimate water visually |
| Clean both pot and heating plate weekly | Only wash the pot interior |
| Replace worn pots promptly | Keep using a scratched or peeling pot |
| Wait 10+ minutes before opening | Lift the lid immediately after cooking ends |
Preventative Maintenance Checklist
To avoid future issues, incorporate these habits into your routine:
- ✅ Rinse all rice before loading
- ✅ Measure water with the provided cup or calibrated measuring tool
- ✅ Wipe down the outer base of the pot after every cook
- ✅ Inspect the heating plate monthly for debris or corrosion
- ✅ Replace the inner pot every 2–3 years, or sooner if damaged
- ✅ Descale the unit every 3 months if using hard water (use vinegar solution: 1 part white vinegar to 3 parts water, run a cycle without rice)
- ✅ Store with the lid slightly ajar to prevent mold and odors
Frequently Asked Questions
Can I still use my rice cooker if the bottom gets burned occasionally?
Occasional light browning may not harm the appliance, but repeated burning degrades the non-stick coating and stresses the heating element. Persistent charring indicates a deeper issue that should be corrected to extend the device’s lifespan.
Why does my new rice cooker burn rice when my old one never did?
Newer models often have faster heating elements and less tolerance for incorrect ratios. Also, modern pots may use thinner coatings or different alloys. Ensure you're following the manufacturer's instructions exactly, especially regarding minimum quantities and water levels.
Is there a way to clean already-burned residue safely?
Yes. Fill the pot with warm water and a few drops of dish soap. Let soak for 1–2 hours. Use a soft sponge or nylon brush to gently loosen debris. For stubborn residue, add two tablespoons of baking soda and simmer in the cooker for 15 minutes (without rice), then let cool and scrub lightly. Never use steel wool.
Conclusion: Take Control of Your Rice Cooking Results
Burnt rice isn’t inevitable — it’s a signal. Whether your cooker is five years old or brand new, consistent results come from attention to detail, regular upkeep, and understanding how the appliance interacts with ingredients. By adjusting your water ratios, maintaining cleanliness, and respecting the technology’s limitations, you can eliminate scorching for good. Don’t dismiss recurring problems as normal wear. Small changes yield dramatic improvements in texture, taste, and longevity of both your meals and your machine.


 浙公网安备
33010002000092号
浙公网安备
33010002000092号 浙B2-20120091-4
Comments
No comments yet. Why don't you start the discussion?