
A steady drip from your shower head long after you’ve turned off the water isn’t just annoying—it can waste hundreds of gallons of water a year and may signal deeper plumbing problems. While minor dripping immediately post-shutdown is normal due to residual water draining, persistent or prolonged leakage usually points to internal component failure, most often within the valve assembly behind the wall. Understanding the root causes and knowing how to diagnose them can save you money on water bills and prevent costly water damage.
How Shower Valves Work and Where Leaks Begin
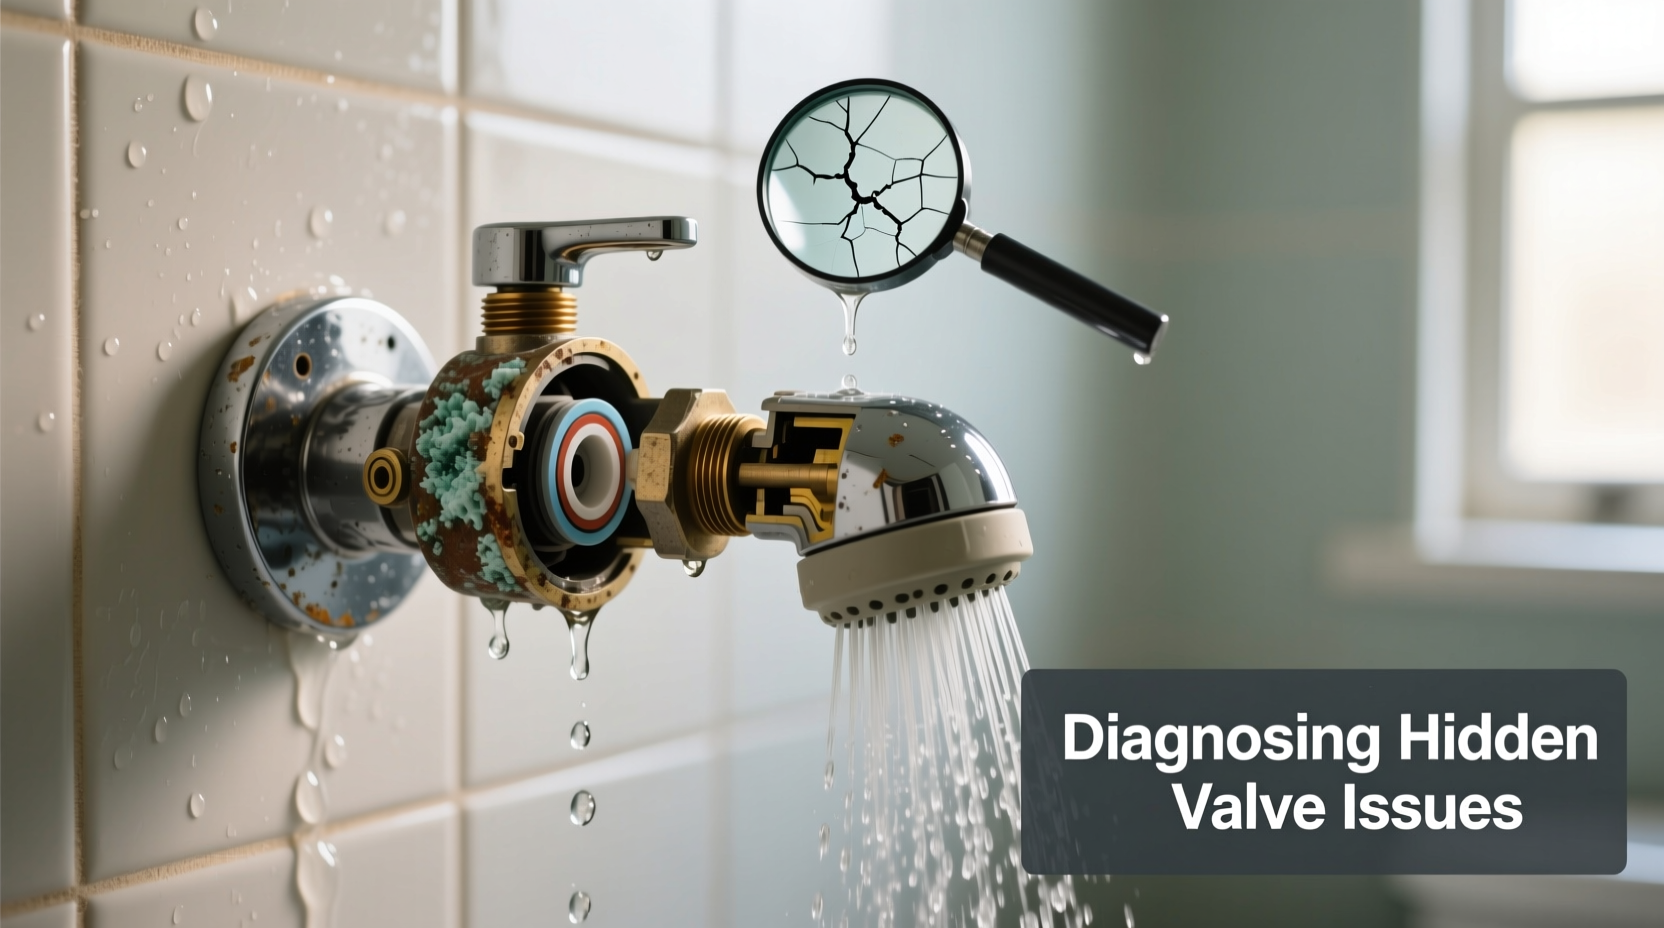
Behind every shower handle lies a valve system that controls water flow and temperature. Most residential showers use one of three valve types: compression, cartridge, or thermostatic. When you turn the handle, the valve opens to allow hot and cold water to mix and flow through the shower head. When closed, it should form a watertight seal. If that seal fails, water continues to seep through—even after shutdown.
The most common culprit for post-shutoff dripping is a worn or damaged valve cartridge, rubber washer, or O-ring. These components degrade over time due to mineral buildup, frequent use, or water pressure fluctuations. In older homes, compression valves with rubber washers are especially prone to wear. Newer models with ceramic cartridges last longer but aren’t immune to failure.
“Even high-end fixtures will develop leaks if internal seals degrade. The key isn’t the brand—it’s maintenance and water quality.” — Daniel Reyes, Master Plumber & Plumbing Instructor
Common Causes of Post-Shutdown Leakage
- Worn Valve Cartridge: Found in single-handle showers, these plastic or ceramic units regulate water flow and temperature. Cracks or erosion prevent full closure.
- Degraded Rubber Washers: Common in older two-handle systems, washers compress to stop flow. Over time, they harden, crack, or dislodge.
- Mineral Buildup: Hard water leaves calcium and lime deposits inside the valve, preventing proper sealing.
- Loose or Damaged O-Rings: Small rubber rings around the cartridge shaft can wear out, causing internal leaks that exit through the shower head.
- Improper Installation: A misaligned or improperly seated cartridge won’t close fully, even if it’s new.
- High Water Pressure: Excessive pressure (over 80 psi) strains seals and accelerates wear.
Unlike faucet leaks, which are often visible, shower valve issues are hidden behind tiles. This makes diagnosis trickier but no less urgent. Left unattended, a leaking valve can lead to mold growth behind walls, deterioration of framing, and increased utility costs.
Step-by-Step Diagnosis and Inspection Process
Before tearing into your wall, follow this logical sequence to identify whether the problem lies in the valve, cartridge, or elsewhere.
- Observe the Drip Pattern: Does the leak start immediately after shutting off? Or does it begin minutes later? Immediate dripping suggests a faulty seal. Delayed leakage could point to trapped water draining slowly—but only if minimal.
- Check Other Fixtures: Test sinks and tubs on the same water line. If they also drip or have low pressure, the issue may be systemic (e.g., sediment in pipes).
- Inspect the Shower Head: Remove the shower head and cap the pipe. Turn the shower on and off. If no water leaks from the pipe, the issue is likely in the shower head itself. If water still seeps, the problem is upstream—likely the valve.
- Remove the Handle and Trim Plate: Use a screwdriver or Allen wrench to access the cartridge. Look for visible cracks, warping, or mineral crust.
- Test the Cartridge Manually: With water off, pull the cartridge slightly out and reseat it. Reassemble and test. If dripping stops temporarily, the cartridge wasn’t seated properly.
- Run a Pressure Test: Install a pressure gauge on an outdoor spigot. Normal household pressure is 40–80 psi. Anything above 80 warrants a pressure-reducing valve.
When to Suspect Hidden Valve Damage
If the cartridge appears intact but dripping persists, the valve body itself may be cracked or eroded. This is more common in galvanized or older brass valves exposed to decades of thermal expansion and contraction. Signs include:
- Water seeping from the wall around the fixture
- Reduced water pressure despite clean filters
- Slight clicking or grinding when turning the handle
In such cases, professional assessment is recommended, as replacing the rough-in valve requires cutting into the wall.
Do’s and Don’ts of Shower Valve Maintenance
| Do’s | Don’ts |
|---|---|
| Flush the valve periodically by running hot water for 5 minutes to clear sediment | Use abrasive cleaners on cartridge surfaces |
| Replace cartridges every 7–10 years as preventive maintenance | Force a stiff handle—this can break the stem or cartridge |
| Install a whole-house water softener in hard water areas | Ignore small drips—they rarely fix themselves |
| Lubricate O-rings with silicone grease during reassembly | Overtighten trim screws, which can distort the cartridge housing |
| Label hot and cold lines during repair to avoid cross-connection | Reuse old washers or O-rings even if they look intact |
Real-World Case: Diagnosing a Chronic Drip in a 15-Year-Old Home
In a suburban home built in 2009, the master bathroom shower began dripping consistently after each use. The homeowner initially assumed the shower head was faulty and replaced it twice. The leak persisted. A local plumber was called, who followed a structured diagnostic process.
First, he removed the shower head and capped the pipe. After turning the shower on and off, water continued to drip from the pipe, ruling out the shower head. He then removed the handle and found a heavily calcified cartridge. After soaking it in vinegar for 30 minutes, he noticed hairline cracks in the ceramic disc—a telltale sign of failure.
The homeowner installed a replacement Moen 1225 cartridge. After reassembly, the drip stopped completely. However, the plumber also noted that household water pressure tested at 92 psi. He recommended installing a pressure-reducing valve to extend the life of all plumbing fixtures.
This case illustrates two critical points: surface-level fixes often miss the real issue, and environmental factors like water pressure play a major role in fixture longevity.
Preventive Maintenance Checklist
To avoid recurring leaks and extend the life of your shower valve, follow this actionable checklist:
- ✅ Inspect shower operation monthly for unusual sounds or drips
- ✅ Clean shower heads every 3 months to reduce back-pressure on valves
- ✅ Replace valve cartridges every 7–10 years, even if no symptoms appear
- ✅ Install a water softener if your area has hard water (above 7 gpg)
- ✅ Test household water pressure annually
- ✅ Shut off main water before any internal repairs
- ✅ Label parts during disassembly to ensure correct reinstallation
- ✅ Use manufacturer-recommended replacement parts—generic cartridges may not seal properly
Frequently Asked Questions
Is a dripping shower head dangerous?
While not immediately hazardous, a constant drip can lead to mold growth behind walls, structural water damage, and higher utility bills. Over time, moisture can compromise drywall and insulation, creating health and safety risks.
Can I fix a leaking shower valve myself?
Yes, if you’re comfortable with basic plumbing tools and have experience disassembling fixtures. Single-handle cartridge replacements are DIY-friendly. However, if the rough-in valve is damaged or you’re dealing with soldered copper lines, professional help is advisable.
Why does my shower drip only in the morning?
This pattern often indicates thermal expansion. As water heats overnight in the tank, pressure builds and forces small amounts past weakened seals. Installing a thermal expansion tank can resolve this.
Conclusion: Act Before the Drip Becomes a Flood
A shower head that leaks after shutdown is more than a nuisance—it’s a warning sign. Behind the wall, aging valves, compromised seals, or excessive pressure may be silently accelerating wear. By understanding how shower valves function and following a disciplined approach to inspection and maintenance, you can catch issues early and avoid expensive repairs.
Start with simple diagnostics: remove the shower head, inspect the cartridge, and test your water pressure. Address root causes like hard water or high psi before replacing parts. Remember, prevention is always cheaper than restoration.


 浙公网安备
33010002000092号
浙公网安备
33010002000092号 浙B2-20120091-4
Comments
No comments yet. Why don't you start the discussion?