
Sourdough baking is both an art and a science. When your carefully nurtured dough collapses just before it hits the oven, it can feel like a personal betrayal. You've fed your starter, shaped the loaf with care, and waited through the long proof—only to find a flat, sad pancake where a lofty boule should be. Deflation isn’t failure, but a signal. Understanding why it happens—and knowing how to respond—can turn disaster into triumph.
The root causes of pre-bake deflation lie in gluten structure, fermentation timing, temperature, and handling. Each factor plays a critical role in whether your dough holds its shape or surrenders under its own weight. More importantly, even when collapse occurs, all is not lost. With timely intervention, you can often rescue the dough and still bake a flavorful, textured loaf.
Why Sourdough Deflates Before Baking: The Core Causes
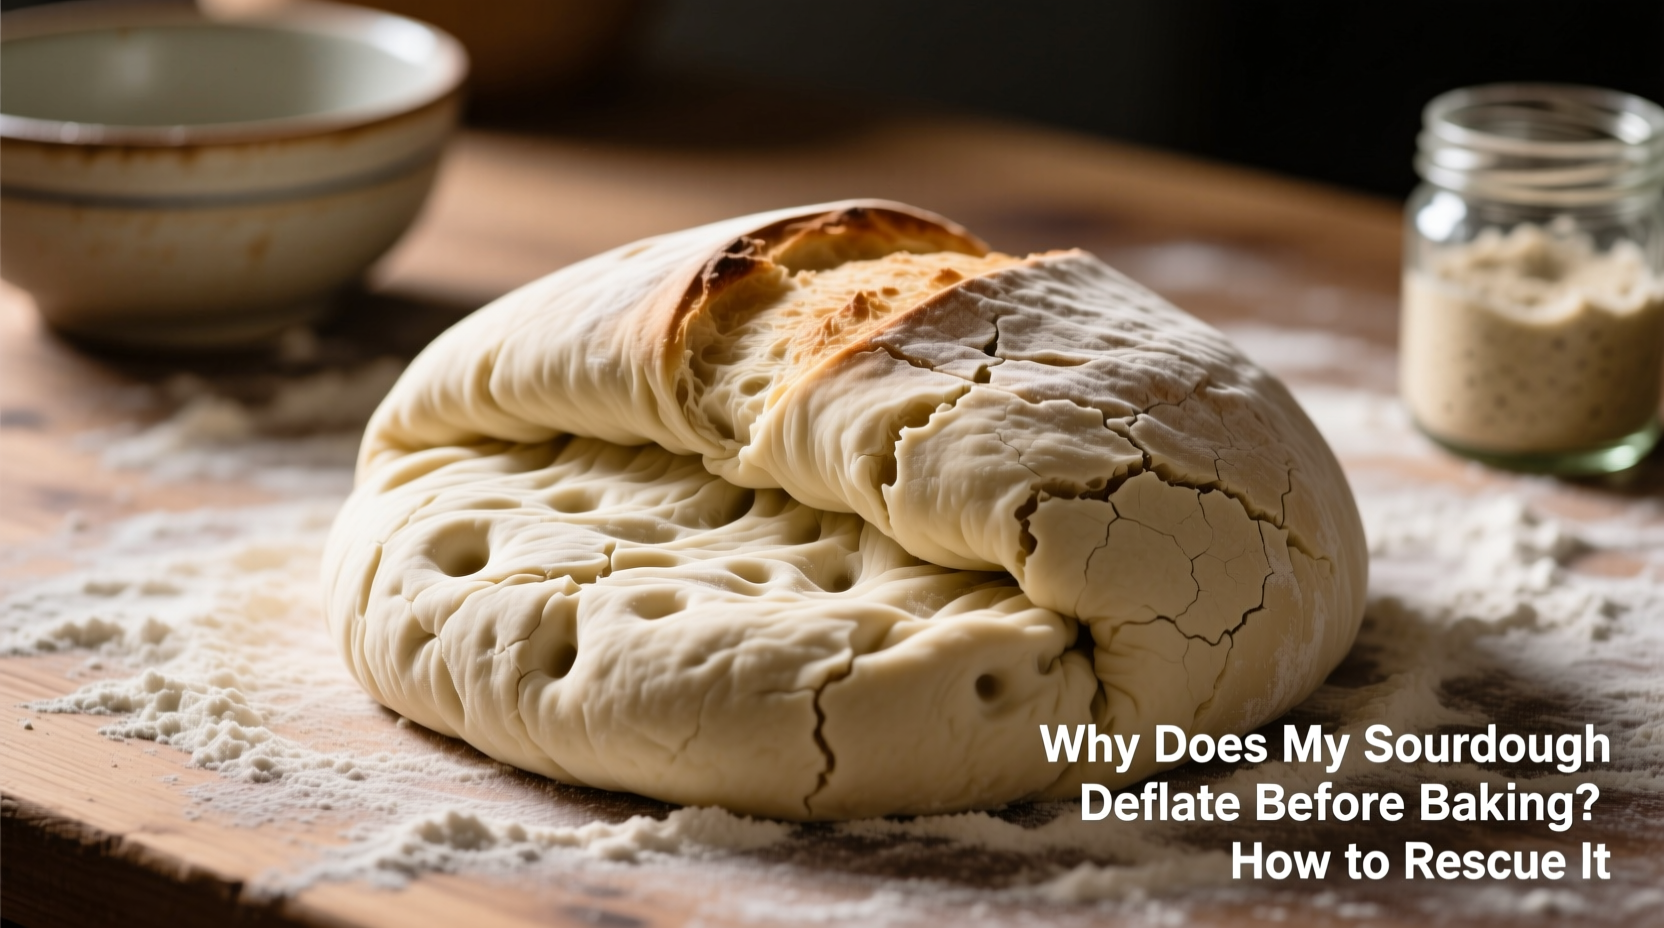
Deflation—also called “collapse” or “slumping”—occurs when the internal gas structure of the dough can no longer support itself. This typically happens during the final proof, either at room temperature or in the refrigerator. The reasons are structural and biochemical, not random.
- Overproofing: This is the most common culprit. When dough proofs too long, the yeast and bacteria exhaust available sugars. The gluten network weakens as enzymes break down proteins, losing elasticity. Gas bubbles grow too large and coalesce, creating thin walls that rupture easily.
- Weak gluten development: If the dough wasn’t kneaded or folded enough during bulk fermentation, the gluten matrix lacks strength. Without sufficient tension, the dough can't retain gas, especially under its own weight after shaping.
- Poor shaping technique: A loose or improperly tensioned shape fails to create a tight surface that supports rise. Even well-developed dough will spread if not shaped correctly.
- Cold shock from refrigeration: Sudden chilling can cause rapid contraction of gases, leading to visible deflation. While some slackening is normal, excessive collapse suggests the dough was already overproofed before going cold.
- High hydration without support: Wet doughs (75%+ hydration) are more prone to spreading. Without proper scoring or a supportive banneton, they may lose height quickly.
How to Rescue Deflated Sourdough Dough
Seeing your dough collapse doesn’t mean it’s doomed. Depending on the cause and severity, you can often recover by reworking the structure. The key is acting quickly and understanding what went wrong.
Step-by-Step Recovery Process
- Assess the damage: Gently touch the dough. Is it soupy and lifeless, or still somewhat elastic? If it feels like wet sponge, recovery is unlikely. If there’s still some bounce, proceed.
- Re-knead briefly: Turn the dough onto a lightly floured surface. Perform 2–3 minutes of gentle kneading to rebuild gluten. Avoid adding excess flour; use just enough to prevent sticking.
- Rework fermentation: Place the dough in a bowl and allow it to undergo a second bulk fermentation of 1.5 to 2 hours at room temperature. Watch closely for volume increase and bubble formation.
- Shape with tension: Pre-shape first, let rest for 15–20 minutes, then final shape with strong surface tension. Use a well-floured banneton to support the loaf.
- Re-proof carefully: Proof again, but reduce time by 25–30%. Monitor closely using the poke test. If using cold proofing, don’t exceed 12 hours.
- Bake immediately upon readiness: Don’t wait “just a little longer.” Bake as soon as the dough passes the fingertip test: a slow, partial spring-back indicates optimal proof.
This method works best when the original dough had good ingredients and fermentation started correctly. It won’t fix a spoiled starter or rancid flour, but it can compensate for timing errors.
Prevention: Building Resilient Dough from the Start
Preventing deflation begins long before shaping. Strong dough comes from consistent technique across the entire process—from mixing to baking.
Do’s and Don’ts During Key Stages
| Stage | Do’s | Don’ts |
|---|---|---|
| Mixing & Autolyse | Allow 30–60 min autolyse for gluten development | Don’t skip resting; rushing leads to weak structure |
| Bulk Fermentation | Perform 3–4 sets of stretch and folds spaced 30 min apart | Don’t overmix or underfold—both weaken cohesion |
| Shaping | Create taut surface tension; use bench scraper to lift | Don’t handle excessively—each touch degases dough |
| Proofing | Use banneton lined with rice flour; monitor time/temp | Don’t leave at room temp beyond 4 hours unless needed |
| Baking | Preheat Dutch oven 45+ min; score deeply (¼–½ inch) | Don’t open oven early—steam loss kills oven spring |
“Gluten isn’t just about strength—it’s about balance. Overdevelopment makes dough stiff and fragile. Underdevelopment means no support. Aim for extensibility *and* elasticity.” — Dr. Linnea Henriksson, Food Scientist & Artisan Baker
Real Example: Recovering a High-Hydration Levain Loaf
Marina, a home baker in Portland, regularly bakes a 78% hydration sourdough using whole wheat and white flour. One weekend, she left her final proof on the counter for 5 hours instead of 3.5. Returning, she found her dough had spread completely, barely holding shape.
Instead of discarding it, she followed a rescue protocol: she gently gathered the dough, added a tablespoon of flour, kneaded for 90 seconds, then performed a 90-minute room-temperature ferment with two fold sessions. After reshaping tightly into a linen-lined banneton, she refrigerated it for 10 hours.
The next morning, the dough retained excellent structure. She baked it in a preheated Dutch oven at 450°F (230°C), releasing a beautifully risen loaf with an open crumb and crisp crust. While not as symmetrical as ideal, the flavor was rich and tangy—proof that recovery is possible with patience.
Essential Checklist for Preventing and Managing Collapse
- ✅ Use the float test only as a rough guide—visual cues are better
- ✅ Perform regular stretch-and-folds during bulk fermentation
- ✅ Shape with firm surface tension; avoid tearing the skin
- ✅ Proof in a properly sized, well-floured banneton
- ✅ Track ambient temperature—warm kitchens speed fermentation
- ✅ Bake when dough springs back slowly, not instantly
- ✅ Keep detailed notes: hydration, flour type, proof times, outcomes
Frequently Asked Questions
Can I still bake sourdough if it deflates in the fridge?
Yes, but assess why it collapsed. If it deflated due to overproofing before chilling, the gluten may be too degraded. If it simply settled slightly, it’s likely fine. Look for bubbles under the surface and some resilience when touched. If present, bake as planned—oven spring may still occur.
Will a deflated loaf taste bad?
Not necessarily. Flavor develops during fermentation, not just structure. A collapsed loaf may lack height and have denser crumb, but acidity, sweetness, and complexity remain. In fact, many artisan bakers prefer slightly longer ferments for depth—even if it means sacrificing loft.
How do I know if my starter is strong enough?
A healthy starter should double within 4–6 hours of feeding at room temperature (70–75°F). It should smell fruity or yogurty, not alcoholic or putrid. To test strength, mix 20g fed starter with 40g water and 40g flour. It should rise noticeably in 4 hours and pass the float test in water. Weak starters lead to sluggish fermentation and structural failure.
Conclusion: Turn Collapse Into Confidence
Every collapsed sourdough loaf teaches something valuable. Deflation isn’t a sign of incompetence—it’s feedback. Whether caused by overproofing, poor tension, or environmental shifts, each incident reveals how your process interacts with living ingredients.
By learning to read dough, adjust techniques, and recover gracefully, you build deeper skill than any flawless loaf could provide. Don’t discard deflated dough out of frustration. Try rescuing it. Taste the result. Compare it to your usual bake. Over time, you’ll develop intuition that no recipe can teach.


 浙公网安备
33010002000092号
浙公网安备
33010002000092号 浙B2-20120091-4
Comments
No comments yet. Why don't you start the discussion?