
If you’ve ever taken a sip from your Stanley Cup, only to find it leaking onto your lap when laid on its side, you’re not alone. These iconic tumblers are praised for their durability and insulation, but even the most trusted models can develop leakage issues under certain conditions. While many assume the cup is defective or beyond repair, the truth is that most tipping-related leaks stem from preventable causes tied to design nuances, wear and tear, or improper use. Understanding the mechanics behind the leak—and knowing how to address it—can save both your drink and your day.
The Stanley Quencher and similar vacuum-insulated tumblers rely on a double-wall construction with a secure lid to maintain temperature and prevent spills. However, tipping the cup disrupts the internal pressure balance and exposes weak points in the seal. This article breaks down the root causes of tipping leaks, offers tested solutions, and provides long-term maintenance strategies so you can enjoy your beverage without worry—even when reclining on the couch or tossing the cup into a backpack.
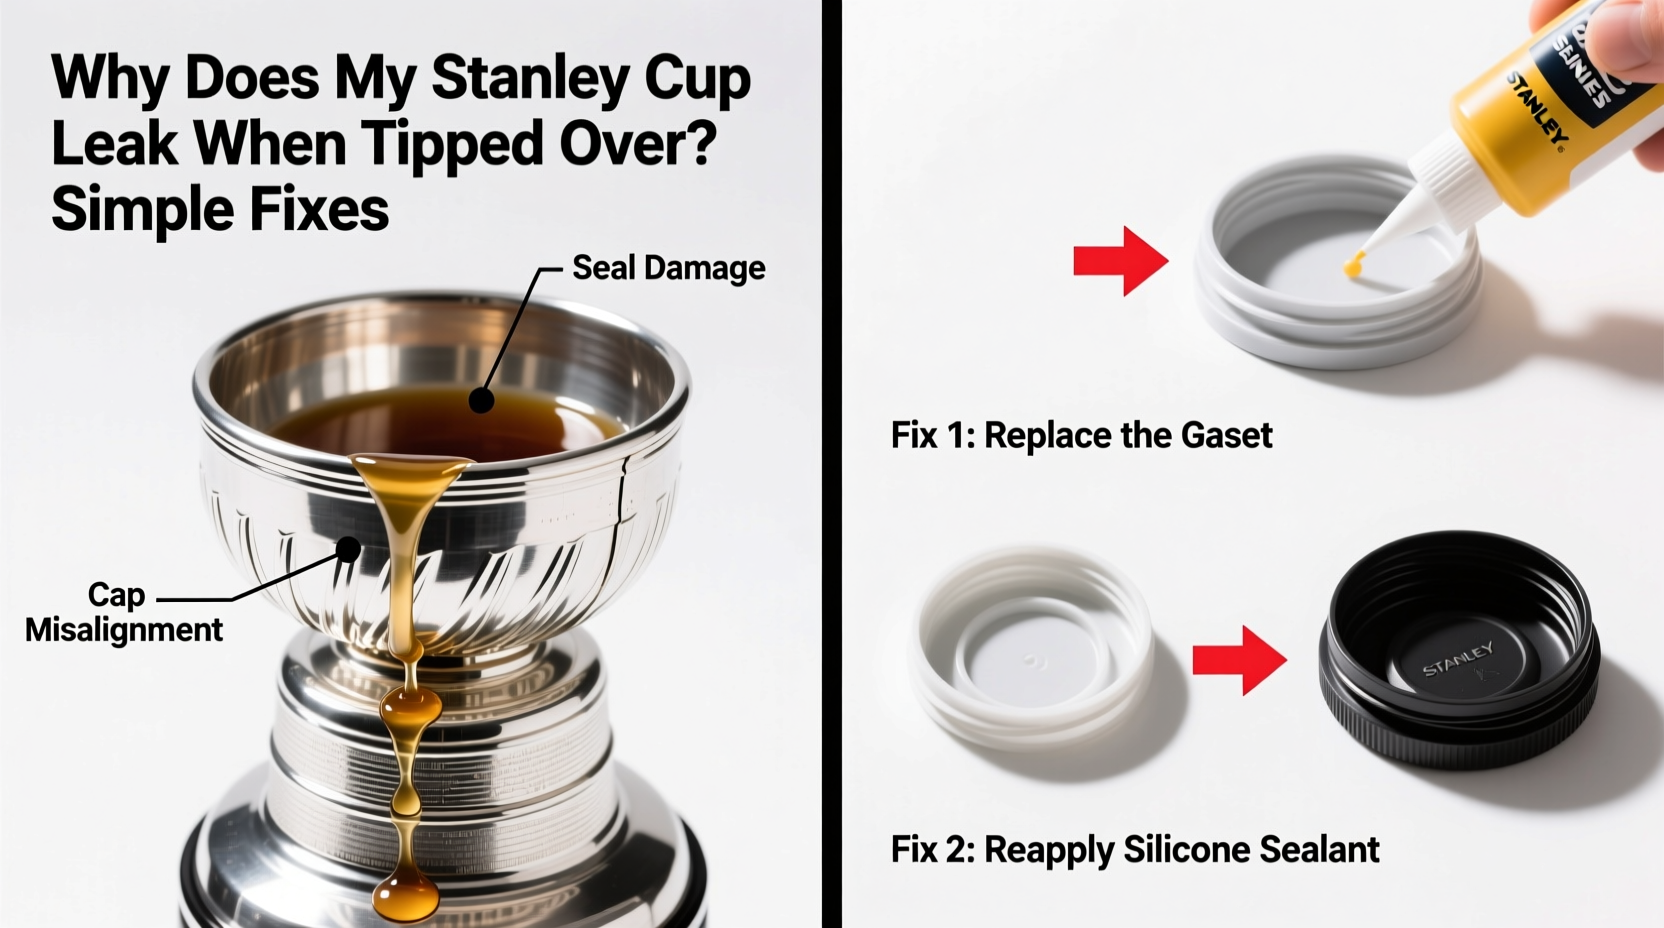
Understanding the Design: Why Tipping Triggers Leaks
Stanley Cups are engineered primarily for upright use. Their lids feature a drinking spout with a sliding closure and a secondary inner seal (often a silicone gasket) designed to block liquid escape during normal handling. But when the cup is tilted or laid horizontally, gravity pulls the liquid toward the lid’s opening mechanism. If any part of the sealing system is compromised—even slightly—liquid can bypass the barrier.
Vacuum-insulated tumblers like the Stanley Cup do not create a fully hermetic seal. Instead, they balance pressure through small vent channels that allow air exchange while keeping liquid contained when upright. When tipped, these vents can become submerged, disrupting the equilibrium and forcing liquid out through the spout or around the gasket.
Common structural components involved in leaks include:
- Silicone gasket: Located beneath the lid, this ring creates a watertight seal against the cup rim. Over time, it may warp, crack, or shift out of place.
- Lid alignment: The lid must screw on evenly. Cross-threading or uneven tightening can compromise the seal.
- Spout flap seal: The plastic slider should press firmly against the spout opening. Worn flaps or debris buildup reduce effectiveness.
- Internal pressure changes: Hot liquids expand, increasing internal pressure. Cold drinks can condense, creating suction shifts that pull liquid toward openings.
Common Causes of Leakage When Tipped
Not every leak has the same origin. Identifying the specific cause is essential for choosing the right fix. Below are the most frequent culprits behind tipping-related spills:
- Worn or misaligned silicone gasket: With repeated washing and use, the gasket can degrade or slip out of its groove. Even a 1mm gap allows seepage when the cup is on its side.
- Lid not fully closed: The slider mechanism may appear shut but leave a micro-gap. A slight nudge can reopen it, especially if the latch is loose.
- Overfilling the cup: Liquid expands when heated. Filling past the max line increases internal pressure, pushing fluid toward weak seals when tilted.
- Damaged or warped lid: Impact from drops or dishwashers can deform the lid structure, preventing a full seal.
- Debris in the seal area: Coffee grounds, sugar crystals, or dried smoothie residue can wedge between the gasket and cup rim, breaking continuity.
Mini Case Study: Commuter’s Morning Spill
Mark, a software developer, relied on his Stanley Cup for morning coffee during his train commute. He noticed that while the cup never leaked in his hand, it consistently dripped when placed sideways in his bag. After inspecting the tumbler, he discovered a tiny grain of sugar lodged under the gasket. Once removed and the cup reassembled, the leak stopped entirely. Mark now rinses the lid and gasket daily, preventing recurrence.
Step-by-Step Guide to Fix a Leaking Stanley Cup
Before replacing your cup, try this systematic troubleshooting process. Most leaks can be resolved in under 15 minutes with basic tools and attention to detail.
- Disassemble the lid completely. Unscrew the lid from the cup and remove the silicone gasket and inner plastic components. Refer to Stanley’s online guide if unsure about parts.
- Inspect the gasket. Look for cracks, warping, or brittleness. Run your finger along the edge—if it feels uneven or sticky, it may need replacement.
- Clean all parts thoroughly. Use warm water, mild dish soap, and a soft brush (like a toothbrush) to scrub the gasket groove, spout channel, and lid interior. Avoid abrasive pads.
- Rinse and dry completely. Moisture left in crevices can trap debris and weaken seals. Air-dry for at least 30 minutes before reassembly.
- Reinstall the gasket properly. Ensure it sits snugly in its circular channel without twisting or bunching. Press gently around the entire perimeter.
- Reassemble the lid and test. Screw the lid back on until fingertight. Fill the cup halfway with water, close the slider, and tip it sideways on a paper towel for 2 minutes.
- Evaluate results. If no leak appears, repeat the test with a full cup. If it still leaks, proceed to replacement or advanced fixes.
Do’s and Don’ts: Best Practices for Leak Prevention
| Do’s | Don’ts |
|---|---|
| Hand-wash the lid and gasket regularly | Put the lid in the dishwasher (high heat warps plastic and degrades silicone) |
| Replace the gasket every 6–12 months with heavy use | Use petroleum-based cleaners (they break down rubber seals) |
| Fill only to the indicated max line | Over-tighten the lid (can deform threads and gasket) |
| Close the slider firmly until it clicks | Store the cup with the lid on tightly for long periods (traps moisture and odor) |
| Carry the cup upright in bags with dedicated holders | Lay the cup on its side immediately after filling |
“Many customers assume their tumbler is faulty when the issue is simply maintenance neglect. A five-minute clean can restore full function.” — Jordan Lee, Customer Support Lead at Stanley Home Products
When to Replace Parts or the Entire Cup
Despite best efforts, some components wear out permanently. Stanley offers replacement lids and gaskets for popular models like the Quencher H2.0 FlowState Tumbler. If your cup continues to leak after thorough cleaning and realignment, consider swapping the gasket first—it’s inexpensive and easy to install.
Signs you need a new lid or cup:
- Visible cracks in the lid body or spout
- Slider no longer locks securely
- Gasket repeatedly slips out of place even when new
- Threads on the cup or lid are stripped
If your model is discontinued or parts aren’t available, upgrading to a newer version may be more cost-effective than ongoing repairs. Newer Stanley designs incorporate improved seal geometry and stronger materials to resist tipping leaks.
Expert Insight: Pressure Dynamics in Insulated Tumblers
According to Dr. Lena Patel, materials engineer at ThermoDesign Labs, “Vacuum insulation requires precise engineering. When a tumbler is tipped, liquid redistributes and can temporarily block vent paths. This creates localized pressure imbalances that force fluid through microscopic gaps. It’s not a flaw—it’s physics. The solution lies in maintaining perfect seal integrity.”
Frequently Asked Questions
Can I make my Stanley Cup completely leak-proof when tipped?
No insulated tumbler is 100% leak-proof when laid on its side. They are designed to minimize spills during transport, not to act as sealed containers. However, proper maintenance significantly reduces the risk of seepage.
Where can I buy genuine Stanley replacement gaskets?
Official Stanley gaskets and lids are available through the brand’s website, Amazon, and select retailers like REI or Target. Be cautious with third-party sellers—cheap knockoffs often fail quickly.
Why does my cup leak only with hot liquids?
Heat increases internal pressure due to steam and expansion. If the seal isn’t flawless, this pressure forces liquid out more aggressively than with cold drinks. Always leave headspace and let boiling liquids cool slightly before sealing.
Final Checklist: Stop the Drip for Good
Use this concise checklist to ensure your Stanley Cup stays leak-free:
- ✅ Inspect the silicone gasket monthly for damage
- ✅ Clean the lid and gasket weekly with a soft brush
- ✅ Replace the gasket every 6–12 months
- ✅ Never fill above the max line
- ✅ Confirm the slider is fully closed before moving the cup
- ✅ Store the cup upright or disassembled when not in use
- ✅ Avoid dishwashers and harsh chemicals
Conclusion: Keep Your Cup—and Confidence—Intact
A leaking Stanley Cup doesn’t mean the end of its usefulness. In most cases, a few simple adjustments restore reliable performance. By understanding how the seal works, staying vigilant about maintenance, and respecting the design limits, you can prevent messy surprises and extend the life of your favorite tumbler. Whether you're hiking, commuting, or just relaxing on the sofa, a well-maintained Stanley Cup should serve you reliably for years.


 浙公网安备
33010002000092号
浙公网安备
33010002000092号 浙B2-20120091-4
Comments
No comments yet. Why don't you start the discussion?