
It’s a common frustration: you join a virtual meeting, speak clearly, yet your voice comes through sounding thin, sharp, and oddly nasal—like you’re talking through a kazoo. Meanwhile, others sound full and natural. The culprit isn’t always poor microphone quality. More often than not, it's about **mic placement** and how sound interacts with your environment and anatomy.
Nasality in recorded or transmitted voice occurs when too much sound energy from your nasal passages is captured relative to the resonance from your mouth and chest. On Zoom, where audio fidelity is compressed and room acoustics play a bigger role, even small misplacements can exaggerate this effect. But the good news? You don’t need expensive gear to fix it. Strategic microphone positioning can dramatically reduce nasality and deliver a warmer, more balanced vocal tone.
The Science Behind Nasal-Sounding Voice on Zoom
Your voice is a complex blend of vibrations produced by your vocal cords and shaped by your vocal tract—including your throat, mouth, and nasal cavity. When you speak, some sound resonates in the oral cavity (mouth), producing rich, warm tones. Other frequencies escape through the nasal passages, contributing brightness—but also potential “pinched” or “whiny” qualities when overemphasized.
In person, listeners perceive a balance between these resonances. However, microphones don’t hear like human ears. They capture sound based on proximity, angle, and directionality. If a mic is placed too close to your nose or directly under your chin, it picks up disproportionate nasal resonance. Additionally, digital platforms like Zoom apply compression algorithms that can further emphasize higher frequencies, making nasality more pronounced.
“Microphone placement affects timbre more than most people realize. A shift of just two inches can turn a balanced voice into something shrill or muffled.” — Dr. Lena Torres, Audio Acoustics Researcher, MIT Media Lab
How Mic Position Influences Vocal Tone
The position of your microphone determines which parts of your vocal resonance are emphasized. Most built-in laptop mics and budget headsets are omnidirectional and poorly positioned—usually centered below the screen, right at chin level. This spot captures sound waves traveling downward from your mouth and upward from reflections off your desk, often amplifying nasal overtones.
Directional microphones (cardioid or supercardioid) are better at isolating your direct voice from ambient noise, but only if aimed correctly. Placing them too close or at the wrong angle can still result in tonal imbalance.
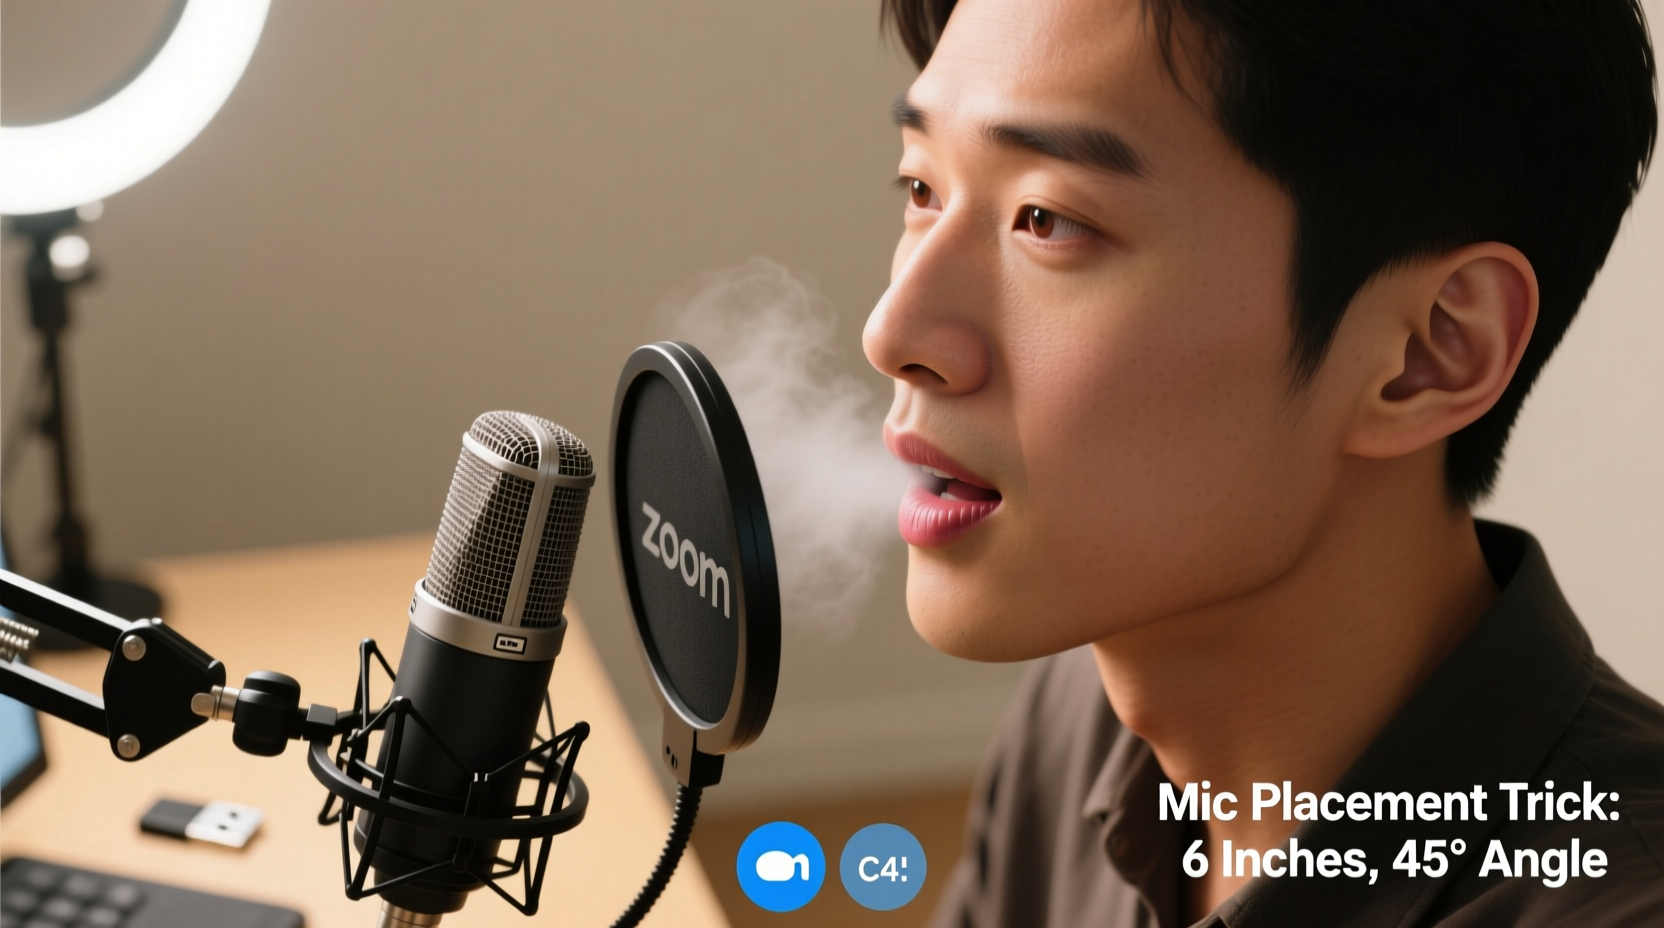
Optimal Mic Placement: The 3-Inch Rule
The sweet spot for microphone placement is typically **3 to 6 inches away from your mouth**, slightly off-center and angled toward the corner of your lips—not straight on. This positioning reduces breath blasts (p-pops) and minimizes nasal resonance pickup.
For external microphones (USB or XLR), place the mic just outside your monitor, elevated so the capsule aligns with your cheekbone. This ensures it captures more oral resonance and less nasal spill. If using a headset, adjust the boom arm so the mic sits near the corner of your mouth, not directly under your nose.
Elevation Matters: Don’t Under-Mic Your Chin
A common mistake is letting the mic sit too low—especially with laptop webcams. When the mic is below chin level, it hears your voice from beneath, increasing the perception of nasality because the lower jaw blocks direct oral sound while nasal emissions travel freely downward.
Raise your microphone to ear or cheek level. You can use a small stand or stack books under your laptop to elevate both camera and mic. This creates a more natural sound path and mimics face-to-face listening angles.
Mic Placement Do’s and Don’ts
| Action | Do | Don't |
|---|---|---|
| Distance | Keep mic 3–6 inches from mouth | Place mic closer than 2 inches |
| Angle | Position mic slightly off-axis (10–30°) | Point mic directly at open mouth |
| Height | Align mic with cheekbone or ear | Leave mic at chin or desk level |
| Type | Use cardioid mic facing mouth corner | Use omnidirectional mic in noisy room |
| Environment | Speak in quiet space with soft furnishings | Record in echoey bathroom or empty room |
Step-by-Step Guide to Fix Nasal Audio
- Assess your current setup: Record a short test clip on Zoom or Voice Memos. Play it back and listen for thinness, sharpness, or excessive \"eh\" or \"ee\" sounds.
- Elevate your microphone: Raise your laptop or attach an external mic to a stand so the capsule is at least at cheek level.
- Reposition the mic: Move it 4–5 inches from your mouth and angle it toward the side of your lips. Imagine speaking across the top of the mic rather than into it.
- Reduce room reflections: Place a pillow, blanket, or acoustic panel behind or beside you to absorb sound bounce that can muddy your voice.
- Test and refine: Record another sample. Compare before and after. Adjust distance or angle incrementally until your voice sounds fuller and less nasal.
- Enable noise suppression wisely: In Zoom settings, use “Suppress Background Noise” set to “Low” or “Auto.” High suppression can thin out your voice and increase metallic or robotic artifacts.
Real Example: From Nasal to Natural in One Adjustment
Sarah, a remote project manager, received feedback that her voice sounded “annoyingly nasal” during team meetings. She used her MacBook’s built-in mic and sat with her chin resting on her hand, leaning forward. Her recordings showed strong high-mid frequencies around 2,000 Hz—a hallmark of nasal resonance.
She raised her laptop using a stand, added a $30 USB condenser mic, and positioned it 5 inches from her face, slightly to the left and at ear height. She also placed a folded sweater behind her chair to dampen reflections.
After retesting, her voice lost its pinched quality. Teammates commented, “You sound clearer,” and “It’s easier to focus when you speak.” No EQ or software processing was used—just strategic mic placement.
Additional Factors That Amplify Nasality
Mic placement isn’t the only factor. These elements can compound the issue:
- Vocal technique: Speaking too high in pitch or with tight throat tension increases nasality. Try speaking from a slightly lower register, as if telling a story quietly.
- Room acoustics: Hard surfaces (glass, tile, bare walls) reflect sound unevenly, creating phase cancellations that emphasize certain frequencies, including nasal ones.
- Audio compression: Zoom compresses audio to save bandwidth, boosting mid-highs and cutting lows. This can strip warmth and exaggerate thinness.
- Headset design: Earbuds with inline mics often sit too far from the mouth and pick up jaw movement noise, leading to inconsistent tone.
“Many people blame their voice, but it’s usually the microphone’s relationship to the speaker that causes the problem.” — Mark Delaney, Professional Voice Engineer, StudioLogic Audio
Checklist: Optimize Your Zoom Voice in 5 Minutes
- ✅ Elevate your laptop or mic to eye/cheek level
- ✅ Position mic 4–6 inches from mouth, angled to the side
- ✅ Avoid speaking directly downward into the mic
- ✅ Add soft materials nearby (pillow, curtains) to absorb echoes
- ✅ Test with a recording and adjust until tone feels balanced
- ✅ Use a pop filter or windscreen if available
- ✅ Set Zoom noise suppression to “Low” or “Auto”
When Equipment Matters: Upgrading Beyond Placement
While proper placement solves most issues, upgrading your microphone can provide additional clarity. Built-in mics lack frequency response range and directional control. Consider:
- USB Condenser Mics (e.g., Audio-Technica AT2020USB+, Shure MV7): Offer studio-quality pickup and clear midrange reproduction.
- Dynamic Mics (e.g., Electro-Voice RE20): Excellent for reducing proximity effect and handling loud environments.
- Shotgun Mics (e.g., Rode NTG2): Highly directional; ideal for isolating voice in noisy spaces.
Even with better gear, placement remains critical. A high-end mic in the wrong position will still sound unnatural.
Frequently Asked Questions
Why does my voice sound different on Zoom than in real life?
Your brain processes your own voice through bone conduction and air simultaneously, giving it a richer internal perception. Zoom only captures airborne sound via the mic, which emphasizes higher frequencies and lacks bass resonance. Combined with compression and mic placement, this creates a thinner, sometimes nasal impression.
Can software fix a nasal-sounding voice?
Yes, to an extent. Tools like Krisp, NVIDIA Broadcast, or DAWs with EQ can reduce frequencies around 1,000–2,500 Hz associated with nasality. However, over-EQing can make your voice sound hollow or robotic. Physical mic adjustments are more effective and natural-sounding.
Is a headset better than a desktop mic for reducing nasality?
It depends. A well-designed headset with a flexible boom mic (like the Jabra Evolve series) keeps the mic consistently positioned near your mouth, reducing variability. However, cheap headsets often have fixed mics that sit too close to the nose or jawline. A desktop mic with proper placement usually offers superior tone control.
Final Thoughts: Take Control of Your Sound
Your voice is your professional signature in the digital world. A nasal tone doesn’t mean you have a bad voice—it likely means your microphone isn’t working *with* your anatomy. Small adjustments in height, distance, and angle can transform how you’re perceived: from grating to grounded, from thin to trustworthy.
You don’t need a home studio or audio degree. Start with what you have. Raise your mic. Angle it slightly. Step back three inches. Listen. Refine. These micro-adjustments yield macro results.


 浙公网安备
33010002000092号
浙公网安备
33010002000092号 浙B2-20120091-4
Comments
No comments yet. Why don't you start the discussion?