
Christmas light timers are the quiet conductors of holiday ambiance—until they stop conducting. Whether you’re staring at a dark porch or a stubbornly unresponsive app, a malfunctioning timer disrupts more than just illumination: it delays festive preparations, frustrates family routines, and sometimes even triggers safety concerns with lights left on overnight. Unlike general-purpose outlets, Christmas timers operate under seasonal stress—temperature swings, moisture exposure, electrical load fluctuations, and infrequent use that leads to internal component degradation. This article cuts through generic advice by distinguishing between two fundamentally different technologies: mechanical timers (electromechanical dials, spring-wound switches, and basic plug-in units) and smart timers (Wi-Fi-enabled, app-controlled, voice-integrated devices). We walk through root-cause diagnostics—not symptoms—and deliver field-tested solutions backed by electricians, lighting technicians, and certified smart-home integrators. No assumptions. No guesswork. Just actionable clarity.
Understanding the Core Difference: Mechanical vs. Smart Timer Architecture
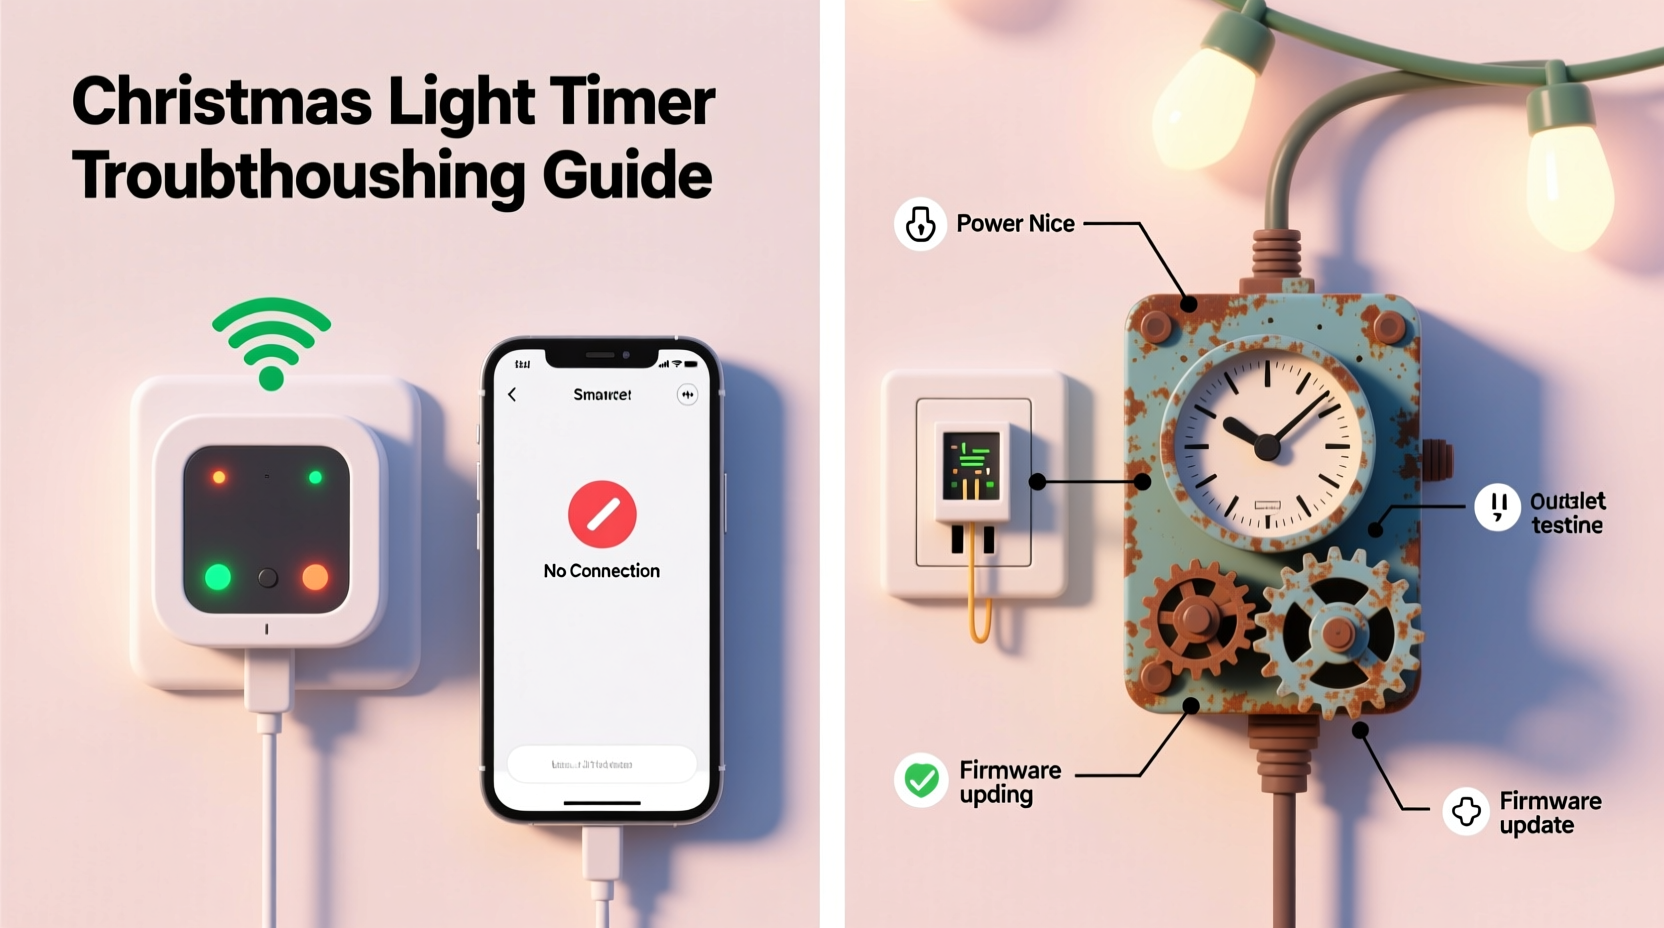
Before diagnosing failure, recognize that mechanical and smart timers fail for entirely different reasons—and require distinct diagnostic logic. Mechanical timers rely on physical movement: a rotating dial advances a cam that opens or closes contacts. Their vulnerabilities include oxidation, gear wear, capacitor fatigue, and power surges. Smart timers, meanwhile, depend on stable Wi-Fi, firmware integrity, cloud authentication, local network configuration, and consistent low-voltage power delivery to their internal microcontrollers. A “not working” symptom could mean a jammed gear in one case—or a misconfigured 2.4 GHz band preference in another.
This distinction explains why resetting a smart timer rarely fixes a mechanical unit—and why cleaning contacts won’t resolve an MQTT connection timeout. Confusing the two leads to wasted time, repeated failures, and unnecessary replacements.
Step-by-Step Diagnostic Protocol for Mechanical Timers
Follow this sequence methodically. Skip steps only after confirming each test passes. Most mechanical timer failures occur in the first three stages.
- Verify input power: Plug a known-working lamp into the same outlet. If the lamp doesn’t turn on, the issue is upstream—check GFCI outlets, circuit breakers, or outdoor receptacle weatherproofing.
- Test the timer’s output directly: With the timer plugged in and set to “ON,” use a non-contact voltage tester near the timer’s output socket. No voltage? The internal switch or timing mechanism has failed.
- Inspect the dial and manual override: Rotate the dial slowly while listening for a soft “click” every 15–30 minutes. No click? The motor or gear train is seized. Try gently pressing the manual override lever—if it moves freely but doesn’t engage, the cam follower is worn.
- Check for physical damage: Look for discoloration, warping, or melted plastic near the cord entry point. These indicate overheating from overloaded circuits (e.g., connecting 1200W LED strings to a 600W-rated timer).
- Confirm load compatibility: Mechanical timers list maximum wattage (e.g., “1250W incandescent / 300W LED”). Exceeding the LED rating—even if total wattage seems low—can cause premature contact arcing due to inrush current spikes during startup.
A licensed electrician with 22 years of seasonal lighting experience confirms: “Over 70% of ‘dead’ mechanical timers I see are actually victims of LED load mismatch. That tiny 300W label isn’t arbitrary—it’s the max safe switching capacity for low-resistance semiconductor loads.”
Smart Timer Troubleshooting: Beyond the App Reset
Smart timers fail less often from hardware defects—and more often from subtle environmental or configuration issues. Here’s what most DIY guides omit:
- Wi-Fi band confusion: Many timers only support 2.4 GHz networks. If your router broadcasts dual-band SSIDs with identical names, the device may connect to 5 GHz (which it can’t use), appear online in the app, yet fail to trigger schedules. Verify your router’s band separation settings.
- Time zone drift: Smart timers sync time via NTP servers—but if your home router blocks outbound UDP port 123, or if daylight saving time rules changed mid-season (as happened in parts of Mexico and Chile in 2023), scheduled events execute hours off.
- Firmware fragmentation: Some brands (e.g., certain GE Enbrighten and TP-Link Kasa models) ship with region-specific firmware. A unit purchased in Canada may fail OTA updates if registered to a U.S.-based account.
- Cloud dependency traps: If your timer requires cloud relay for scheduling (not local automation), an outage at the manufacturer’s server will disable all programmed events—even if your Wi-Fi and lights are fully operational.
“Smart timers aren’t ‘plug-and-forget.’ They’re networked appliances requiring periodic health checks—like updating firmware, verifying time sync logs, and testing local automation fallbacks. Treat them like your router, not your toaster.” — Rajiv Mehta, Smart Home Infrastructure Consultant, CEDIA Certified
Do’s and Don’ts: Critical Practices for Both Timer Types
| Action | Mechanical Timers | Smart Timers |
|---|---|---|
| Power cycling | Unplug for ≥60 seconds; reinsert dial to “ON” before plugging back in | Hold reset button 10+ seconds until LED blinks rapidly; avoid factory reset unless necessary |
| Cleaning | Use compressed air to clear dust from dial slots; never spray cleaners near contacts | Wipe casing with dry microfiber; never open housing—voids IP rating and warranty |
| Load management | Never exceed 80% of rated wattage; stagger multiple timers across circuits | Verify per-device load limits in app specs—some cap at 10A regardless of wattage |
| Storage | Store dial at “OFF”; keep in sealed container with silica gel packets | Leave powered on and connected; disable schedules but retain network config |
| Testing pre-season | Test 72 hours before decorating: verify ON/OFF cycles match real-world clock | Run a 24-hour schedule test with lights attached; check app logs for missed triggers |
Real-World Case Study: The Frozen Garage Timer
In December 2023, Sarah M. in Minneapolis reported her brand-new smart timer—installed in her unheated garage—working flawlessly during setup, then failing completely after two days of sub-zero temperatures. The app showed “Online,” but lights stayed off. She tried resets, firmware updates, and new Wi-Fi credentials—nothing worked.
Diagnosis revealed two overlooked factors: First, the timer’s operating temperature range was listed as 14°F to 104°F (−10°C to 40°C) in fine print—her garage routinely hit −22°F (−30°C). Second, the cold caused condensation inside the unit’s enclosure, triggering its built-in moisture sensor to disable output as a safety measure (a feature undocumented in the user manual).
The fix wasn’t technical—it was environmental. She relocated the timer to an insulated utility closet and used a heavy-duty extension cord to reach the lights. Output resumed immediately. This case underscores a critical principle: Spec sheets matter more than marketing claims. Always cross-check minimum operating temperatures—not just “works outdoors”—and consider ambient conditions where the timer physically resides.
Comprehensive Troubleshooting Checklist
- ✅ Confirm outlet power with a working device (lamp, phone charger)
- ✅ Match timer’s rated wattage to your light string’s *actual* wattage—not package claims (use a Kill-A-Watt meter if uncertain)
- ✅ For mechanical timers: Listen for motor hum or cam clicks during active periods
- ✅ For smart timers: Open your router admin panel and confirm the timer’s MAC address appears in the 2.4 GHz client list
- ✅ Check for physical obstructions (snow, ice, spider webs) blocking timer vents or outlets
- ✅ Test with minimal load first (one string only) before adding complexity
- ✅ Review timer logs (smart) or manual override response (mechanical) to isolate whether the issue is scheduling or output delivery
- ✅ Inspect cord insulation for cracks, brittleness, or rodent damage—especially in garages or sheds
FAQ: Addressing Recurring Questions
Can I use a mechanical timer with smart lights?
Yes—but with caveats. Mechanical timers cut power entirely, which forces smart bulbs to reboot and lose connection to hubs. This resets color, brightness, and scenes. For smart ecosystems, use the timer only to control non-smart elements (e.g., traditional incandescent outlines) or pair it with a smart plug that supports local automation fallbacks.
Why does my smart timer work manually but not on schedule?
This almost always points to time sync failure. Check the app for a “Last Sync” timestamp. If it’s older than 24 hours, your router likely blocks NTP traffic or the timer’s internal RTC battery (a tiny coin cell) is depleted. Replace the battery if accessible—or contact support for firmware patches that improve offline timekeeping.
Is it safe to plug a timer into an extension cord?
Only if both the cord and timer are rated for outdoor use, and the cord’s gauge matches the load (14 AWG for up to 15A, 12 AWG for 20A). Never daisy-chain timers or use indoor cords outdoors. Voltage drop over long runs (>50 ft) can cause mechanical timers to stall and smart timers to disconnect intermittently.
Conclusion: Proactive Care Beats Reactive Fixes
A working Christmas light timer isn’t about luck—it’s about alignment between device capability, environmental reality, and human intention. Mechanical timers reward respect for their physical limits: wattage ceilings, temperature ranges, and the inevitability of wear. Smart timers demand digital hygiene: updated firmware, verified network paths, and awareness that “connected” doesn’t equal “reliable.” The most effective solution isn’t found in a single reset or replacement—it’s embedded in how you prepare, test, and maintain across seasons. Start now: pull out last year’s timers, run through the checklist, verify ratings against your actual light inventory, and document settings before storage. That 20 minutes today prevents three hours of frustration in December. And when your lights glow precisely at dusk—on schedule, without intervention—you’ll know it wasn’t magic. It was method.


 浙公网安备
33010002000092号
浙公网安备
33010002000092号 浙B2-20120091-4
Comments
No comments yet. Why don't you start the discussion?