
A morning cup of coffee should be a ritual of comfort, not chaos. Yet, nothing disrupts that peace faster than discovering a puddle beneath your coffee maker. If you've noticed water pooling on your countertop after brewing, you're not alone. Leaks from the bottom of coffee makers are surprisingly common—and often fixable without professional help. Understanding the root causes and knowing how to respond quickly can save your appliance, your kitchen surface, and your sanity.
Coffee makers are engineered with precision, but over time, wear, mineral buildup, or improper use can compromise their integrity. The good news? Most leaks stem from preventable or easily repairable issues. This guide walks through the most frequent culprits, offers step-by-step solutions, and provides long-term strategies to keep your brewer running cleanly.
Common Causes of Bottom Leaks in Coffee Makers
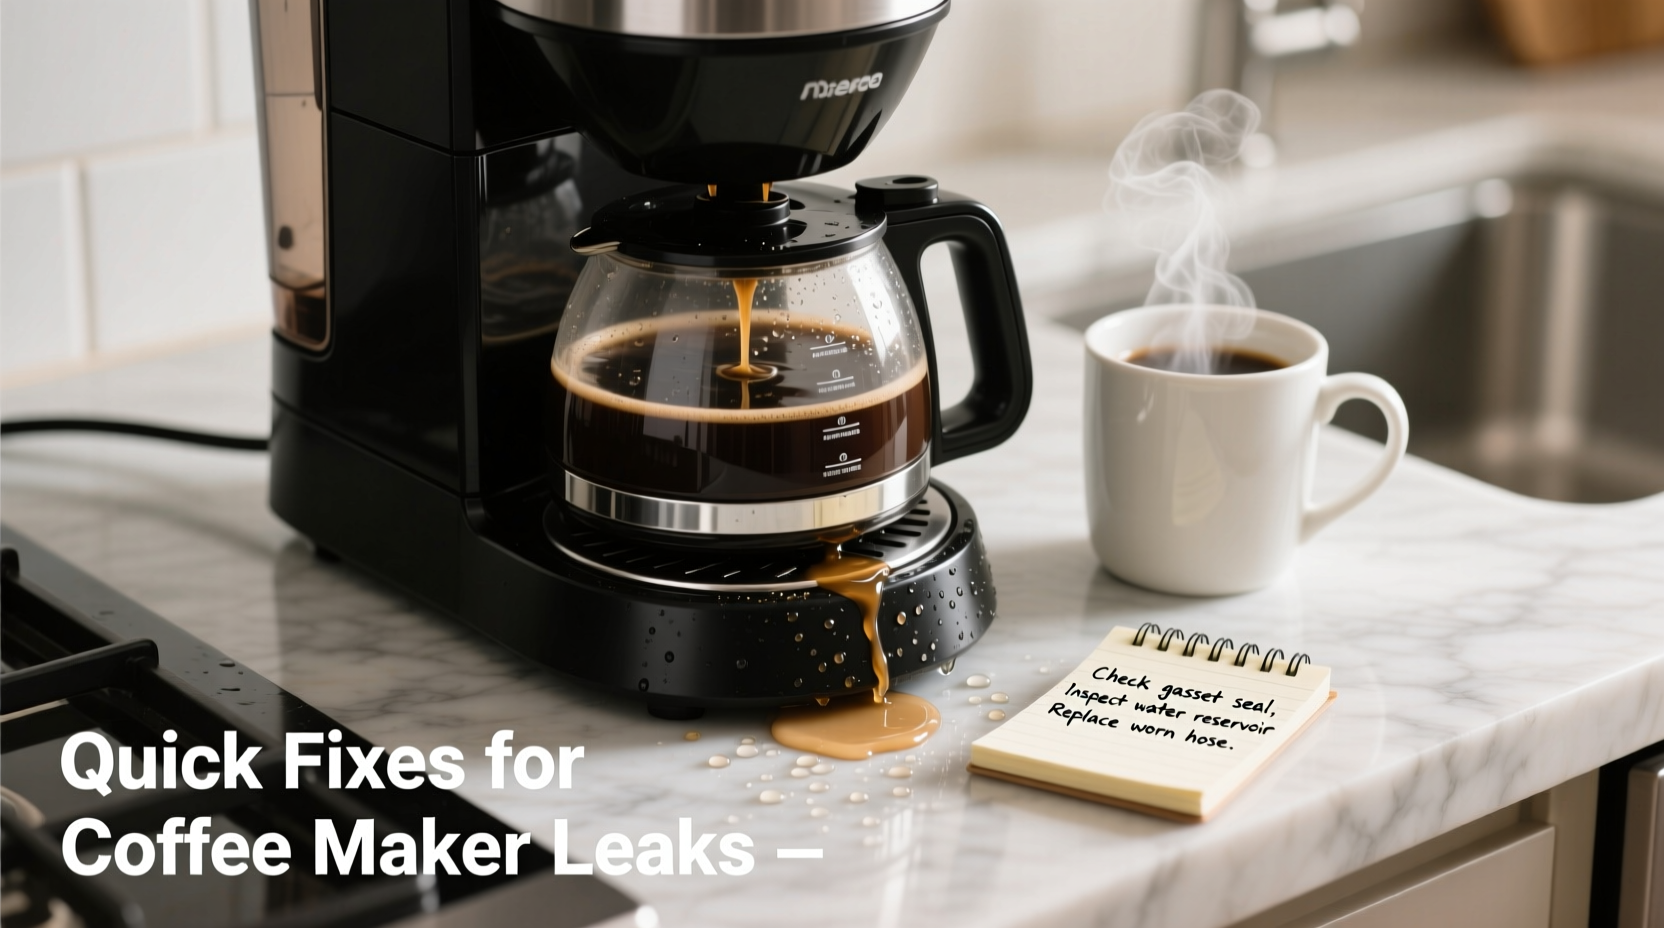
Before reaching for a towel, it’s essential to identify where the leak originates. A drip under the unit typically points to internal components failing or misaligned parts. The following are the most frequent reasons your coffee maker might be leaking from the bottom:
- Cracked or warped carafe: Even hairline fractures can allow water to escape during brewing.
- Loose or damaged reservoir seal: The rubber gasket between the water tank and internal tubing can degrade over time.
- Mineral buildup in internal valves: Hard water leads to limescale accumulation, which can block flow paths and force water out at weak points.
- Overfilled water reservoir: Exceeding the max line can cause overflow into unintended channels.
- Blocked or clogged overflow tube: Located inside the machine, this tube redirects excess water; if obstructed, it may back up and leak downward.
- Faulty internal tubing or connectors: Plastic hoses can crack or detach due to heat stress or age.
- Worn heating element gasket: The seal around the heating plate can deteriorate, allowing steam or condensation to escape as liquid.
Each of these issues manifests differently. For example, a slow drip after brewing likely indicates a seal problem, while sudden gushing suggests an overfill or major crack. Pinpointing the source is half the battle.
Step-by-Step Guide to Diagnose and Fix the Leak
Follow this systematic approach to troubleshoot and resolve the leak efficiently. Most fixes require only basic tools and household items.
- Unplug the machine and let it cool completely. Safety first—never inspect internal components while powered or hot.
- Remove all removable parts: Take out the carafe, filter basket, water reservoir, and any drip trays. Inspect each for cracks, warping, or debris.
- Check the carafe for damage. Hold it up to light and look for hairline fractures, especially near the spout or base. Even microscopic cracks can cause significant leakage.
- Inspect the water reservoir seal. Locate the rubber or silicone gasket where the reservoir connects to the machine. Look for brittleness, tears, or misalignment. Clean it gently with a soft cloth and warm water.
- Run a vinegar descaling cycle. Mix equal parts white vinegar and water. Pour into the reservoir and run a full brew cycle (without coffee). Follow with two cycles of clean water to flush out residue. This clears mineral deposits that may be forcing water off-course.
- Examine internal tubing (if accessible). On many models, you can peek into the reservoir cavity to see small plastic tubes. Ensure they’re intact and securely connected. Use a pipe cleaner or compressed air to clear obstructions.
- Test the overflow tube. This narrow channel directs excess water away from critical components. Use a thin wire or syringe to flush it with warm water.
- Reassemble and test. Put everything back carefully. Brew a small pot using only water and observe the base closely. If the leak stops, the issue was likely scale or a loose part.
If the leak continues after this process, the problem may lie deeper—such as a cracked internal housing or failed heating element seal. In such cases, replacement parts or professional service may be necessary.
Do’s and Don’ts When Dealing With Leaks
Mistakes during troubleshooting can worsen the issue or void warranties. Use this table to avoid common pitfalls.
| Do’s | Don’ts |
|---|---|
| Unplug the machine before inspection | Never open sealed internal compartments unless qualified |
| Use food-safe descaling solutions (vinegar or branded cleaners) | Don’t use abrasive scrubbers on seals or plastic parts |
| Replace worn gaskets promptly | Don’t operate the machine while leaking—it risks electrical damage |
| Regularly clean and descale every 1–3 months | Don’t ignore recurring leaks—they often worsen over time |
| Consult the user manual for model-specific guidance | Don’t use super glue or tape as permanent fixes on internal parts |
Real Example: How Sarah Fixed Her Dripping Drip Brewer
Sarah, a remote worker in Denver, started noticing a small puddle under her three-year-old coffee maker every morning. At first, she assumed it was condensation. But when the pool grew larger and began damaging her wooden countertop, she decided to act.
She followed the descaling process with vinegar, but the leak persisted. After removing the water reservoir, she spotted a tiny crack in the plastic connector feeding into the machine’s base. The crack wasn’t visible from the outside—only when disassembled did it become apparent.
Sarah contacted the manufacturer, provided her model number, and received a free replacement reservoir under warranty. She reinstalled it, ran a test cycle, and the leak vanished. “I didn’t think a $100 machine would still be covered,” she said. “But asking took five minutes and saved me from buying a new one.”
This case underscores the importance of thorough inspection and not hesitating to reach out to customer support—especially if your machine is less than five years old.
“Many coffee maker leaks are due to overlooked maintenance. Regular descaling and seal checks can prevent 80% of failures.” — James Lin, Appliance Repair Technician with 15+ years of experience
Quick Fix Checklist
Keep this checklist handy for fast action the next time your coffee maker starts leaking:
- ✅ Unplug the machine immediately
- ✅ Remove and inspect the carafe for cracks
- ✅ Check the water reservoir and its sealing gasket
- ✅ Run a descaling cycle with vinegar solution
- ✅ Flush the overflow tube with warm water
- ✅ Wipe down all contact surfaces and reassemble
- ✅ Test with a water-only brew cycle
- ✅ Contact manufacturer if under warranty
- ✅ Replace faulty parts if available
- ✅ Consider replacement if older than 5 years and repeatedly failing
Completing this list within 24 hours of noticing the leak can prevent mold growth, electrical hazards, and irreversible damage to countertops or cabinetry.
Frequently Asked Questions
Can I still use my coffee maker if it’s leaking slightly?
No. Even minor leaks pose safety risks. Water near electrical components can lead to short circuits or shock hazards. Stop using the machine until the issue is resolved.
How often should I descale my coffee maker to prevent leaks?
At minimum, every three months. If you live in a hard water area, monthly descaling is recommended. Frequent descaling prevents mineral buildup that can redirect water flow and stress internal seals.
Is it worth repairing an older coffee maker that’s leaking?
It depends. Machines under three years old are usually worth fixing, especially if under warranty. For units older than five years, replacement is often more cost-effective. Modern models are also more energy-efficient and come with better leak-resistant designs.
Prevent Future Leaks with Smart Maintenance
Once you’ve stopped the current leak, take steps to ensure it doesn’t return. Prevention is simpler and cheaper than repeated repairs.
Start by using filtered water instead of tap water. This drastically reduces mineral deposits. Also, never leave water sitting in the reservoir for days—empty it after each use to inhibit bacterial growth and corrosion.
Establish a monthly maintenance routine: wipe seals, check tubing, and verify the carafe’s integrity. Store the machine in a dry location, away from steam or direct sunlight, which can warp plastic components.
Finally, consider upgrading to a model with a self-cleaning function or stainless steel internal components. While pricier upfront, these machines tend to have longer lifespans and fewer leak-related complaints.
Conclusion: Stop the Drip Before It Damages More Than Your Countertop
A leaking coffee maker isn’t just a mess—it’s a warning sign. Whether caused by neglect, wear, or manufacturing flaws, the issue demands prompt attention. By understanding the mechanics behind the leak, applying targeted fixes, and maintaining your machine regularly, you can restore reliable performance and extend its lifespan.
Most importantly, don’t ignore the first signs of trouble. Addressing a small drip today can prevent costly repairs, ruined furniture, or even electrical hazards tomorrow. Take control of your coffee routine with confidence: inspect, clean, and maintain. Your perfect brew deserves a dependable machine.


 浙公网安备
33010002000092号
浙公网安备
33010002000092号 浙B2-20120091-4
Comments
No comments yet. Why don't you start the discussion?