
Bread baking is as much science as it is art. When your kitchen feels more like a winter cabin than a bakery, your dough pays the price. Many home bakers struggle with sluggish or failed rises—especially during colder months—and assume their yeast has gone bad or their recipe is flawed. In reality, the culprit is often the ambient temperature. Yeast thrives in warmth, and without it, fermentation slows to a crawl. Understanding how temperature affects proofing and learning to create reliable warm zones in any kitchen can transform your baking results.
The Science Behind Dough Proofing
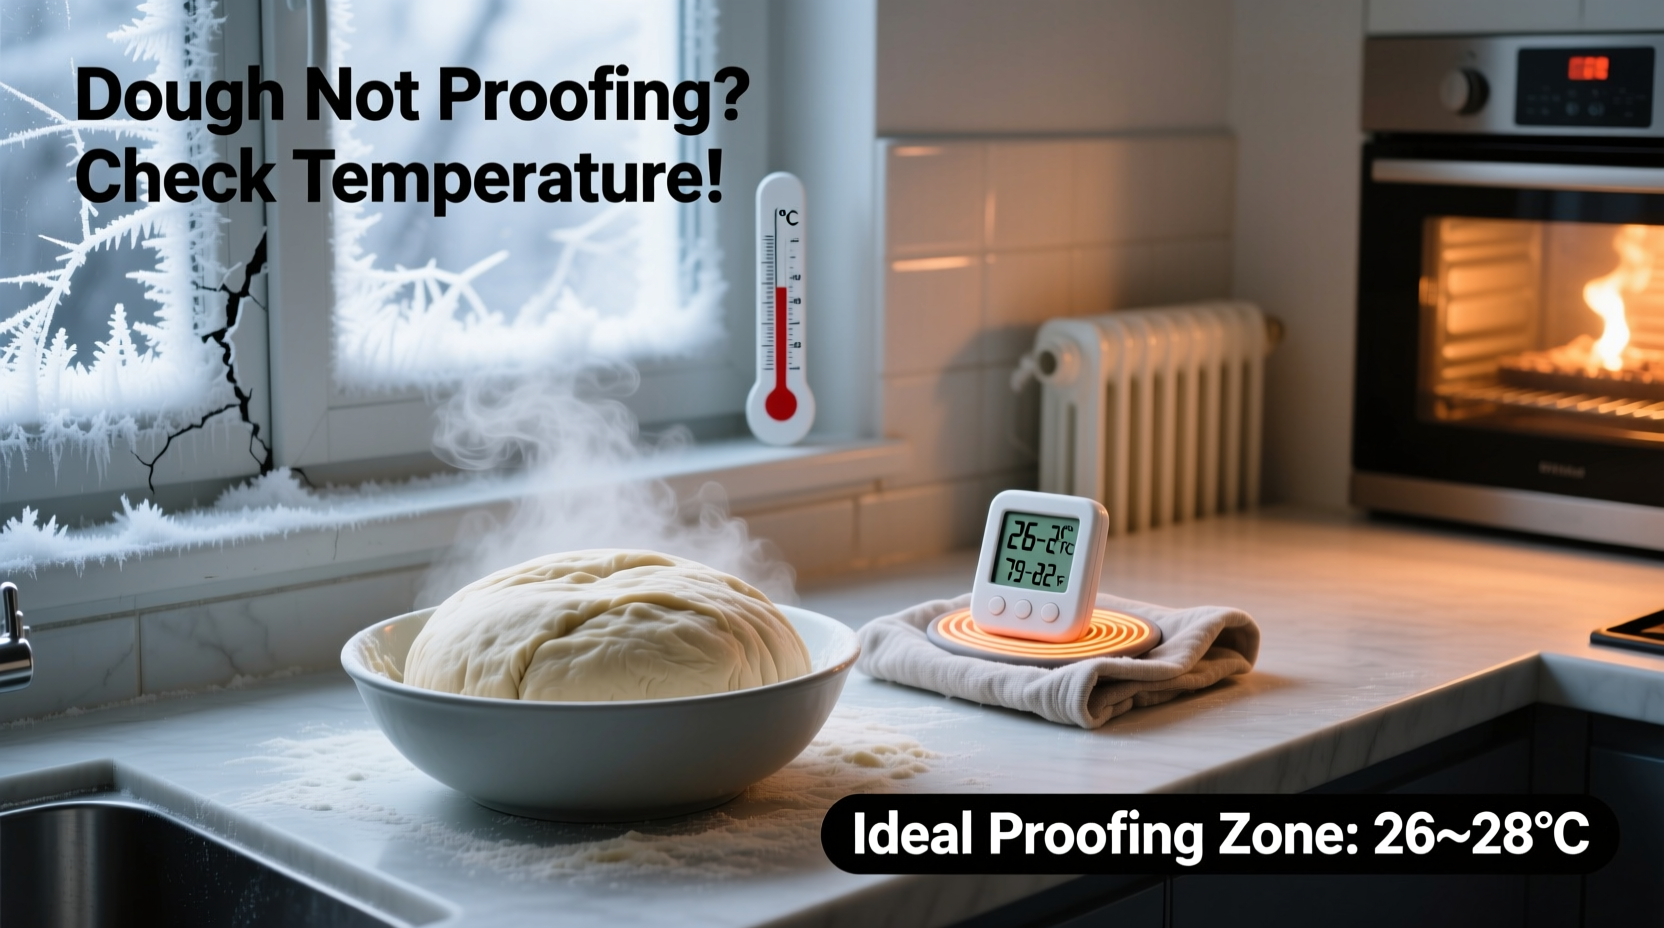
Proofing, or fermentation, is the stage where yeast consumes sugars in the dough and produces carbon dioxide, causing the bread to rise. This biological process depends heavily on temperature. The ideal range for most yeast activity is between 75°F and 80°F (24°C–27°C). Below this range, yeast becomes less active; below 60°F (15°C), it may nearly stop altogether.
Cold environments slow down enzymatic reactions and gas production. This doesn’t necessarily kill the yeast—it just puts it into hibernation. A dough left in a 60°F kitchen might take twice as long to rise compared to one in a warmer space. Worse, inconsistent temperatures can lead to uneven fermentation, off-flavors, or collapsed structure after baking.
“Temperature is the silent conductor of fermentation. Even slight deviations can alter flavor development and texture.” — Dr. Elena Ruiz, Food Microbiologist and Artisan Baking Consultant
This means that even if your ingredients are fresh and your technique solid, a chilly kitchen can sabotage your efforts before you even reach the oven.
Common Signs Your Kitchen Is Too Cold for Proofing
Recognizing the symptoms of underproofing due to cold starts with observation:
- No visible rise after 2+ hours: If your dough remains flat and dense despite using active yeast, temperature is likely the issue.
- Tight, non-elastic texture: Cold dough resists stretching and springs back aggressively because gluten hasn’t relaxed through proper fermentation.
- Longer-than-expected timelines: Recipes assume room temperature around 70°F+. If your kitchen is below that, expected rise times become unreliable.
- Dense crumb and poor oven spring: Insufficient gas production leads to heavy bread lacking airy holes.
How to Create a Warm Spot in Any Kitchen
You don’t need a professional proofer to achieve great results. With a few clever techniques, you can generate a stable microclimate ideal for rising dough—even in the coldest seasons.
1. Use Your Oven (Off, But Strategic)
The oven is one of the best insulated spaces in your kitchen. Turn it off but place a bowl of boiling water on the bottom rack. Put your covered dough on the center rack and close the door. The steam and residual heat create a humid, warm chamber. Replace the water every hour if doing a long bulk ferment.
2. Leverage Appliance Heat
Refrigerators, dishwashers, and especially dryers emit gentle background heat. Place your dough near—but not touching—these appliances. A shelf above the fridge is often 5–10 degrees warmer than the rest of the kitchen.
3. Microwave Method with Caution
Heat a cup of water in the microwave for 1–2 minutes until steaming. Remove the water, place your dough inside, and close the door. This creates a temporary warm box. Do not turn the microwave on with dough inside unless following a specific delayed-rise method.
4. DIY Proofing Box with a Cooler
Use an insulated cooler and fill it with warm water bottles (sealed tightly) placed around—not under—the bowl of dough. Close the lid. This maintains 75°F+ for several hours. Monitor with a thermometer if possible.
5. Heating Pad Trick
Place a low-setting heating pad on a counter, cover it with a thick towel, and set your bowl on top. Ensure it’s not too hot—your hand should tolerate it for 30 seconds comfortably. This works well for overnight cold ferments brought to room temperature.
6. Bathroom Boost During Shower
If your bathroom stays warm and steamy after a shower, place your dough inside with the door closed. The ambient humidity and heat mimic a professional proofing cabinet. Just make sure it's away from direct water contact.
Step-by-Step Guide: Creating a Consistent Warm Zone
Follow this sequence to reliably proof dough in cold conditions:
- Measure your kitchen temperature using a standalone thermometer. Note the average over a few hours.
- Choose a warm micro-location based on available tools (oven, appliance proximity, etc.).
- Pre-warm the space—e.g., run hot water in the oven or microwave briefly to raise internal temp.
- Add moisture via a bowl of hot water to prevent dough surface drying.
- Monitor rise visually, not by time. Look for ~50% increase in volume and a jiggly, puffy texture.
- Rotate if needed to ensure even exposure if heat sources are directional.
- Adjust for longer ferments: If proofing overnight, reduce hydration slightly and use cooler (but not cold) temps to control sourness.
Do’s and Don’ts of Cold-Kitchen Proofing
| Do’s | Don’ts |
|---|---|
| Use lukewarm water (about 105°F–110°F) when mixing dough to give yeast a head start. | Use boiling water—it can kill yeast instantly. |
| Cover dough tightly with plastic wrap or a damp cloth to retain moisture. | Leave dough uncovered—dry skin forms and inhibits rise. |
| Use glass or ceramic bowls—they retain warmth better than metal. | Use thin stainless steel bowls that cool quickly. |
| Plan ahead: Start dough earlier in the day when indoor temps are higher. | Expect same-day results in winter without adjusting methods. |
| Test yeast viability in warm water with a pinch of sugar before mixing. | Assume old yeast is still active—check expiration dates. |
Real Example: From Failed Loaves to Perfect Sourdough
Sarah, a home baker in Vermont, struggled for months with her sourdough starter refusing to rise past midday. Her kitchen averaged 62°F in December, and despite feeding her starter religiously, loaves came out dense and gummy. After tracking her fermentation times and temperatures, she realized her bulk ferment was taking over 12 hours instead of the expected 6.
She began placing her dough inside the oven with a pan of hot water beneath. She also started pre-warming her mixing bowl with hot tap water before adding ingredients. Within two weeks, her rise times halved, and her bread developed open crumb and tangy flavor. “I didn’t change my recipe,” she said. “I just gave the yeast a fighting chance.”
Checklist: Optimize Your Cold-Kitchen Proofing Setup
- ✅ Measure current kitchen temperature
- ✅ Identify at least one potential warm zone (oven, near appliance, etc.)
- ✅ Gather tools: thermometer, hot water kettle, towels, plastic wrap
- ✅ Pre-warm containers before mixing dough
- ✅ Add a moisture source (bowl of water) in enclosed spaces
- ✅ Monitor dough by sight and touch, not clock
- ✅ Adjust expectations: proofing will be slower in winter
- ✅ Keep yeast and starter stored properly (refrigerated when inactive)
Frequently Asked Questions
Can I proof dough overnight in a cold kitchen?
Yes, but with adjustments. Cold fermentation (retardation) is actually beneficial for flavor development in sourdough and enriched doughs. Place shaped dough in the refrigerator for 8–12 hours. For final proof, bring it back to a warm spot before baking. If you must proof entirely at room temperature in a cold kitchen, expect it to take 2–3 times longer.
Is my yeast dead if my dough isn’t rising?
Not necessarily. First, test your yeast by mixing 1/2 teaspoon in 1/4 cup of warm water with a pinch of sugar. It should bubble within 5–10 minutes. If it does, the yeast is alive—the environment is the problem. If not, replace your yeast supply.
Does using more yeast compensate for cold temperatures?
Adding extra yeast speeds things up temporarily but risks off-flavors and weak gluten structure. Overactive yeast exhausts food sources too quickly, leading to collapse. Better to maintain optimal temperature than to overload the dough with yeast.
Conclusion: Take Control of Your Fermentation Environment
Your kitchen’s temperature doesn’t have to dictate your baking success. By understanding how cold slows yeast activity and applying simple, accessible strategies to create warm microclimates, you reclaim consistency in your bread-making process. Whether you’re crafting a rustic boule or soft dinner rolls, the right environment ensures proper rise, balanced flavor, and satisfying texture. These methods cost nothing beyond a little creativity and attention to detail.


 浙公网安备
33010002000092号
浙公网安备
33010002000092号 浙B2-20120091-4
Comments
No comments yet. Why don't you start the discussion?