
There’s nothing more disappointing than spending time kneading, rising, and shaping dough only to end up with a dense, chewy loaf or pastry that feels like leather. A tough dough can ruin even the most carefully planned baking session. The good news? This issue is both preventable and fixable. Understanding the science behind gluten development, hydration, and technique allows bakers—both novice and experienced—to diagnose problems and produce consistently tender, airy baked goods.
Understanding Dough Structure: Gluten and Hydration
Dough texture hinges on two primary factors: gluten formation and hydration. Gluten, a network of proteins formed when flour meets water, gives structure to breads and pastries. When developed properly, it creates elasticity and traps gas during fermentation, leading to a light crumb. However, too much gluten—or improperly managed development—results in toughness.
Hydration, or the ratio of water to flour, plays an equally crucial role. Low hydration leads to stiff, dry dough that resists expansion. High hydration, while often used in artisanal breads, requires skill to handle but yields softer textures. The balance between these elements determines whether your dough rises beautifully or turns out dense and unyielding.
Common Causes of Tough Dough
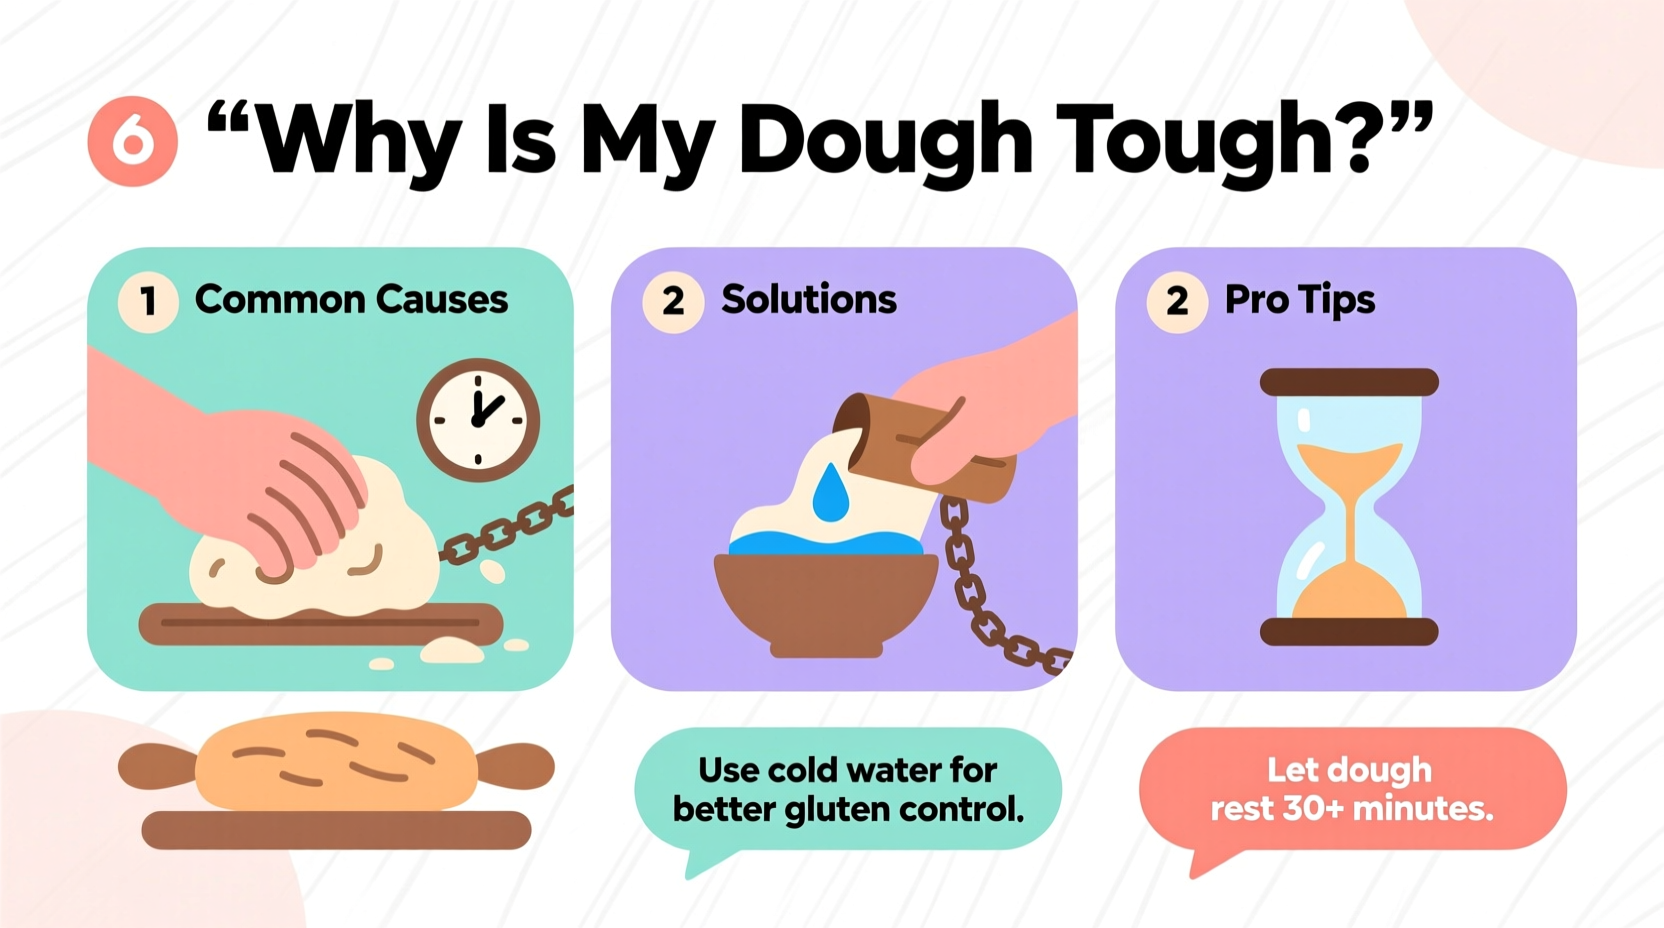
Toughness doesn’t happen randomly. It stems from specific missteps during preparation. Identifying the root cause is the first step toward correction.
- Over-kneading: Excessive mechanical action develops too much gluten, creating a tight, rubbery texture.
- Too much flour: Adding extra flour during mixing or shaping dries out the dough and increases gluten density.
- Under-hydration: Using too little water prevents proper gluten relaxation and limits gas retention.
- Incorrect flour type: High-protein flours (like bread flour) build stronger gluten networks. Using them in recipes designed for all-purpose or cake flour can lead to toughness.
- Poor resting or proofing: Skipping or shortening rest periods prevents gluten from relaxing, making dough hard to shape and resulting in a compact final product.
- Over-baking: Extended oven time removes moisture, drying out the crumb and firming the crust excessively.
Flour Types and Their Impact on Dough Texture
| Flour Type | Protein Content | Best For | Risk of Toughness |
|---|---|---|---|
| Cake Flour | 6–8% | Cakes, pastries | Low – produces tender crumb |
| All-Purpose Flour | 10–12% | Breads, cookies, general use | Moderate – balanced performance |
| Bread Flour | 12–14% | Yeast breads, bagels | High – strong gluten unless controlled |
| Whole Wheat Flour | 13–15% | Hearty loaves, rolls | Very High – dense and absorbent |
“Gluten is a baker’s best friend when managed correctly—but left unchecked, it becomes the enemy of tenderness.” — Dr. Laura Simmons, Food Scientist & Baking Consultant
Solutions to Prevent and Fix Tough Dough
Once you understand what went wrong, correcting the issue becomes straightforward. Implement these practical fixes based on the most frequent causes.
Adjust Your Kneading Technique
Kneading should develop gluten just enough to create structure without overworking the dough. For most standard breads, 8–10 minutes by hand or 5–7 minutes in a stand mixer is sufficient. Stop when the dough passes the “windowpane test”: stretch a small piece between your fingers—if it forms a thin, translucent membrane without tearing, gluten is adequately developed.
Measure Ingredients Accurately
Adding too much flour is one of the most common mistakes. Spoon flour into your measuring cup and level it off—don’t scoop directly from the bag, which compacts the flour and adds up to 25% more than intended. Better yet, switch to grams using a digital scale.
Increase Hydration Gradually
If your dough feels stiff or dry, add water in small increments (½ tablespoon at a time). Let the dough rest for 10–15 minutes after adjusting—this autolyse period allows flour to fully hydrate and gluten to relax naturally.
Use the Right Flour for the Recipe
Substituting flours without adjustments alters texture. If a recipe calls for all-purpose flour, avoid replacing it with bread flour unless you reduce the amount slightly or increase liquid. For delicate pastries, stick to low-protein options.
Allow Proper Resting Time
After kneading, let the dough rest for at least 15–20 minutes before shaping. This allows gluten strands to relax, making the dough easier to work with and less likely to snap back. Similarly, ensure adequate proofing time—under-proofed dough lacks air pockets and bakes up dense.
Step-by-Step Guide to Soft, Elastic Dough
- Weigh or measure ingredients precisely—use 100g of flour to 60–70g of water as a baseline for moderate hydration.
- Mix until shaggy ball forms, then knead gently for 8–10 minutes by hand or until smooth and elastic.
- Rest the dough for 15–20 minutes to allow gluten relaxation.
- Shape gently without excessive handling; avoid re-rolling scraps multiple times (especially for pastries).
- Proof in a warm, draft-free area until doubled in size—usually 1–2 hours depending on yeast activity.
- Bake according to recipe, checking doneness early to avoid over-baking.
- Cool completely on a wire rack before slicing to preserve moisture and texture.
Real Example: Fixing a Failed Sourdough Loaf
Sarah had been trying to perfect her sourdough for weeks. Each loaf rose well but emerged from the oven with a thick, leathery crust and a dense, chewy interior. She was using bread flour and kneading for 15 minutes, thinking more effort meant better structure. After consulting a local baker, she realized her mistake: over-kneading combined with insufficient resting time was tightening the gluten network beyond recovery.
She adjusted her method—reduced kneading to 8 minutes, added a 20-minute bench rest, and introduced steam during baking to keep the crust flexible during oven spring. Her next loaf had an open crumb, crisp yet tender crust, and a satisfyingly soft bite. The transformation came not from new ingredients, but from understanding dough behavior.
Frequently Asked Questions
Can I fix tough dough after it’s already been mixed?
Yes. If the dough is dry or stiff, gradually work in small amounts of water and let it rest for 20–30 minutes. This helps hydrate the flour and relaxes the gluten. Avoid adding more flour unless absolutely necessary.
Why is my pastry dough tough even though I didn’t overwork it?
Pastry dough relies on minimal gluten development. Even brief handling can activate gluten if the butter melts or if too much water is used. Always keep ingredients cold, use ice water, and handle the dough as little as possible. Over-chilling can also make dough brittle—let it warm slightly before rolling.
Does salt affect dough toughness?
Indirectly, yes. Salt strengthens gluten structure and controls yeast activity. Too much salt can make dough tighter and slower to rise, contributing to a denser texture. Stick to the recommended 1.8–2% salt by flour weight (about 1 tsp per 500g flour).
Conclusion: Master Your Dough, One Batch at a Time
Tough dough isn’t a dead end—it’s feedback. Every batch teaches something about ingredient balance, timing, and technique. By paying attention to hydration, flour choice, kneading duration, and rest periods, you gain control over the outcome. Baking is equal parts science and art, and mastering dough texture brings you closer to both.


 浙公网安备
33010002000092号
浙公网安备
33010002000092号 浙B2-20120091-4
Comments
No comments yet. Why don't you start the discussion?