
Epoxy resin projects can transform ordinary materials into stunning, glass-like finishes—ideal for countertops, artwork, and furniture. But when the final result turns out cloudy or hazy instead of crystal clear, it’s frustrating and confusing. The good news is that most cloudiness and surface imperfections in epoxy are preventable—and often fixable. Understanding the root causes and knowing how to correct them empowers you to achieve professional-quality results, even if this isn’t your first attempt gone wrong.
What Causes Epoxy Resin to Turn Cloudy?
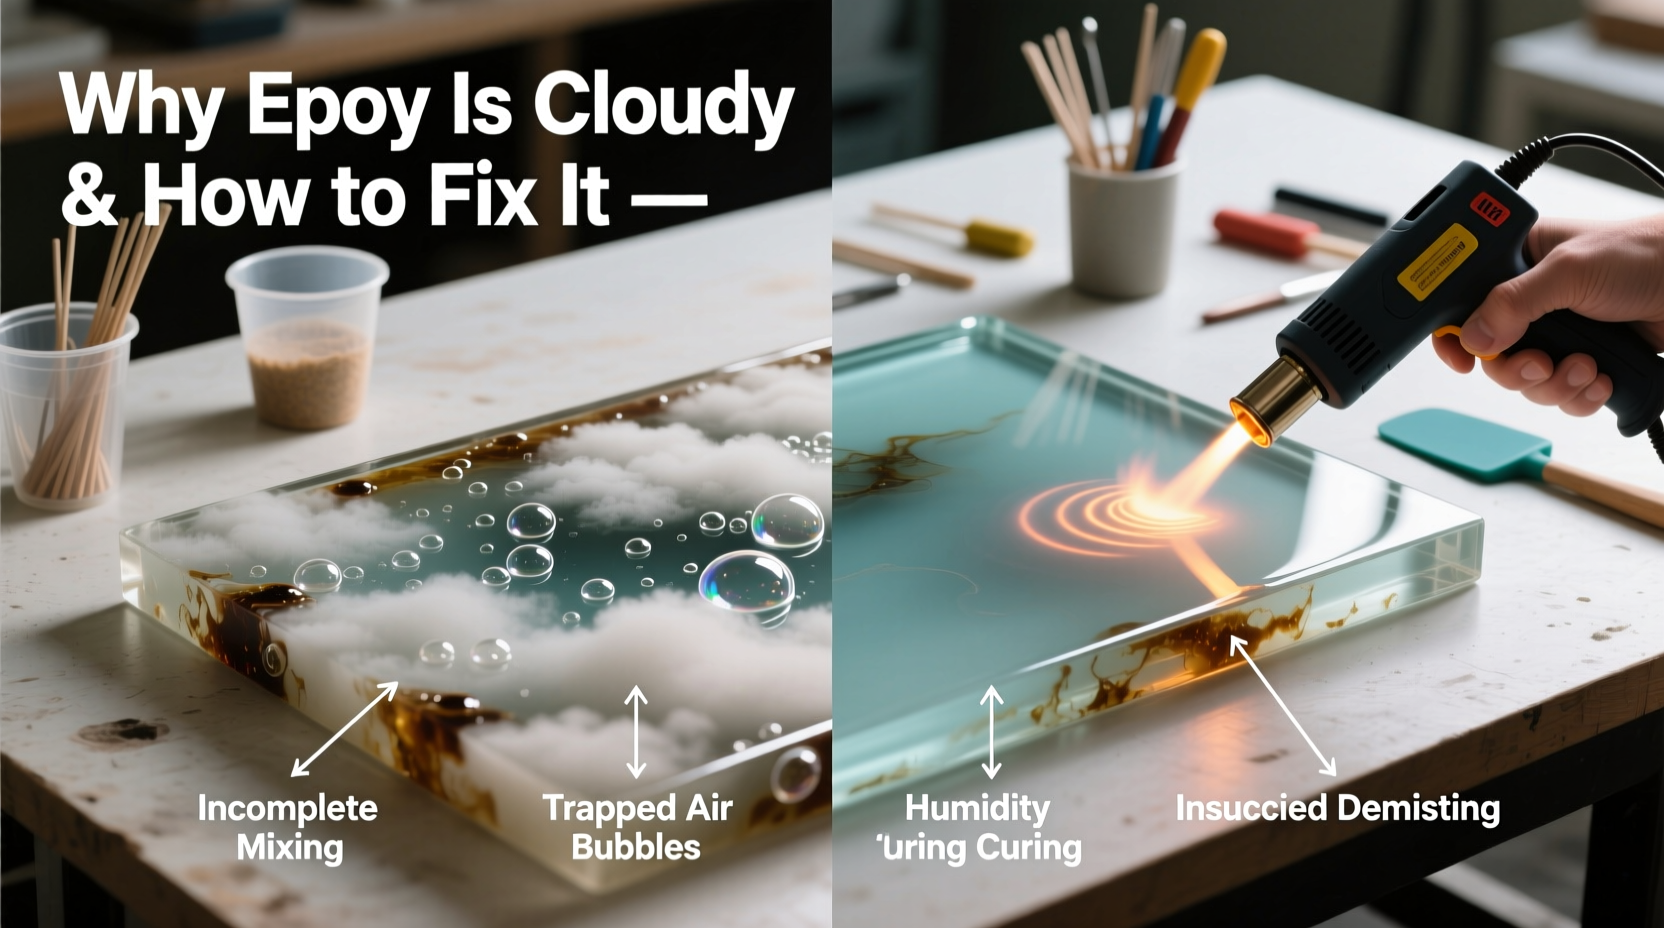
Cloudiness in cured epoxy is not just a cosmetic flaw—it’s a signal that something went wrong during mixing, application, or curing. The transparency of epoxy depends on precise chemical reactions and environmental conditions. When these factors are off, microbubbles, moisture contamination, or improper curing can scatter light, creating a milky appearance.
- Moisture exposure: Water trapped in the substrate or high humidity during curing introduces tiny bubbles and cloudiness.
- Incorrect mixing ratio: Deviating from the manufacturer’s resin-to-hardener ratio prevents full polymerization, leaving a sticky or hazy surface.
- Inadequate mixing: Under-mixing fails to activate the hardener fully, while over-mixing introduces air bubbles.
- Cold temperatures: Applying epoxy below 70°F (21°C) slows curing and traps bubbles.
- Contaminated surfaces: Dust, oil, or wax on the substrate can interfere with adhesion and clarity.
Common Resin Finish Mistakes and How to Fix Them
Mistakes happen—even experienced crafters encounter issues. The key is identifying the problem early and applying the right corrective method without starting over.
1. Cloudy or Milky Epoxy Due to Moisture
If your epoxy appears foggy shortly after pouring, especially over porous materials like wood, moisture is likely the culprit. Wood can hold hidden dampness that vaporizes during curing, forming steam bubbles.
“Epoxy is unforgiving when it comes to moisture. Even a small amount of trapped water can turn a flawless pour into a milky disaster.” — Daniel Reeves, Industrial Coatings Specialist
Solution: Sand the surface with 220-grit paper, then apply a thin sealing coat of epoxy to lock in moisture. Allow it to cure fully before applying flood coats. For severe cases, remove the layer entirely using a heat gun and scraper, then reseal the substrate.
2. Sticky or Tacky Spots
Sticky areas indicate incomplete curing, usually due to inaccurate measuring or poor mixing. Resin systems require exact ratios—deviations as small as 5% can disrupt the chemical reaction.
Fix: Scrape off the uncured portion carefully. Clean the area with isopropyl alcohol, then apply a fresh, properly mixed coat. Never pour new epoxy over sticky spots—they won’t bond correctly.
3. Bubbles and Pinholes
Bubbles appear from shaking containers, vigorous stirring, or off-gassing from porous materials. While some rise and pop naturally, others get trapped beneath the surface.
Prevention: Mix slowly and thoroughly for 3–5 minutes, scraping the sides and bottom of the container. Let the mixture rest for 2–3 minutes before pouring to allow bubbles to escape.
Correction: After pouring, pass a propane torch or heat gun lightly over the surface to burst bubbles. Keep the flame moving to avoid scorching.
4. Uneven or Dripping Edges
Thick pours or unlevel work surfaces cause resin to run down the sides unevenly, creating drips or thin spots.
Fix: Once fully cured, sand down excess drips with progressively finer grits (220 → 400). For future projects, use masking tape or dam systems around the edges to contain flow.
Step-by-Step Guide to Repairing a Cloudy Epoxy Finish
If your project has already cured with a cloudy appearance, don’t discard it. Most flaws can be corrected with patience and the right approach.
- Assess the damage: Determine whether the cloudiness is surface-level (e.g., amine blush) or deep (moisture or under-cure).
- Sand the surface: Use 220-grit wet/dry sandpaper with water to gently abrade the entire surface. This removes the hazy top layer and prepares for recoating.
- Clean thoroughly: Wipe away residue with a lint-free cloth and isopropyl alcohol. Ensure no dust or oils remain.
- Apply a thin repair coat: Mix a new batch of epoxy precisely. Pour a flood coat just thick enough to self-level (about 1/8 inch).
- Debubble and cure: Torch the surface lightly and let it cure in a dust-free, warm environment (70–75°F) for 24–72 hours.
- Polish for clarity: After full cure, use a polishing compound designed for epoxy or automotive clear coats with a soft cloth or buffing wheel to restore gloss.
Do’s and Don’ts of Epoxy Application
| Do’s | Don’ts |
|---|---|
| Measure resin and hardener by volume or weight exactly as directed. | Estimate ratios “by eye”—this leads to incomplete curing. |
| Mix slowly and scrape container walls to ensure full blending. | Stir too fast, which whips in air bubbles. |
| Work in a climate-controlled space between 70–75°F (21–24°C). | Apply epoxy in cold garages or humid basements. |
| Seal porous substrates (wood, concrete) before the main pour. | Pour directly onto untreated, damp surfaces. |
| Use a heat gun or torch to remove surface bubbles. | Touch the surface with tools or fingers—introduces contaminants. |
Real Example: Fixing a Cloudy River Table
A woodworker in Oregon built a beautiful walnut river table but noticed cloudiness along the center seam after curing. He had poured the epoxy on a rainy day with 80% humidity and hadn’t pre-sealed the wood. The trapped moisture caused a milky haze.
Instead of scrapping the piece, he sanded the entire surface with 220-grit wet sandpaper, wiped it clean, and applied a sealing coat. After 12 hours, he added a second flood coat in a dehumidified room, using a butane torch to eliminate bubbles. The final result was crystal clear, with a deep, glossy finish that enhanced the wood grain.
This case shows that environmental control and proper prep matter more than perfect technique alone.
Checklist: Preventing Epoxy Mistakes Before You Start
- ✅ Measure resin and hardener accurately using digital scales or graduated cups.
- ✅ Condition materials at room temperature for at least 24 hours.
- ✅ Seal porous substrates with a thin epoxy primer coat.
- ✅ Work in a clean, dry environment between 70–75°F (21–24°C).
- ✅ Mix slowly and thoroughly for 3–5 minutes, scraping container edges.
- ✅ Let mixed resin sit for 2–3 minutes to release entrapped air.
- ✅ Use a torch or heat gun immediately after pouring to remove bubbles.
- ✅ Cover the project to prevent dust contamination during cure.
Frequently Asked Questions
Can I fix cloudy epoxy without sanding?
In most cases, no. Surface cloudiness is typically a chemical film (like amine blush) or physical defect that must be removed mechanically. Some minor haze may respond to polishing compounds, but sanding is the most reliable method for preparing a new coat.
Why does my epoxy look clear when wet but cloudy when dry?
This is a sign of amine blush—a waxy film formed when moisture reacts with unreacted amines in the hardener. It appears cloudy when dry but temporarily clears when wet. Wash the surface with warm, soapy water and a scrub pad, then rinse and dry completely before recoating.
How long should I wait before applying a second coat?
Wait until the first coat is tack-free but still slightly soft—usually 4–8 hours for most resins. This ensures a chemical bond between layers. If waiting longer than 24 hours, lightly sand the surface to promote adhesion.
Expert Insight: The Science Behind Clarity
“Epoxy clarity depends on uniform refractive index. Any disruption—air pockets, phase separation, or surface roughness—scatters light. That’s why consistency in mix, temp, and application is non-negotiable.” — Dr. Lena Patel, Materials Chemist, Polymer Research Institute
This principle explains why seemingly small errors lead to visible defects. Light passes smoothly through perfectly cured epoxy because its molecular structure is uniform. Introduce impurities or stress points, and that clarity breaks down.
Final Thoughts and Next Steps
A cloudy epoxy finish doesn’t mean failure—it’s a learning opportunity. With the right knowledge, nearly every mistake can be reversed. The process teaches precision, patience, and respect for the material’s chemistry.
Whether you’re crafting jewelry, coating a tabletop, or sealing artwork, the difference between amateur and professional results lies in preparation and correction. Now that you understand why cloudiness happens and how to fix it, you’re equipped to produce flawless, glass-smooth finishes consistently.


 浙公网安备
33010002000092号
浙公网安备
33010002000092号 浙B2-20120091-4
Comments
No comments yet. Why don't you start the discussion?