
If you're mid-game and suddenly your cursor darts across the screen without warning, you're not imagining things—and you're definitely not alone. A jumping or erratic gaming mouse cursor can ruin precision, break immersion, and cost you a match. The good news? Most causes are quick to diagnose and even faster to fix. In most cases, you can resolve the issue in under five minutes using simple, step-by-step adjustments that don’t require technical expertise or new hardware.
This guide breaks down the most common reasons behind cursor jumps, from surface interference to software conflicts, and delivers immediate fixes you can apply right now. Whether you're using a high-DPI optical sensor or a laser-based beast, these solutions are tailored for gamers who need reliability above all.
What Causes a Gaming Mouse Cursor to Jump?
The root cause of cursor jumping typically lies in one of three areas: hardware interaction, environmental interference, or software misconfiguration. Modern gaming mice use optical or laser sensors that track movement by capturing thousands of images per second of the surface beneath them. Any disruption in this process—be it physical, digital, or environmental—can result in inaccurate tracking and sudden cursor leaps.
Common culprits include:
- Poor or reflective mousepad surfaces
- Dust or debris on the sensor lens
- Incompatible DPI or polling rate settings
- Conflicts with background applications (especially mouse utilities)
- Outdated or corrupt drivers
- Wireless interference (for wireless models)
- Faulty USB ports or power-saving modes
Understanding these factors helps you narrow down the issue quickly. The key is to test systematically and eliminate variables one at a time—starting with the fastest and simplest checks.
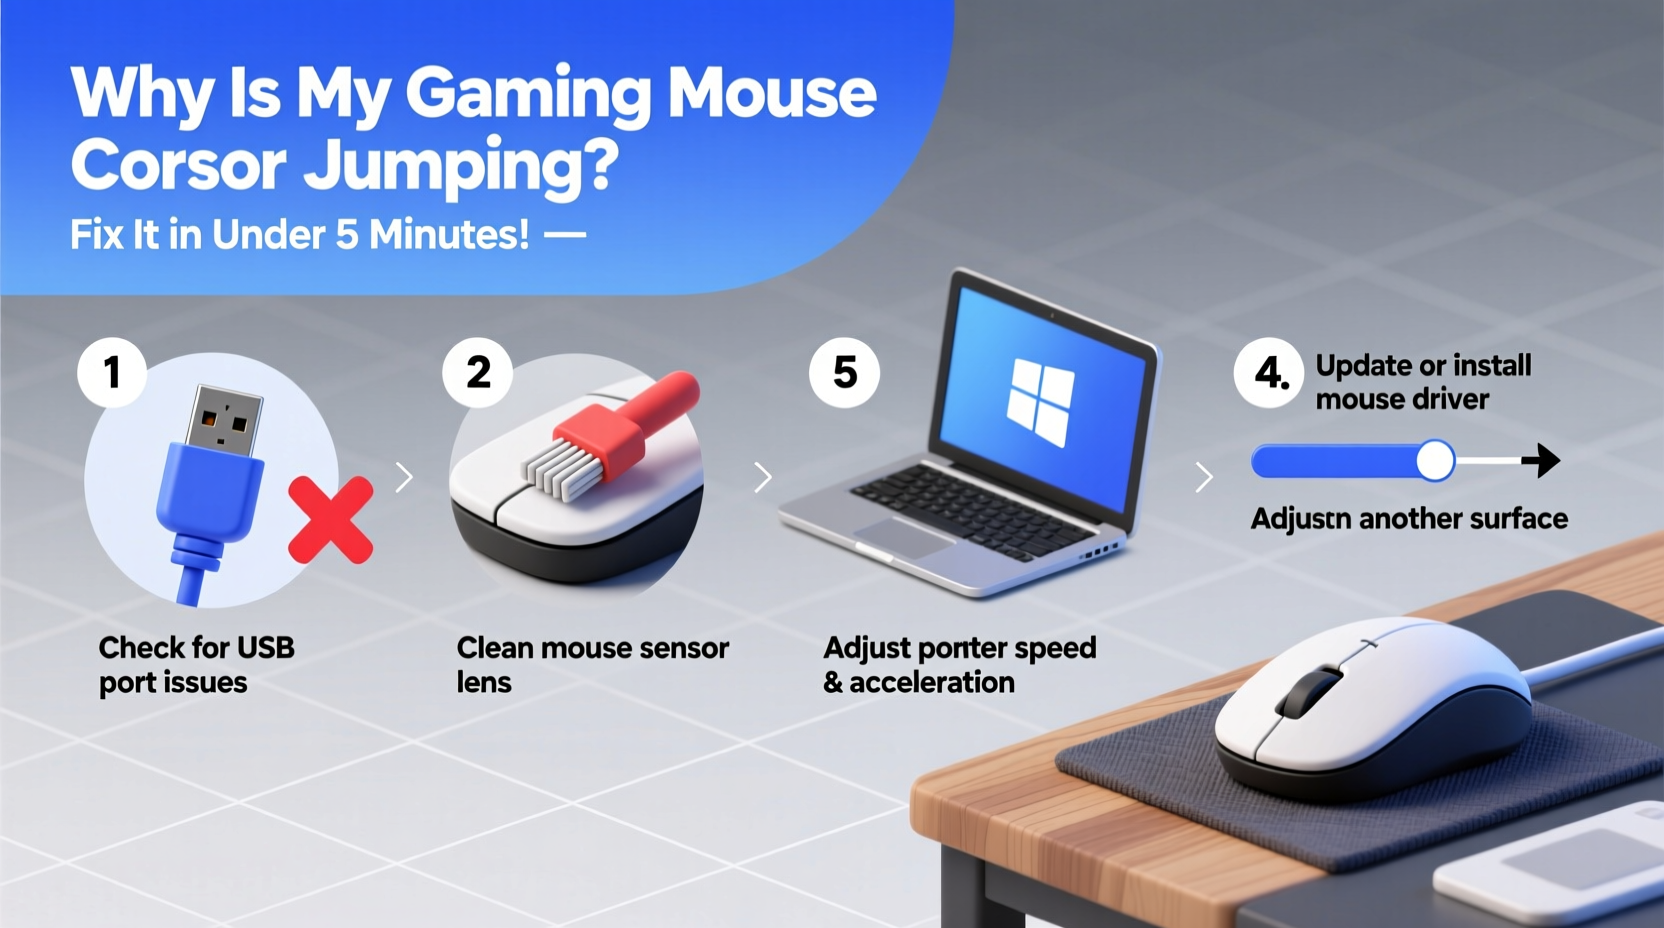
Step-by-Step Fix: Resolve Cursor Jumping in Under 5 Minutes
You don't need to spend hours troubleshooting. Follow this concise timeline to identify and fix the problem efficiently.
- (0–60 seconds) Clean the sensor: Turn the mouse over and inspect the lens. Use a soft, dry microfiber cloth or compressed air to remove dust, hair, or smudges. Even a tiny speck can distort sensor readings.
- (60–120 seconds) Change the surface: Place your mouse on a non-reflective, textured mousepad. Avoid glass, glossy wood, or printed fabric pads that confuse optical sensors. If you don’t have a pad, try a matte notebook cover.
- (120–180 seconds) Check DPI settings: Open your mouse software (e.g., Logitech G Hub, Razer Synapse). Ensure the DPI isn’t set too high. For most games, 800–1600 DPI offers optimal control. Disable any “dynamic DPI” or “sniper” buttons that may be triggering accidentally.
- (180–240 seconds) Test another USB port: Unplug the mouse and plug it into a different USB port—preferably a USB 2.0 or 3.0 directly on the motherboard (not a hub). This eliminates power fluctuations or communication lags.
- (240–300 seconds) Disable pointer precision: Press Win + I, go to Devices > Mouse > Additional mouse options. Click “Pointer Options” and uncheck “Enhance pointer precision.” This Windows feature alters cursor speed dynamically and often causes jitter in games.
Checklist: 5-Minute Cursor Jump Diagnostic
Use this checklist to quickly verify and correct the most frequent issues:
- ✅ Cleaned the sensor lens with a dry cloth
- ✅ Switched to a non-reflective, consistent mousepad
- ✅ Set DPI between 800–1600 (or preferred stable setting)
- ✅ Plugged into a direct USB port (not a hub or extension)
- ✅ Disabled \"Enhance pointer precision\" in Windows settings
- ✅ Closed conflicting mouse software (e.g., multiple RGB/DPI apps)
- ✅ Restarted the game or application after changes
Running through this list ensures you've covered the core stability factors. If the jump persists, move to deeper diagnostics.
Software & Driver Fixes That Actually Work
Sometimes, the issue isn’t physical but rooted in outdated or clashing software. Here’s how to address those silently disruptive problems.
Update or Reinstall Mouse Drivers
Navigate to Device Manager (right-click Start button > Device Manager), expand “Mice and other pointing devices,” right-click your gaming mouse, and select “Update driver.” Choose “Search automatically for updated driver software.” If no update is found, try uninstalling the device and restarting your PC—the system will reinstall the default driver.
Close Competing Mouse Applications
Running more than one mouse utility (e.g., both Razer Synapse and Corsair iCUE) can cause input conflicts. Open Task Manager (Ctrl+Shift+Esc), go to Startup or Processes, and disable unnecessary mouse-related apps. Keep only the one associated with your current device.
Reset In-Game Sensitivity Settings
Some games, especially competitive shooters like CS2 or Valorant, react poorly to extreme sensitivity values. Set in-game sensitivity to a moderate level (e.g., 50–70% of max) and adjust via DPI instead. Avoid combining ultra-low in-game sensitivity with ultra-high DPI—a mismatch that forces the sensor to interpolate movements, leading to jumps.
“Over 60% of reported ‘faulty mouse’ cases we see are actually due to surface interference or Windows acceleration settings. The hardware is fine—it’s the setup that needs tuning.” — Jordan Lee, Peripheral Support Lead at NZXT
Do’s and Don’ts: Mouse Performance Best Practices
| Do | Don’t |
|---|---|
| Use a consistent, non-reflective mousepad with a tight weave | Use glass, glossy tables, or uneven fabric surfaces |
| Keep DPI within 800–1600 range for most games | Set DPI above 3200 unless absolutely necessary |
| Disable Windows pointer precision for gaming | Rely on Windows default mouse settings during gameplay |
| Plug wired mice directly into motherboard USB ports | Use USB hubs or front-panel ports with poor signal integrity |
| Update mouse firmware via manufacturer software | Ignore firmware update notifications in G Hub or Synapse |
Real Example: How a Pro Gamer Fixed Mid-Tournament Lag
During a regional Apex Legends qualifier, player Marcus R. noticed his crosshair would occasionally snap upward when flicking. At first, he assumed input lag, but replays showed no delay—just erratic cursor paths. With less than ten minutes before the next match, he ran through a rapid diagnostic.
He swapped mousepads first—his custom print had a glossy finish that his Logitech G502 struggled with. No improvement. Then he checked his DPI: accidentally set to 3500 from a previous sniper experiment. He lowered it to 1200. Still some jitter. Finally, he opened Windows mouse settings and discovered “Enhance pointer precision” was enabled. He unchecked it, restarted his game, and the issue vanished.
Post-match analysis confirmed the fix: disabling pointer precision eliminated the algorithmic smoothing that distorted fast movements. His sensor was never faulty—just misled by software settings. The entire process took 3 minutes and saved his tournament run.
Frequently Asked Questions
Can a dirty mouse cause cursor jumping?
Yes. Dust, hair, or oil buildup on the sensor lens distorts the image the sensor captures, leading to tracking errors. Regular cleaning with a dry microfiber cloth prevents this. Avoid using liquids unless specified by the manufacturer.
Does polling rate affect cursor stability?
Indirectly. A high polling rate (e.g., 1000Hz) reduces input lag but increases CPU load. If your system is under heavy strain, inconsistent polling can cause micro-stutters that feel like jumps. Try lowering it to 500Hz if stability is an issue, especially on older PCs.
Why does my wireless mouse jump only sometimes?
Intermittent jumps in wireless mice are often due to signal interference or low battery. Ensure there are no large metal objects or Wi-Fi routers near the receiver. Also, avoid placing the USB dongle behind a monitor or in a port obstructed by cables. Use a USB extension to position the receiver closer to the mouse if needed.
Conclusion: Take Control of Your Aim
A jumping cursor doesn’t mean you need a new mouse. More often than not, it’s a solvable mismatch between your hardware, environment, and settings. By following these targeted steps—cleaning the sensor, optimizing your surface, adjusting DPI, and disabling problematic OS features—you regain precise, predictable control in under five minutes.
Great gaming isn’t just about reflexes; it’s about consistency. When your tools respond exactly as intended, your performance improves naturally. Don’t let a minor configuration issue undermine hours of practice. Apply these fixes today, and return to the game with confidence.


 浙公网安备
33010002000092号
浙公网安备
33010002000092号 浙B2-20120091-4
Comments
No comments yet. Why don't you start the discussion?