
Nothing disrupts a productive workday like pulling a freshly printed document from your printer only to find it smeared, streaked, or covered in ink smudges. Smudging not only ruins the appearance of your documents but can also signal deeper mechanical issues that, if ignored, may lead to costly repairs. The good news? Most smudging problems are preventable—and often fixable—with basic maintenance and a few targeted troubleshooting steps.
Printers, whether inkjet or laser, rely on precise internal mechanisms to transfer toner or ink cleanly onto paper. When this process breaks down, the result is messy output. But before you consider replacing your device, take a closer look at what might be causing the issue and how simple cleaning routines can restore clarity and performance.
Understanding Common Causes of Printer Smudging
Smudging occurs when excess ink or toner transfers unevenly to the page or fails to bond properly with the paper surface. The root cause varies depending on your printer type, usage patterns, and environmental conditions. Identifying the source is the first step toward resolution.
- Ink buildup on rollers or printheads (inkjet): Over time, dried ink accumulates on critical components, leading to inconsistent ink distribution.
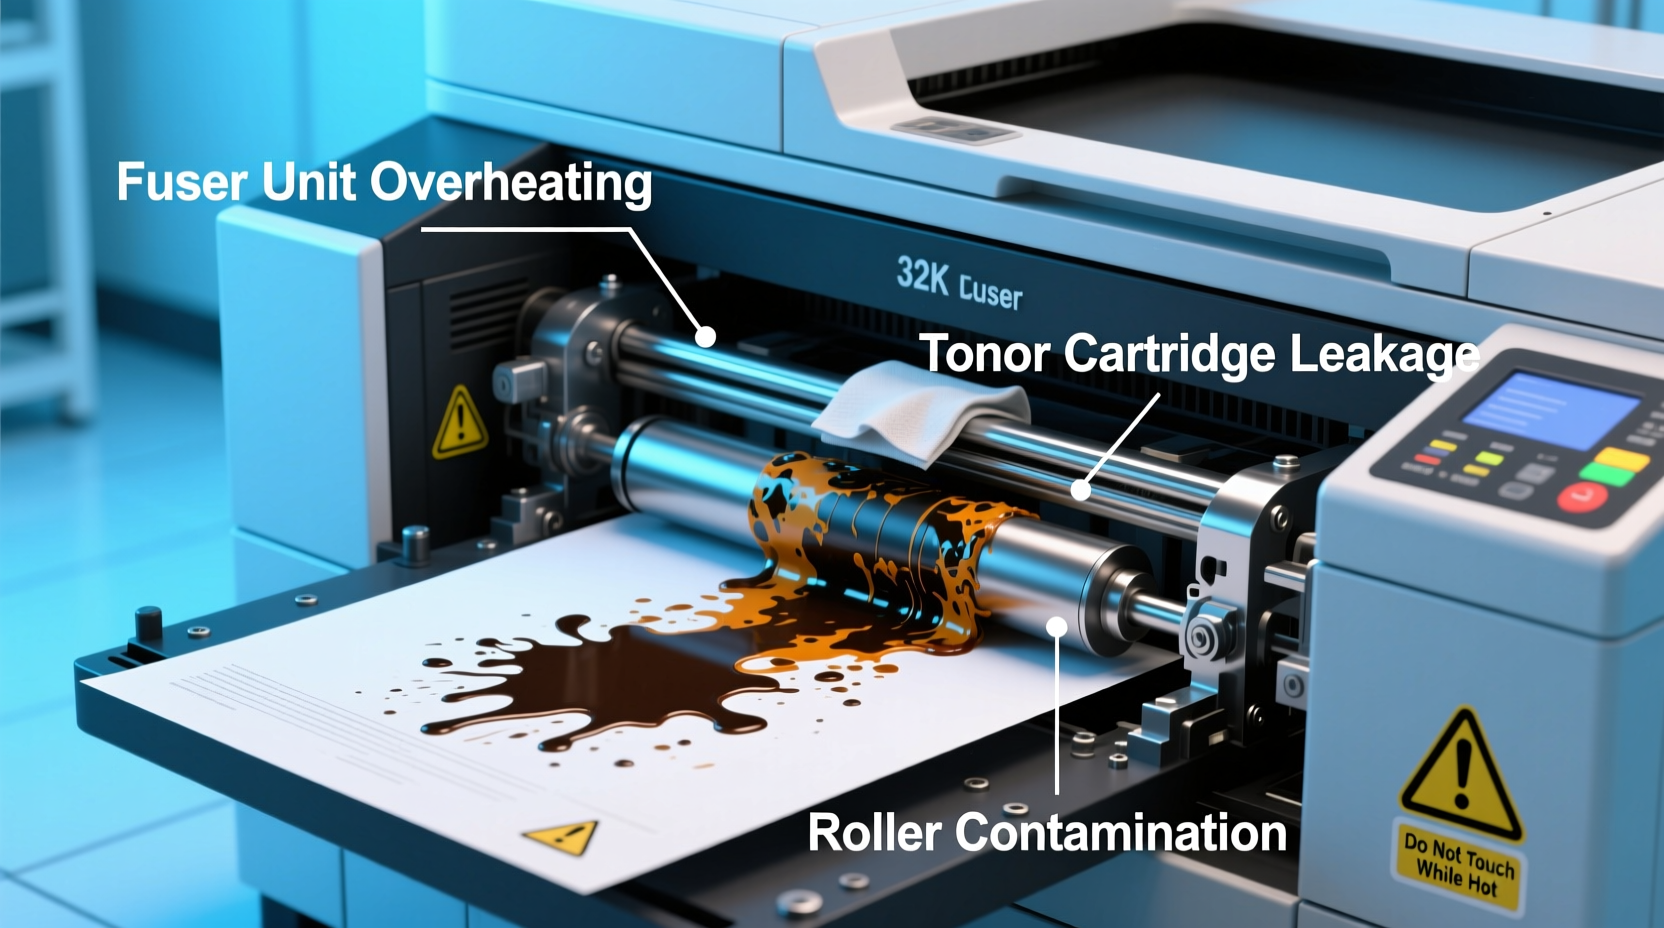
- Fuser malfunction (laser printers): The fuser melts toner onto paper. If it’s worn or dirty, toner won’t adhere properly and can rub off easily.
- Low-quality or damp paper: Moisture or poor paper coating can cause ink to bleed or toner to flake.
- Overheating or high humidity: Warm, humid environments affect ink drying times and toner fusion.
- Clogged or misaligned printheads: Inkjets require regular alignment; clogs cause overlapping or skewed ink application.
- Expired or leaking cartridges: Old or damaged cartridges may leak or dispense too much ink.
Step-by-Step Guide: Cleaning Your Printer to Stop Smudging
Regular cleaning maintains optimal print quality and extends your printer’s lifespan. Follow this comprehensive routine tailored for both inkjet and laser models.
- Run the printer’s built-in cleaning utility.
Most modern printers include a self-cleaning function accessible through the control panel or connected software. For inkjets, select “Clean Printhead.” Laser printers often have a “Drum Clean” option. Run this 1–2 times and print a test page afterward. - Inspect and clean the paper feed rollers.
Dirty rollers can transfer grime to paper, causing smears. Power off the printer, open the tray, and gently wipe rubber rollers with a lint-free cloth slightly dampened with distilled water. Avoid alcohol or solvents unless specified by the manufacturer. - Clean the printhead (inkjet only).
Remove cartridges and use a cotton swab dipped in isopropyl alcohol (70% or higher) to lightly clean the printhead contacts and nozzles. Do not scrub—gentle dabbing suffices. Let it air dry completely before reassembling. - Check and clean the fuser unit (laser printers).
Open the rear access door (if available) and inspect the fuser roller for toner buildup. Use a dry, lint-free cloth to remove residue. Never touch the fuser with bare hands—oil from skin can worsen smudging. - Vacuum internal dust and debris.
Use a small handheld vacuum or compressed air to clear dust from paper paths and internal compartments. Focus on areas where paper travels, as debris can interfere with smooth feeding. - Align and calibrate the printhead.
After cleaning, run the alignment tool via your printer’s settings menu. This ensures ink is applied precisely, reducing overlap and bleeding. - Replace worn parts if necessary.
If smudging persists after cleaning, components like rollers, drums, or fusers may need replacement. Consult your printer manual for part numbers and compatibility.
Do’s and Don’ts of Printer Maintenance
| Do’s | Don’ts |
|---|---|
| Use manufacturer-recommended paper types and weights. | Don’t use wrinkled, torn, or damp paper. |
| Print at least once a week to prevent ink drying. | Don’t leave cartridges idle for months without use. |
| Store your printer in a cool, dry place away from direct sunlight. | Don’t expose the printer to high humidity or temperature swings. |
| Clean rollers and printheads every 1–2 months for heavy-use environments. | Don’t use abrasive cloths or household cleaners on internal parts. |
| Keep firmware updated to ensure optimal performance. | Don’t ignore error messages or recurring print defects. |
Real-World Example: Resolving Office Print Quality Issues
A mid-sized marketing firm in Portland reported persistent smudging across their shared HP LaserJet MFP. Documents appeared professionally designed but arrived at desks with gray streaks and toner flaking off. Initial suspicion fell on low toner, but replacement cartridges didn’t solve the issue.
The office manager followed a structured diagnostic process: they ran the internal drum cleaning cycle, inspected the fuser for visible residue, and used compressed air to remove paper dust. Upon closer inspection, they noticed a faint scorch mark inside the fuser unit—indicative of overheating and degraded coating.
After ordering a replacement fuser kit ($85), the technician installed it following the service manual. Post-installation, all test prints were flawless. The team now schedules quarterly internal cleanings and tracks print volume to anticipate part wear. Downtime dropped by 70%, and client-facing materials regained their polished look.
“Many print quality issues aren’t about ink or toner levels—they’re mechanical. A dirty fuser or worn roller can mimic cartridge failure. Always inspect the full print path.” — Marcus Tran, Certified Printer Technician, Imaging Solutions Group
Preventive Checklist: Maintain Smudge-Free Printing
Consistency beats crisis. Integrate these actions into your routine to avoid future smudging:
- ✅ Run printhead cleaning monthly (inkjet) or drum cleaning (laser)
- ✅ Wipe paper feed rollers every 60 days
- ✅ Store paper in sealed containers to prevent moisture absorption
- ✅ Replace cartridges before they fully deplete to avoid clogs
- ✅ Use high-quality, printer-specific paper (e.g., 24–32 lb bond for important documents)
- ✅ Keep the printer firmware updated via the manufacturer’s software
- ✅ Print a calibration page quarterly to monitor alignment and color accuracy
- ✅ Monitor ambient conditions—ideally 68–77°F (20–25°C) and under 50% humidity
Frequently Asked Questions
Why does my laser printer smudge even after replacing the toner?
Toner replacement doesn’t fix mechanical issues. Smudging post-replacement often points to a dirty or failing fuser, which is responsible for bonding toner to paper. Clean the fuser roller or replace the unit if it shows signs of wear like scratches or dark spots.
Can I use rubbing alcohol to clean inkjet cartridges?
Yes, but carefully. Use 70% isopropyl alcohol and a cotton swab to gently clean the copper contacts and nozzle plate. Avoid soaking the cartridge—excess liquid can damage internal circuitry. Always let components dry fully before reinserting.
How often should I deep-clean my printer?
For home users printing 10–20 pages per week, a thorough cleaning every 3–4 months is sufficient. Offices with daily printing should clean monthly. High-volume environments may need biweekly maintenance to prevent buildup.
Conclusion: Take Control of Your Print Quality Today
Smudged prints don’t have to be a constant frustration. With a clear understanding of the causes and a reliable maintenance routine, you can restore and sustain sharp, professional-quality output. Whether you're managing a home office or supporting a busy workplace, proactive care saves time, reduces waste, and preserves your printer’s functionality.
Start with the cleaning steps outlined here, implement the preventive checklist, and pay attention to the paper and environment around your device. Small habits make a big difference. Don’t wait for the next smudged report to act—your printer deserves consistent care, just like any other essential tool.


 浙公网安备
33010002000092号
浙公网安备
33010002000092号 浙B2-20120091-4
Comments
No comments yet. Why don't you start the discussion?