
A blurry projector image can ruin an otherwise perfect movie night, presentation, or gaming session. You’ve adjusted the focus ring, double-checked the lens, and still—fuzzy edges, soft text, or distorted colors persist. The issue isn’t always with the lens. Many users assume that focusing alone will solve clarity problems, but several underlying factors can interfere with a sharp image. From incorrect throw distance to misaligned keystone settings, the root cause might be more complex than it appears. This guide dives into the most common reasons for persistent blurriness and provides practical, step-by-step solutions to restore crisp, clear projection.
Understanding Focus vs. Calibration
Focusing a projector adjusts the lens to sharpen the image at a given distance. However, focus is just one component of overall image quality. Calibration refers to the broader process of aligning the projector’s settings, position, and environment to produce optimal visual output. Even with perfect focus, poor calibration can result in a blurry or distorted image.
Think of it like adjusting a pair of glasses: focus fine-tunes what you see, but if the frame is crooked or the prescription is wrong, clarity won’t improve. Similarly, if your projector isn’t properly aligned with the screen, or if the resolution doesn’t match your source, no amount of lens twisting will fix the blur.
Common Causes of Persistent Blurriness
Before diving into fixes, it’s essential to diagnose why the image remains blurry despite correct focusing. Here are the top culprits:
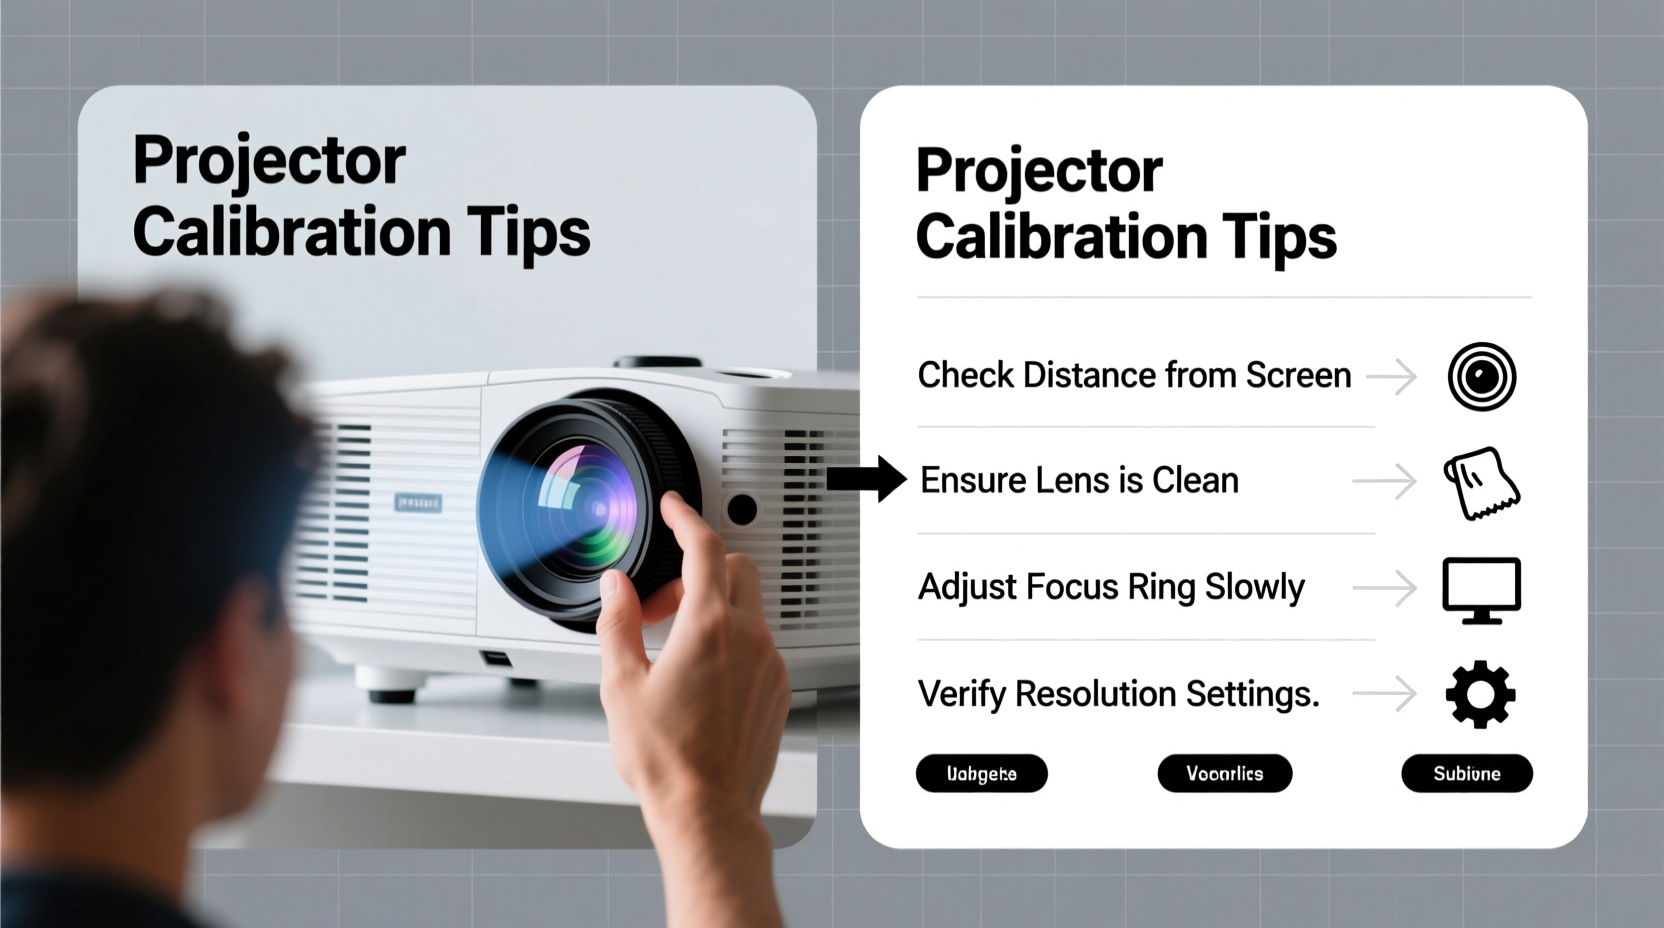
- Incorrect Throw Distance: Projectors have a specific range (throw ratio) where they produce a focused image. If placed too close or too far from the screen, the lens can’t achieve proper focus.
- Dirty Lens or Air Filter: Dust buildup on the lens scatters light and softens the image. A clogged air filter causes overheating, leading to internal lens warping.
- Keystone Correction Overuse: Digital keystone adjustment stretches pixels, reducing sharpness. Excessive correction creates artificial blur.
- Mismatched Resolution: If the input signal resolution doesn’t match the projector’s native resolution, the image must be scaled, degrading quality.
- Low-Quality Source Content: Streaming in 480p or using compressed video files results in inherently soft images, regardless of projector capability.
- Screen Surface Issues: Wrinkles, uneven texture, or improper material (e.g., painting on drywall) diffuse light and reduce clarity.
“Many users waste time refocusing when the real issue is digital scaling or environmental alignment. True sharpness comes from system-wide harmony.” — David Lin, AV Integration Specialist
Step-by-Step Calibration Guide for a Crisp Image
Follow this sequence to systematically eliminate sources of blurriness. Perform each step in order, testing the image after every change.
- Power On and Warm Up: Turn on the projector and wait 10 minutes. Thermal expansion stabilizes optics and ensures accurate focus.
- Clean the Lens: Use a microfiber cloth and lens cleaning solution. Gently wipe in circular motions. Avoid paper towels or clothing, which can scratch.
- Check Throw Distance: Consult your projector’s manual for its throw ratio. For example, a 1.5:1 ratio means 1.5 feet of distance per foot of image width. Adjust placement accordingly.
- Center the Projector: Align the lens perpendicular to the center of the screen. Use a tripod or ceiling mount for stability. Off-axis angles require keystone correction, which harms sharpness.
- Disable Digital Keystone: Turn off vertical and horizontal keystone in the menu. Physically adjust the projector height or angle instead.
- Match Input Resolution: Go to your source device (laptop, media box) and set output resolution to the projector’s native resolution (e.g., 1080p, 4K). Avoid “auto” settings.
- Select the Right Display Mode: Use “Cinema,” “Presentation,” or “High Brightness” modes based on content. Avoid “Vivid” or “Dynamic” modes, which oversharpen and create halos.
- Manually Focus the Lens: Use a test pattern (grid or text) and slowly turn the focus ring. Zoom in digitally on your phone to inspect edge sharpness. Stop when lines are crisp and distinct.
- Verify Cable Quality: Replace HDMI cables older than three years or labeled “Standard HDMI.” Use certified High-Speed HDMI cables for 1080p or higher.
Mini Case Study: Fixing a Home Theater Blur
Mark installed a new 1080p projector in his basement but struggled with blurry text during sports games. He adjusted the focus repeatedly with no improvement. After reviewing this guide, he discovered two issues: first, the projector was mounted too high, forcing a 20-degree downward tilt. He used +20 vertical keystone to compensate, which softened the image. Second, his streaming box was outputting at 720p due to a bandwidth limitation.
He lowered the mount, eliminated keystone correction, and reset his router to prioritize the streaming device. Then, he manually set the box to 1080p. After re-focusing, the image became dramatically sharper. Mark noted that eliminating digital correction had the biggest impact—something he hadn’t considered before.
Do’s and Don’ts: Quick Reference Table
| Do | Don’t |
|---|---|
| Use a hard, flat surface for the projector | Place on uneven or vibrating surfaces |
| Match source resolution to native projector resolution | Rely on automatic resolution detection |
| Clean the lens weekly in dusty environments | Touch the lens with bare fingers |
| Physically align the projector with the screen | Use more than ±10 degrees of digital keystone |
| Use a dedicated projection screen | Project onto textured walls or windows |
Advanced Tips for Consistent Clarity
Beyond basic setup, these advanced practices ensure long-term image quality:
- Use Test Patterns: Download free test images (focus grids, resolution charts) from sites like Lagom.nl or TVTestPatterns.com. Display them full-screen to evaluate sharpness objectively.
- Adjust Sharpness Settings Carefully: Most projectors have a “Sharpness” menu option. Set it between 50–70%. Higher values create artificial edge enhancement that mimics clarity but adds noise.
- Enable Pixel Mapping (if available): High-end models allow pixel alignment calibration, correcting microscopic distortions in the imaging chip.
- Monitor Lamp or LED Health: Aging light sources dim and shift color temperature, making the image appear softer. Replace lamps at manufacturer-recommended intervals.
- Control Ambient Light: Even slight light leakage washes out contrast, making edges seem less defined. Use blackout curtains and avoid reflective surfaces behind the screen.
FAQ: Common Questions About Projector Blurriness
Can a scratched lens cause permanent blur?
Minor scratches typically don’t affect image quality because the lens focuses light from many angles. However, deep or central scratches may scatter light and create soft spots. In such cases, lens replacement is recommended.
Why does my projector look sharp at first but get blurry over time?
This often indicates overheating. A clogged air filter or failing cooling fan causes internal components to expand unevenly. Clean filters monthly and ensure adequate ventilation around the unit.
Is zooming in on the image the same as moving the projector closer?
No. Optical zoom maintains image quality by adjusting internal lens elements. Digital zoom crops and enlarges the image, reducing resolution and introducing blur. Always prefer physical repositioning over digital zoom.
Final Checklist: Achieve Perfect Clarity
Before concluding, run through this final checklist to confirm all bases are covered:
- ✅ Projector has warmed up (10+ minutes)
- ✅ Lens and air filter are clean
- ✅ Throw distance matches projector specifications
- ✅ Projector is level and centered with the screen
- ✅ Digital keystone is disabled or minimal
- ✅ Source resolution matches native projector resolution
- ✅ High-speed HDMI cable is used
- ✅ Screen surface is smooth and undamaged
- ✅ Ambient light is controlled
- ✅ Sharpness setting is between 50–70%
Conclusion: Take Control of Your Viewing Experience
A blurry projector doesn’t mean you need a new device—it often signals a fixable setup issue. By understanding the difference between focus and full calibration, you gain the power to consistently deliver sharp, immersive visuals. Whether you’re hosting a movie night, delivering a business pitch, or enjoying console gaming, image clarity directly impacts engagement and enjoyment. Don’t settle for soft edges or fuzzy text. Apply these calibration techniques today, revisit your setup with fresh eyes, and rediscover the true potential of your projector.


 浙公网安备
33010002000092号
浙公网安备
33010002000092号 浙B2-20120091-4
Comments
No comments yet. Why don't you start the discussion?