
A puddle of water forming at the bottom of your refrigerator is more than just a nuisance—it can damage food, promote mold growth, and signal underlying mechanical issues. While refrigerators are designed to maintain cold, dry environments, internal leaks are surprisingly common. The causes range from simple oversights like overfilled containers to complex failures in drainage or defrost systems. Understanding the root cause is essential for an effective fix. This guide walks through the most frequent reasons behind internal refrigerator leaks and provides actionable, practical solutions to restore your appliance’s performance.
Common Causes of Internal Refrigerator Leaks
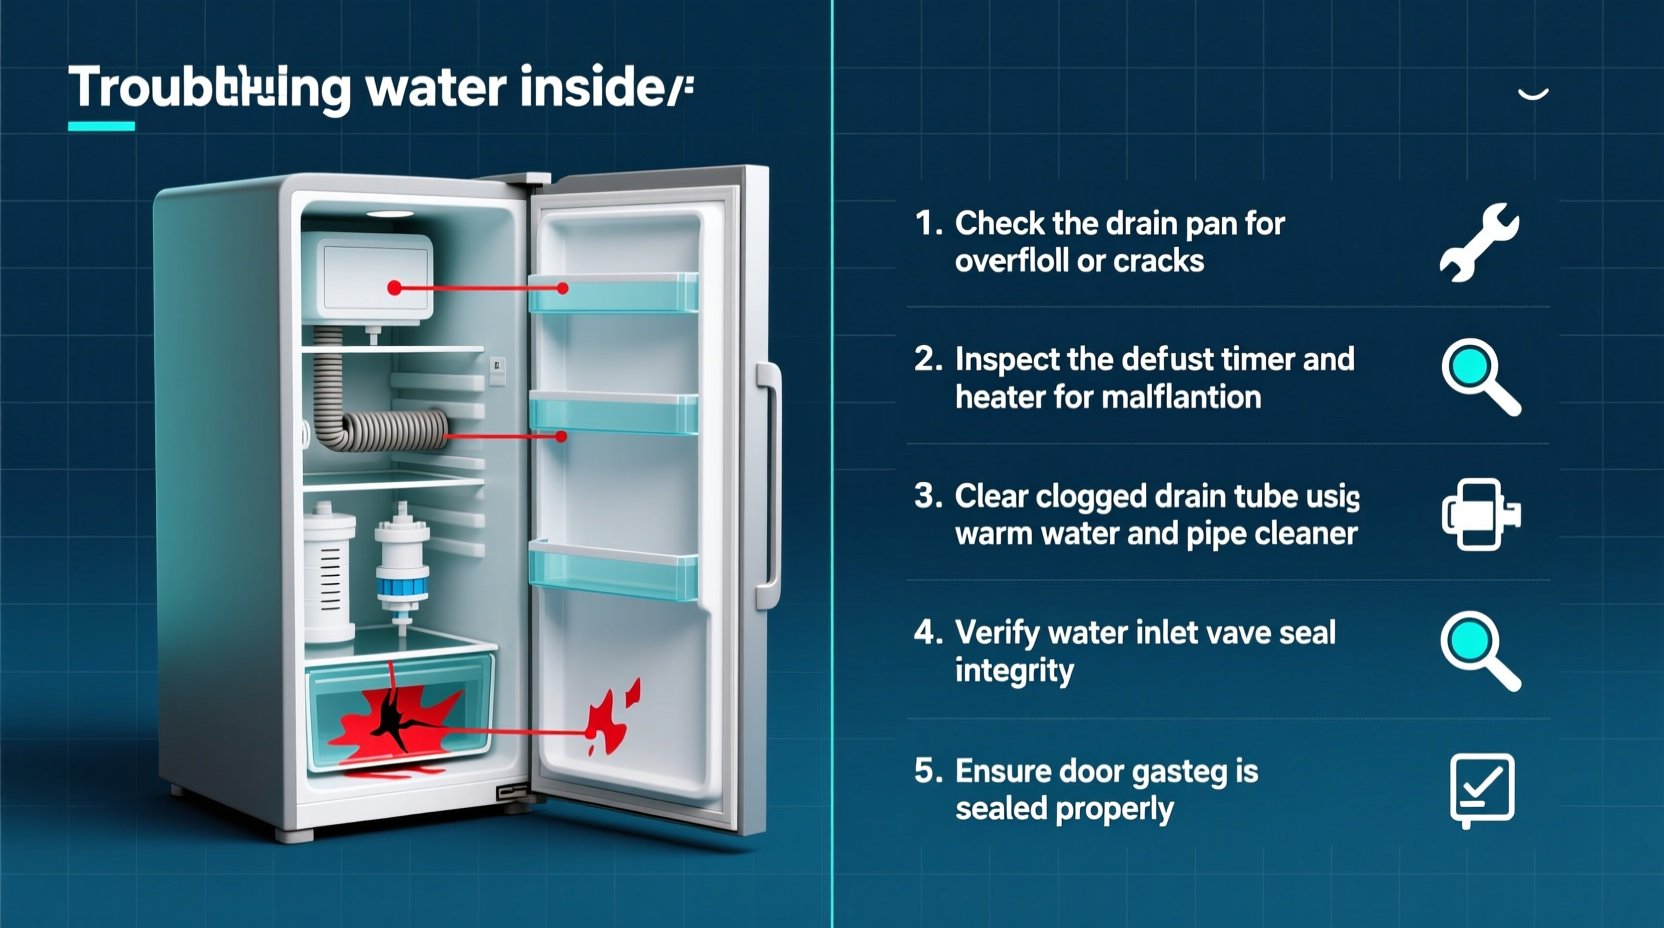
Before attempting repairs, it's crucial to identify where the water is coming from. Unlike external leaks—often due to condensation or faulty supply lines—internal leaks originate within the fridge compartment itself. The five most common culprits include:
- Clogged defrost drain tube
- Improperly stored liquids or condensation buildup
- Faulty door seals allowing warm air in
- Overuse of ice/water dispensers causing overflow
- Defrost system malfunctions (heater, thermostat, or timer failure)
The defrost drain is the single most frequent source of internal leaks. During normal operation, frost accumulates on the evaporator coils in the freezer. Periodically, the refrigerator enters a defrost cycle, melting this frost into water. That water should flow through a small drain tube into a pan beneath the unit, where it evaporates. If that tube becomes blocked by ice or debris, water backs up and spills into the fresh food compartment.
“Over 60% of service calls for refrigerator leaks trace back to a clogged or frozen defrost drain.” — James Rutherford, Appliance Repair Technician with 18 years of field experience
Step-by-Step Troubleshooting Guide
Follow this systematic approach to diagnose and resolve the leak efficiently. Start with the simplest possibilities before moving to mechanical components.
- Empty the refrigerator and locate the source of water. Remove all shelves and drawers. Check if water pools near the back wall (indicating a defrost issue) or under crisper bins (suggesting overflow or container leakage).
- Inspect food and beverage storage. Look for cracked containers, open bottles, or improperly sealed jars. Even minor spills can accumulate over time, especially in high-humidity environments.
- Check the door gasket seal. Run your fingers along the rubber seal. If it feels cracked, brittle, or loose, warm, moist air may be entering the fridge, increasing condensation. Close the door on a dollar bill—if you can pull it out easily, the seal needs replacement.
- Examine the ice maker and water dispenser. If your model has a built-in ice maker, ensure the fill cup isn’t overflowing. Also, inspect the water reservoir for cracks or loose connections.
- Access the defrost drain system. In most models, the drain is located at the back of the freezer compartment, behind a panel. Use a flashlight to look for ice buildup or debris.
Clearing a Clogged Defrost Drain Tube
This is often the definitive fix for persistent internal leaks. Here’s how to clear the blockage safely:
- Unplug the refrigerator and remove all items from the freezer.
- Locate the rear panel in the freezer compartment. It’s usually held by screws or clips.
- Remove the panel to expose the evaporator coils and the drain hole below them.
- If ice is present, allow it to thaw naturally or use a hairdryer on low heat (do not chip with sharp tools).
- Once clear, flush the drain tube using a basting syringe filled with hot water. Repeat until water flows freely into the drain pan below.
- For stubborn clogs, insert a pipe cleaner or flexible wire (like a straightened coat hanger) gently into the tube to dislodge debris.
- Reassemble the panel and plug the unit back in.
After completing this process, monitor the fridge for 24–48 hours. If no new water appears, the drain was likely the culprit.
Do’s and Don’ts When Handling Refrigerator Leaks
| Do | Don't |
|---|---|
| Unplug the appliance before servicing internal components | Use sharp tools to break ice near coils or wiring |
| Flush the drain with warm water monthly as preventive maintenance | Ignore recurring leaks after initial fixes |
| Replace worn door gaskets promptly | Overfill liquid containers in the fridge |
| Level the refrigerator to ensure proper drainage | Assume the leak is from plumbing without checking internal sources first |
| Use distilled white vinegar to sanitize the drain and inhibit mold | Run the fridge empty for extended periods without monitoring humidity |
Real-World Example: A Persistent Leak Solved
Sarah, a homeowner in Portland, noticed water accumulating near her vegetable drawers every few days. She cleaned it up repeatedly but assumed it was from a spilled juice box. After removing the drawers and placing towels overnight, she confirmed the water wasn’t from spills. Following online advice, she inspected the door seal—firm in some areas but loose near the top hinge. Replacing the gasket helped reduce condensation, but the leak returned.
Digging deeper, Sarah pulled out the freezer fan cover and discovered a thick layer of ice behind the panel. After thawing it and flushing the drain with hot water, she observed immediate improvement. To prevent recurrence, she began monthly maintenance using a mixture of warm water and vinegar through a turkey baster. Her refrigerator hasn’t leaked since—a testament to proactive care and accurate diagnosis.
When Mechanical Failure Is the Root Cause
If basic cleaning and sealing don’t stop the leak, the issue may lie in the defrost system. Components such as the defrost heater, thermostat, or control board can fail silently, leading to incomplete defrost cycles. Without proper melting, frost builds up excessively and eventually melts uncontrollably when the compressor shuts down.
To test the defrost heater:
- Unplug the fridge and access the heater (typically behind the evaporator coils).
- Use a multimeter to check for continuity. No reading means the heater is dead and must be replaced.
Likewise, a failed defrost thermostat won’t trigger the heater at the right temperature. These parts are relatively inexpensive and user-replaceable for those comfortable with DIY repairs. However, if the main control board is malfunctioning, professional service is recommended.
Preventive Maintenance Checklist
Regular upkeep significantly reduces the risk of leaks. Follow this checklist every three months:
- ✅ Clean interior surfaces with mild soapy water
- ✅ Inspect and clean the defrost drain opening
- ✅ Test door seal integrity using the dollar bill method
- ✅ Vacuum condenser coils at the back or bottom of the unit
- ✅ Ensure the refrigerator is level—adjust feet as needed
- ✅ Flush drain tube with warm water and vinegar solution
- ✅ Check ice maker alignment and water line connections
Frequently Asked Questions
Is condensation inside the fridge normal?
Minor condensation can occur when warm air enters during frequent door openings. However, pooling water is not normal and indicates a problem with drainage, sealing, or airflow.
Can a refrigerator leak cause mold?
Yes. Standing water creates a damp environment ideal for mold and mildew, especially in crisper drawers and under shelves. Address leaks immediately and clean affected areas with a vinegar-water solution.
Why does my fridge leak only in summer?
Higher ambient humidity increases condensation, especially if the door seal is weak. Additionally, the defrost system works harder in warm environments, raising the chance of drain clogs or overflows.
Final Steps and Long-Term Care
Fixing a leaking refrigerator isn’t always about one dramatic repair—it’s often the result of small oversights compounding over time. Whether it’s a frozen drain, a failing seal, or poor storage habits, each factor plays a role in the appliance’s overall health. Once the immediate leak is resolved, shift focus to prevention. Schedule seasonal maintenance, keep the drain clear, and remain vigilant about door closure and food containment.
Modern refrigerators are built to last 10–15 years with proper care. Addressing leaks early not only protects your kitchen floor and groceries but also extends the life of the unit. Ignoring the issue risks compressor strain, increased energy bills, and premature failure.


 浙公网安备
33010002000092号
浙公网安备
33010002000092号 浙B2-20120091-4
Comments
No comments yet. Why don't you start the discussion?