
Sourdough bread has earned a reputation as both a rewarding and challenging craft. When done right, it yields a loaf with an open crumb, crisp crust, and complex flavor. But many beginners face the same frustrating outcome: a dense, gummy, or heavy loaf that lacks lift and airiness. This result isn’t a failure of potential—it’s usually a sign of one or more correctable mistakes in the process.
The beauty of sourdough lies in its simplicity—just flour, water, salt, and time. Yet within that simplicity are subtle variables that dramatically affect the final product. Understanding these nuances can transform your baking from inconsistent to confident. Let’s explore the most common reasons behind dense sourdough and how to address them systematically.
Understanding What Causes Density in Sourdough
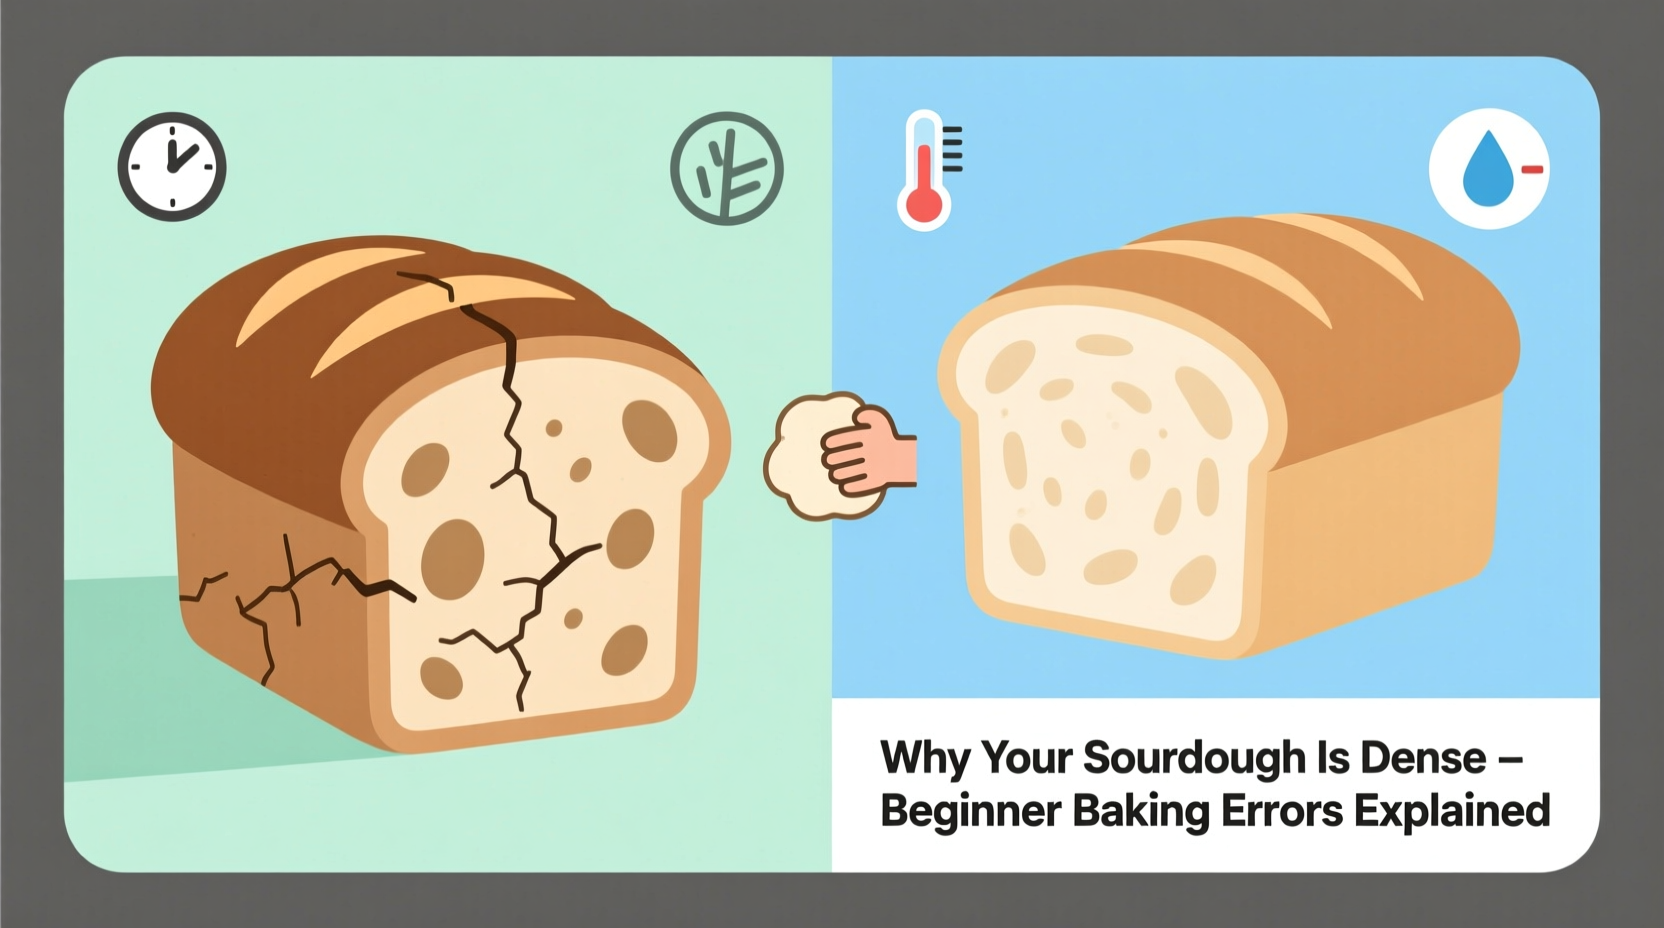
Density in sourdough bread typically means insufficient gas retention during fermentation and baking. In other words, the dough didn’t trap enough carbon dioxide produced by the wild yeast and bacteria in your starter. For a light, airy crumb, several conditions must align:
- The starter must be active and mature.
- The gluten structure must be well-developed.
- Fermentation timing must be precise—not under- or over-proofed.
- Baking must include adequate steam and proper oven temperature.
When any of these elements fall short, the loaf collapses or fails to expand, resulting in a compact, chewy texture. The good news? Each issue is diagnosable and fixable.
Common Beginner Errors That Lead to Dense Loaves
1. Using an Inactive Starter
Your sourdough starter is the engine of your loaf. If it’s sluggish or not peaking at the right time, your dough won’t rise properly. A common mistake is assuming that if the starter has bubbles, it’s ready. But visual cues alone aren’t enough.
An effective starter should double in volume within 4–8 hours after feeding, have a pleasant tangy aroma (not alcoholic or rancid), and pass the float test: drop a small spoonful into a glass of water—if it floats, it’s ready to use.
2. Underdeveloped Gluten Structure
Gluten is the protein network that traps gas during fermentation. Without sufficient strength, the dough can’t hold expansion, leading to collapse and density. Many beginners mix their dough and immediately bulk ferment without developing strength.
Techniques like stretch and folds or autolyse (resting flour and water before adding salt and starter) significantly improve gluten development. Overmixing in a stand mixer can damage gluten, but under-handling leads to weakness.
3. Incorrect Hydration Levels
Hydration refers to the ratio of water to flour in your recipe. High hydration (75% and above) creates an open crumb but is harder to handle. Low hydration (<65%) produces a denser crumb and is often mistaken for success because it feels easier to shape.
Beginners often default to low hydration recipes thinking they’re simpler, but this can limit oven spring and crumb openness. Matching your flour type to hydration is key—whole grain flours absorb more water than white.
4. Under- or Over-Fermentation
Fermentation is not measured in hours—it’s measured in signs. Dough temperature, room climate, starter strength, and flour type all influence timing. Basing proofing solely on a clock leads to errors.
Under-fermented dough lacks gas production and enzymatic breakdown, making it tight and dense. Over-fermented dough loses structural integrity, collapses when baked, and tastes overly sour.
“Fermentation is about feel, not time. Learn to read your dough—its jiggle, puffiness, and resistance.” — Daniel Leader, author of *Local Breads*
5. Poor Shaping Technique
Shaping isn’t just about appearance—it’s critical for creating surface tension that helps the loaf hold its shape and expand upward during baking. A loosely shaped boule spreads out instead of rising, resulting in a flat, dense loaf.
Take time to pre-shape, rest, and then final-shape with confidence. Use minimal flour to prevent slippage, and ensure the seam is sealed tightly underneath.
Step-by-Step Guide to Avoiding Dense Sourdough
Follow this structured approach to minimize common pitfalls and consistently produce lighter loaves.
- Prepare an Active Starter: Feed your starter 6–8 hours before mixing. It should be bubbly, risen, and pass the float test.
- Autolyse (Rest Flour and Water): Mix only flour and water and let sit for 30–60 minutes. This hydrates the flour and jumpstarts gluten formation.
- Mix and Add Salt: Incorporate starter and salt. Mix until shaggy, then let rest 10 minutes before kneading or folding.
- Perform Stretch and Folds: Every 30 minutes during the first 2 hours of bulk fermentation, perform 4 sets of stretch and folds. This builds strength without overworking.
- Monitor Bulk Fermentation: Look for a 30–50% increase in volume, a domed surface, bubbles beneath, and a jiggly consistency. This may take 3–5 hours depending on temperature.
- Pre-Shape and Final Shape: Pre-shape into a round, rest 20–30 minutes, then final-shape with tight surface tension.
- Proof Properly: Proof either at room temperature for 2–3 hours or cold in the fridge for 8–12 hours. The dough should feel puffy but still resilient when gently pressed.
- Bake with Steam: Use a Dutch oven or steam-injected oven. Bake covered for 20 minutes, then uncovered for 20–25 minutes until deeply golden.
Do’s and Don’ts: Sourdough Success Checklist
| Do’s | Don’ts |
|---|---|
| Feed your starter regularly and use it at peak activity | Use a starter straight from the fridge without feeding |
| Use a kitchen scale for accurate measurements | Rely on cup measurements, which vary widely |
| Perform stretch and folds during bulk fermentation | Mix once and walk away—gluten needs development |
| Proof in a banneton to support structure | Proof on a flat surface without support |
| Bake in a preheated Dutch oven for steam and heat retention | Bake on a sheet pan without steam |
| Let the loaf cool completely (2+ hours) before slicing | Cut into hot bread—steam inside will make it gummy |
Real Example: From Brick to Boule
Sarah, a home baker in Portland, struggled for months with dense sourdough. Her first attempts were edible but heavy, with little crumb structure. She followed recipes exactly but ignored her environment: her kitchen was cool (64°F), and she used whole wheat flour exclusively.
After tracking her process, she realized her starter wasn’t peaking due to the cold, and her whole wheat dough needed more hydration and longer fermentation. She began feeding her starter earlier in the day, moved it to a warmer spot near the oven, switched to a 50/50 white and whole wheat blend, increased hydration to 72%, and added four stretch-and-folds.
Within two bakes, her loaf opened up dramatically. The crumb became airy, the crust crackled, and the flavor deepened. “I was following steps,” she said, “but not observing the dough. Once I started watching instead of just timing, everything changed.”
Expert Insight: Why Time Isn’t the Best Measure
Many beginners rely on recipe timelines, but professional bakers emphasize sensory evaluation. Temperature is the biggest variable affecting fermentation speed. A dough at 78°F ferments nearly twice as fast as one at 68°F.
“In artisan baking, we don’t say ‘ferment for 4 hours.’ We say ‘ferment until the dough shows signs of maturity.’ That means volume gain, bubble structure, and elasticity.” — Chad Robertson, Tartine Bakery
This mindset shift—from rigid schedules to responsive observation—is what separates consistent results from hit-or-miss outcomes.
Frequently Asked Questions
Why does my sourdough bread taste gummy?
Gumminess is usually caused by underbaking or slicing too soon. Even if the crust looks done, the interior may still be moist. Always bake to an internal temperature of 205–210°F and allow the loaf to cool for at least 2 hours. Cutting early traps steam, creating a gummy texture.
Can I fix a dense loaf after baking?
No—but you can repurpose it. Slice and toast it for crostini, cube it for croutons, or turn it into breadcrumbs. More importantly, analyze what went wrong: Was the starter weak? Was the dough over-proofed? Use each loaf as feedback for the next.
Does flour type affect density?
Absolutely. All-purpose flour works well for beginners due to moderate protein content (~11%). Bread flour (~12–13%) offers more strength for better oven spring. Whole grain flours absorb more water and ferment faster, requiring adjustments in hydration and timing. Using 100% whole grain without adaptation often leads to denser loaves.
Final Tips for Lighter, Airier Sourdough
Consistency in sourdough comes not from perfection, but from understanding cause and effect. Track your variables: starter feed schedule, room temperature, flour type, hydration, and fermentation times. Keep a simple baking journal—even notes on the back of a recipe card help.
Embrace the learning curve. Your first few loaves may not win awards, but each one teaches you more about fermentation, dough behavior, and your own kitchen’s rhythm. Small tweaks—like adjusting fold frequency or extending proof time—can yield dramatic improvements.
Conclusion: Turn Dense into Delicious
Dense sourdough isn’t a dead end—it’s a diagnostic signal. By identifying where the process broke down, you gain control over the variables that matter most. Whether it’s starter health, gluten development, or proofing precision, each challenge is an opportunity to grow as a baker.
Start with one change: ensure your starter is truly active. Then master stretch and folds. Then refine your shaping. Layer these skills over time, and you’ll move from confusion to confidence. The perfect sourdough loaf isn’t about luck—it’s about learning.


 浙公网安备
33010002000092号
浙公网安备
33010002000092号 浙B2-20120091-4
Comments
No comments yet. Why don't you start the discussion?