
Sourdough bread should have an open crumb, a crisp crust, and a satisfying chew. When your loaf comes out heavy, gummy, or compact, it’s not just disappointing—it can feel like a mystery. Many home bakers assume they’ve failed at some fundamental step, but in reality, density is often the result of subtle imbalances in fermentation, hydration, shaping, or baking. The good news? Most causes of dense sourdough are fixable once you know what to look for.
This guide walks through the most common reasons sourdough turns out dense, backed by baking science and real-world experience. Whether you're a beginner or refining your technique, these insights will help you diagnose issues and consistently bake lighter, more flavorful loaves.
Understanding Sourdough Structure: What Creates Airiness?
The texture of sourdough depends on three key elements: gluten development, gas production, and oven spring. Gluten forms a network that traps carbon dioxide produced by wild yeast and bacteria during fermentation. As the dough proofs, bubbles expand. During baking, steam and heat cause a final burst of expansion—oven spring—before the structure sets.
Density occurs when one or more of these processes fails:
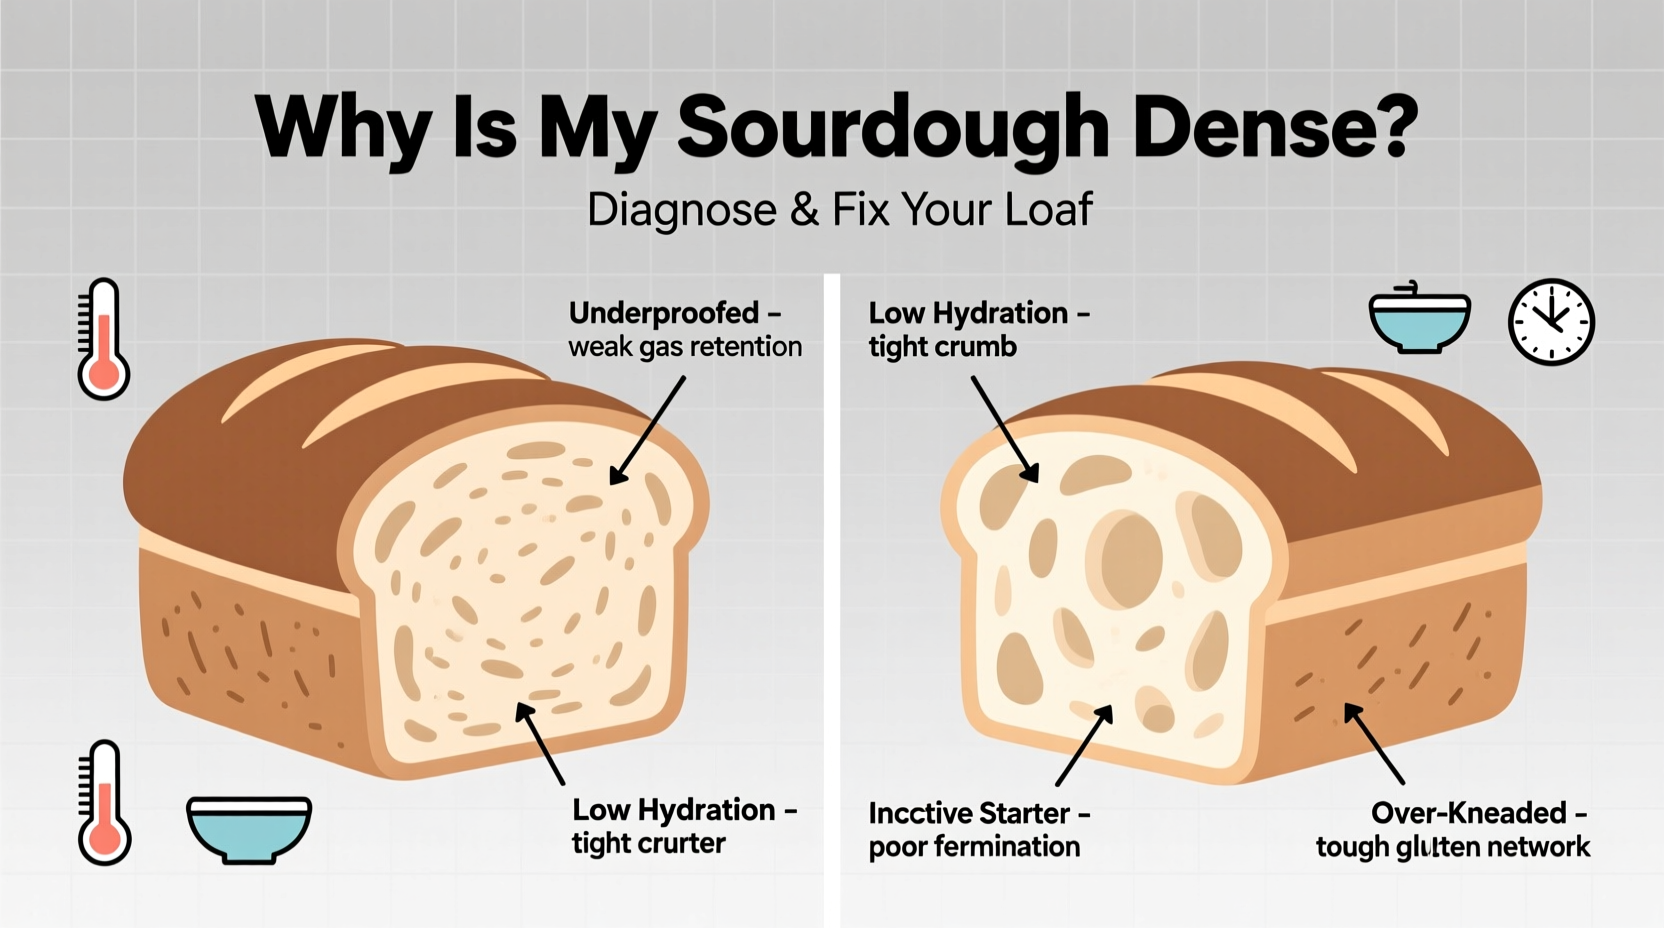
- Insufficient gas production from an inactive starter
- Poor gluten development due to undermixing or low-protein flour
- Overproofing or underproofing, leading to collapsed structure
- Inadequate oven spring from low baking temperature or lack of steam
Before jumping into fixes, confirm your starter is active. A healthy starter should double within 4–8 hours of feeding and be full of bubbles. If it doesn’t, no amount of kneading or shaping will rescue your loaf.
Common Causes of Dense Sourdough and How to Fix Them
1. Weak or Underripe Starter
Your starter is the engine of your sourdough. If it's sluggish, your dough won't ferment properly. An underripe starter lacks sufficient yeast and acid balance to leaven the bread effectively.
Signs of a weak starter:
- Doesn’t double after feeding
- Floating test fails (a spoonful dropped in water sinks)
- Minimal bubbling or hooch (liquid layer) on top
To strengthen your starter, feed it twice daily for 2–3 days using unbleached all-purpose or whole grain flour. Whole rye or whole wheat can boost microbial activity. Always discard and feed at consistent intervals to build strength.
“Your starter should smell tangy and slightly sweet—not alcoholic or rotten. That’s a sign of imbalance.” — Chad Robertson, Tartine Bakery
2. Inadequate Gluten Development
Gluten gives dough its elasticity and ability to trap gas. Without proper development, bubbles escape or collapse, resulting in a tight, dense crumb.
Common mistakes include:
- Under-kneading or under-stretching
- Using low-protein flour (e.g., cake flour)
- Over-hydrating without adjusting mixing technique
For optimal gluten formation, use high-protein bread flour (12–13% protein). Perform a series of stretch-and-folds during bulk fermentation—typically 4 sets over 2 hours. This builds strength gradually without overworking the dough.
3. Incorrect Hydration Level
Hydration—the ratio of water to flour by weight—greatly affects texture. High hydration (75%+) creates an open crumb but requires skill to handle. Too much water without sufficient gluten development leads to flat, dense loaves.
If you're new to sourdough, start with 65–70% hydration. This range is forgiving and easier to shape. As your skills improve, gradually increase hydration.
| Hydration Level | Flour : Water Ratio | Texture & Handling |
|---|---|---|
| 60–65% | 100g : 60–65g | Firm, easy to shape; denser crumb |
| 68–72% | 100g : 68–72g | Soft, tacky; balanced openness |
| 75%+ | 100g : 75g+ | Sticky, challenging; very open crumb |
Adjust hydration based on flour type. Whole grain flours absorb more water, so you may need to add 5–10% more water than with all-white flour recipes.
4. Poor Shaping Technique
Shaping isn’t just about appearance—it creates surface tension that helps the loaf hold its structure during proofing and baking. A poorly shaped dough spreads out instead of rising upward, limiting oven spring and creating density.
To shape properly:
- Pre-shape into a round and rest for 20–30 minutes.
- Flip seam-side up and flatten slightly.
- Stretch the top over the center, press to seal.
- Repeat around the edges, rotating as you go.
- Roll into a tight log or ball, sealing the seam underneath.
- Place seam-side down in a floured banneton.
A well-shaped loaf should feel taut and resist gentle poking.
5. Proofing Issues: Overproofed vs. Underproofed
Proofing is the final fermentation stage. Getting it right is crucial for volume and texture.
Underproofed dough hasn’t developed enough gas. It expands rapidly in the oven but lacks flavor and has a gummy center.
Overproofed dough has exhausted its gas-producing capacity. The structure collapses during baking, resulting in a flat, dense loaf.
Use the finger poke test: Gently press the dough. If it springs back slowly and leaves a slight indentation, it’s ready. If it springs back instantly, it needs more time. If it doesn’t spring back at all, it’s overproofed.
Step-by-Step Guide to Lighter Sourdough Loaves
Follow this sequence to maximize your chances of success:
- Feed your starter 8–12 hours before mixing. Use it when bubbly and at peak volume.
- Mix dough with 65–70% hydration using bread flour for beginners.
- Bulk ferment at room temperature (72–76°F). Perform 4 sets of stretch-and-folds at 30-minute intervals during the first 2 hours.
- Check for readiness: Dough should be smooth, domed, and ~50% increased in volume.
- Shape tightly with surface tension. Place in a floured banneton.
- Final proof: 1–2 hours at room temp or 10–14 hours in the fridge.
- Preheat oven to 450–475°F with a Dutch oven inside for at least 30 minutes.
- Bake covered for 20 minutes (traps steam), then uncovered for 20–25 minutes until deep golden.
- Cool completely (1–2 hours) before slicing to prevent gumminess.
Real Example: From Dense to Dreamy Loaf
Jenna had been baking sourdough for months with inconsistent results. Her loaves were edible but consistently dense, especially in the center. She used a 78% hydration recipe she found online and baked in a Dutch oven, but something was off.
After reviewing her process, she realized her starter wasn’t peaking when she used it—it was fed the night before and used in the morning, meaning it had already fallen. She also skipped stretch-and-folds, assuming mixing was enough.
She adjusted: feeding her starter in the morning for an evening bake, doing four stretch-and-folds, and reducing hydration to 70%. Her next loaf had visible oven spring, an open crumb, and a springy texture. The difference was dramatic—and entirely process-driven.
“I thought I needed better equipment,” she said. “But it was just timing and technique.”
Troubleshooting Checklist
Use this checklist to diagnose and correct dense sourdough:
- ✅ Is my starter active and peaking when used?
- ✅ Did I perform stretch-and-folds during bulk fermentation?
- ✅ Is my flour high-protein (bread or all-purpose)?
- ✅ Is my hydration appropriate for my skill level?
- ✅ Was the dough shaped tightly with surface tension?
- ✅ Did I proof correctly? (Passed the poke test)
- ✅ Was the oven hot enough with adequate steam?
- ✅ Did I cool the bread fully before cutting?
Go through each item after every bake—even experienced bakers miss small details.
Frequently Asked Questions
Why is my sourdough dense in the middle but okay on the outside?
This is usually due to underbaking or slicing too soon. The center remains gummy if the internal temperature doesn’t reach 205–210°F. Always use a thermometer and let the loaf cool completely—cutting early traps moisture and creates a false impression of density.
Can I fix dense sourdough after baking?
No—once baked, the structure is set. However, dense loaves make excellent toast, breadcrumbs, or crostini. You can also repurpose them into savory puddings or panzanella. Prevention is key for future bakes.
Does whole wheat flour make sourdough denser?
Yes, because bran particles cut gluten strands and reduce elasticity. To improve rise with whole grains, increase pre-fermentation (soak flour and water before adding starter), use a higher percentage of white flour, or add vital wheat gluten (1–2 tsp per cup).
Expert Tips for Consistent Results
Beyond fundamentals, experienced bakers rely on environmental control and precision.
- Control temperature: Ferment in a warm spot (75°F ideal). Cold kitchens slow fermentation and weaken yeast activity.
- Use a scale: Volume measurements (cups) vary widely. Weigh all ingredients for consistency.
- Track variables: Keep a baking journal noting starter ripeness, room temp, fermentation times, and outcomes.
- Score deeply: Make cuts ½ inch deep at a 30-degree angle to allow controlled expansion.
“The best sourdough bakers aren’t the ones with fancy ovens—they’re the ones who observe, adjust, and repeat.” — Ken Forkish, author of *The Elements of Pizza*
Conclusion: Turn Density Into Discovery
Dense sourdough isn’t failure—it’s feedback. Each loaf tells you something about your starter, environment, and technique. By systematically addressing the root causes—starter health, gluten development, proofing, and baking—you’ll transform dense disappointments into light, airy successes.
Don’t rush the process. Sourdough rewards patience, observation, and consistency. Master the basics, keep refining, and soon you’ll bake loaves that rise proudly, crackle when tapped, and slice with ease.


 浙公网安备
33010002000092号
浙公网安备
33010002000092号 浙B2-20120091-4
Comments
No comments yet. Why don't you start the discussion?