
Sourdough bread with a light, open crumb—those irregular holes scattered through a golden, chewy interior—is the hallmark of a well-executed loaf. Yet for many home bakers, the reality is far from ideal: dense, gummy interiors, flat loaves, or bread that resembles a brick more than bakery artistry. Achieving that coveted texture isn’t magic; it’s science, timing, and technique working in harmony. When your sourdough comes out too dense, it’s usually a symptom of one or more underlying issues in fermentation, dough development, or baking methodology. Understanding these factors—and how to correct them—can transform your results from disappointing to exceptional.
The Science Behind Sourdough Crumb Structure
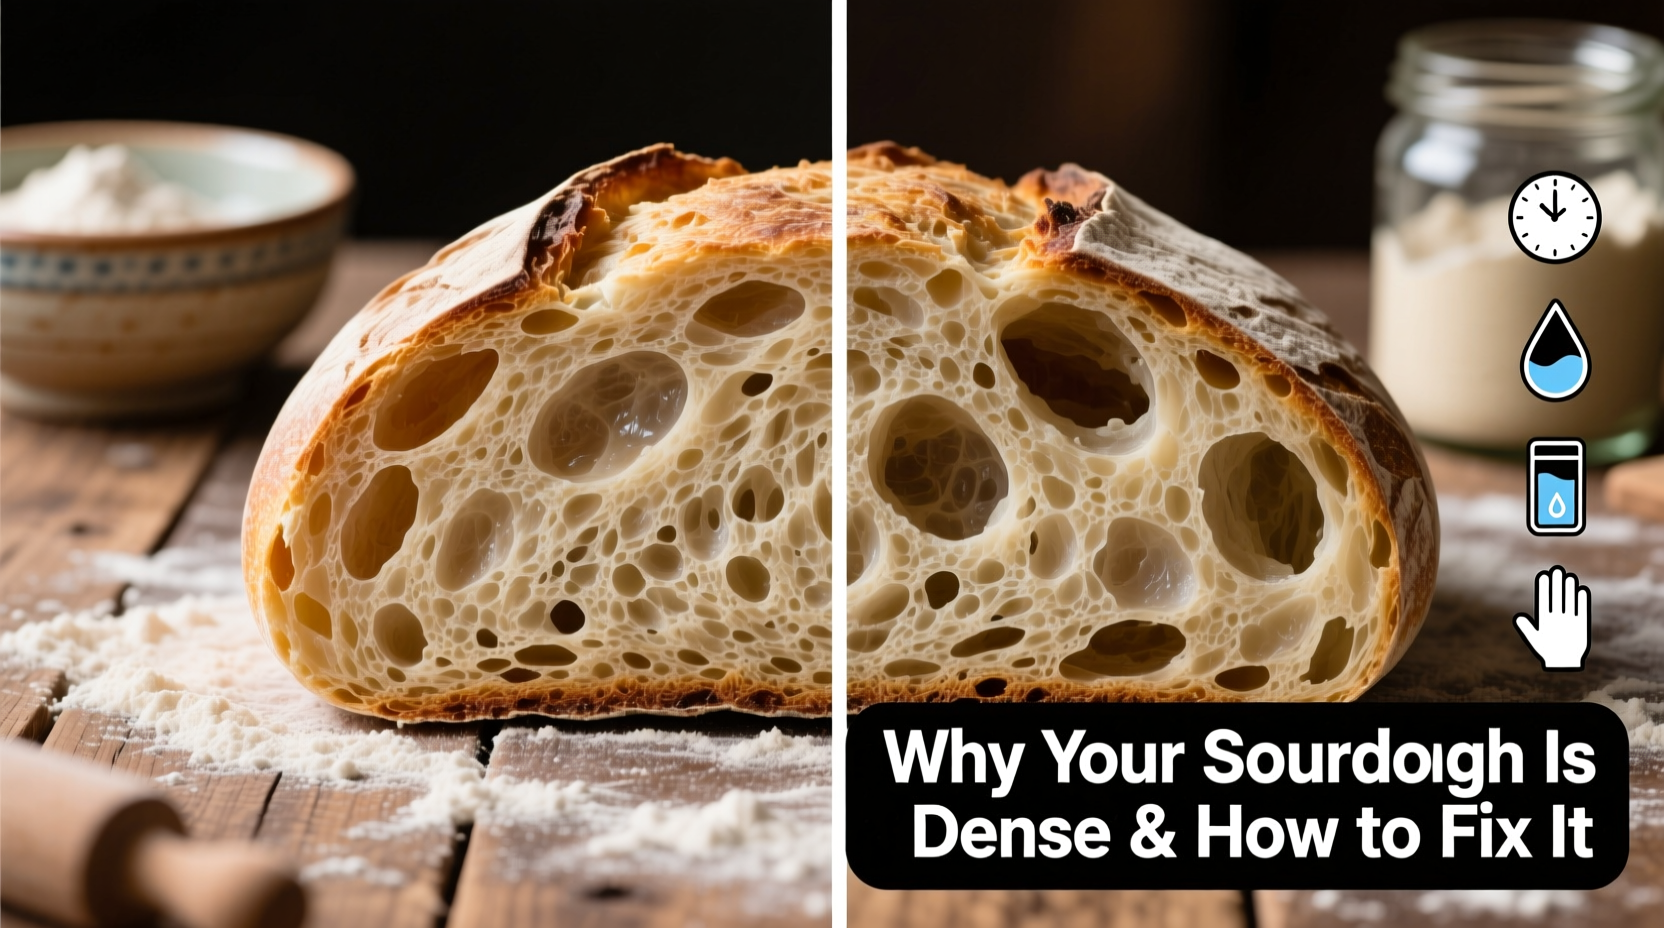
The crumb of sourdough bread refers to its internal structure—the way the gluten network holds gas produced during fermentation. A successful crumb depends on three key elements: gluten strength, gas retention, and oven spring. Gluten forms when flour and water hydrate and are agitated (through mixing and folding). As fermentation progresses, wild yeast and lactic acid bacteria produce carbon dioxide, which gets trapped in the elastic gluten matrix. If this system functions properly, the dough expands evenly during proofing and again in the oven, creating an open, airy texture.
Density occurs when one or more parts of this process fail. Perhaps the gluten didn’t develop enough to hold gas, fermentation was insufficient or excessive, or the loaf wasn’t baked at the right temperature. Each variable plays a role, and small adjustments can yield dramatic improvements.
“Great sourdough isn’t about perfection—it’s about understanding the dialogue between flour, water, time, and temperature.” — Chad Robertson, Co-founder of Tartine Bakery
Common Causes of Dense Sourdough Bread
Before fixing the problem, identify the root cause. Here are the most frequent culprits behind dense sourdough:
- Underdeveloped gluten: Without sufficient strength, the dough can’t trap gas effectively.
- Weak or inactive starter: If your starter isn’t peaking with activity, fermentation stalls.
- Under-proofing: Dough hasn’t fermented long enough to generate adequate gas.
- Over-proofing: The gluten breaks down, and gas escapes before baking.
- Low hydration: Drier doughs restrict expansion and limit hole formation.
- Inadequate shaping: Poor tension prevents upward rise and encourages spreading.
- Insufficient oven spring: Lack of steam or low baking temperature limits final expansion.
How to Fix Dense Sourdough: A Step-by-Step Guide
Correcting density requires a systematic approach. Follow this timeline to diagnose and improve each stage of the bake.
- Assess Your Starter (Day 0)
Feed your starter 8–12 hours before baking using equal parts flour and water by weight (1:1 ratio). It should double in volume and pass the float test. Use it at peak ripeness—typically 6–12 hours after feeding, depending on room temperature. - Bulk Fermentation (4–6 hours)
After mixing, let the dough rest for 30 minutes, then perform a series of stretch-and-folds every 30 minutes for 2–3 hours. This builds gluten without overworking the dough. The bulk ferment is complete when the dough has risen 30–50%, feels airy, and shows visible bubbles. - Final Proof (1–4 hours at room temp or overnight in fridge)
Shape the dough gently but firmly, creating surface tension. For best oven spring, use a cold retard (refrigerate for 8–16 hours). Cold fermentation enhances flavor and controls proofing, reducing the risk of over-proofing. - Scoring and Baking
Preheat your Dutch oven to 450°F (230°C) for at least 30 minutes. Score the dough deeply (½ inch) with a razor to allow controlled expansion. Bake covered for 20 minutes to trap steam, then uncover and bake another 20–25 minutes until deeply golden. - Cooling
Let the bread cool completely—minimum 2 hours—before slicing. Cutting too early releases trapped steam, collapsing the crumb and creating gumminess.
Hydration Adjustments for Better Crumb
Higher hydration doughs (70% and above) generally produce more open crumb structures because they allow greater expansion during oven spring. However, they require stronger gluten development and careful handling. Start with a moderate hydration (65%) if you're new, then gradually increase as your skills improve.
| Hydration Level | Texture & Handling | Crumb Potential | Best For |
|---|---|---|---|
| 60–65% | Firm, easy to handle | Mildly open, even | Beginners, sandwich loaves |
| 66–75% | Sticky, requires skill | Open, irregular holes | Experienced bakers |
| 76%+ | Very wet, challenging | Very open, fragile | Artisan results, high skill |
Essential Tips for Achieving Open Crumb
Even with proper technique, subtle nuances make the difference between good and great sourdough. These tips target common oversights that sabotage crumb development.
- Use strong bread flour: High-protein flour (12–13%) supports better gluten networks. All-purpose flour works, but may limit rise.
- Don’t skip folds: Four sets of stretch-and-folds during bulk fermentation dramatically strengthen the dough.
- Control temperature: Ideal dough temperature is 75–78°F (24–26°C). Cooler slows fermentation; warmer speeds it up but risks over-proofing.
- Score confidently: A single decisive cut, ½ inch deep, allows steam to escape and guides expansion. Hesitant scoring leads to bursting at weak points.
- Bake hot and steamy: A preheated Dutch oven mimics professional steam ovens. Never open the lid during the first 20 minutes.
Real Example: From Brick to Boule
Sarah, a home baker in Portland, struggled for months with dense sourdough. Her loaves were flat, heavy, and lacked any sign of an open crumb. She followed recipes exactly but saw no improvement. After tracking her process, she discovered three issues: her starter was being used 2 hours past peak, her kitchen was too cold (64°F), and she was cutting the bread within 20 minutes of removing it from the oven.
She adjusted: feeding her starter earlier in the day, proofing the shaped loaf in a turned-off oven with a bowl of warm water to boost temperature, and waiting two full hours before slicing. Her next loaf had a noticeably lighter texture, with pockets of air throughout. Within two weeks, she achieved a bakery-quality crumb—proof that small, precise changes yield big results.
Do’s and Don’ts of Sourdough Baking
| Do | Don’t |
|---|---|
| Feed your starter regularly and use it at peak activity | Use a sluggish or collapsed starter |
| Perform stretch-and-folds during bulk fermentation | Over-mix or knead aggressively |
| Retard the dough overnight in the fridge | Proof at room temperature for more than 4 hours unless necessary |
| Preheat your Dutch oven thoroughly | Bake on a cold surface or without steam |
| Cool bread completely before slicing | Cut into a warm loaf |
Frequently Asked Questions
Why is my sourdough dense even though I used an active starter?
An active starter is essential, but it’s not the only factor. Even with good leavening power, poor gluten development, under-proofing, or inadequate shaping can prevent expansion. Evaluate your entire process—not just the starter.
Can I fix a dense loaf after baking?
No. Once baked, the structure is set. However, dense bread makes excellent toast, breadcrumbs, or strata. Learn from the bake and adjust variables like fermentation time or hydration for next time.
Does whole grain flour always make denser bread?
Yes, to some extent. Whole wheat, rye, and other whole grains contain bran and germ, which cut gluten strands and inhibit rise. To improve crumb, use a blend (e.g., 20–30% whole grain), extend autolyse, or add vital wheat gluten.
Checklist for Light, Airy Sourdough
Use this checklist before your next bake to ensure optimal conditions for open crumb:
- ✅ Starter is fed 8–12 hours prior and at peak volume
- ✅ Dough temperature is between 75–78°F (24–26°C)
- ✅ Autolyse performed for 30–60 minutes
- ✅ 3–4 sets of stretch-and-folds completed during bulk fermentation
- ✅ Bulk ferment ends with ~50% rise, bubbles, and jiggly texture
- ✅ Shaping creates tight surface tension
- ✅ Final proof includes cold retard (8–16 hours in fridge) or monitored room-temp proof
- ✅ Dutch oven preheated for 30+ minutes
- ✅ Scored deeply with a sharp blade
- ✅ Baked covered for 20 min, uncovered for 20–25 min
- ✅ Cooled for at least 2 hours before slicing
Mastery Through Practice and Observation
Perfecting sourdough is less about rigid adherence to recipes and more about cultivating awareness. Watch how your dough behaves. Press it gently to assess gas retention. Smell it—ripe fermentation carries a tangy, yogurty aroma, not alcohol or acetone. Note environmental changes: summer bakes faster than winter; humidity affects hydration. Keep a baking journal to record variables and outcomes. Over time, you’ll develop intuition—an internal sense of when dough is ready, even without clocks or charts.
Remember, density isn’t failure. It’s feedback. Each dense loaf teaches you something about fermentation balance, gluten development, or thermal dynamics. The journey to open crumb is iterative, rewarding, and deeply personal.
“The best sourdough bakers aren’t those who never fail—they’re the ones who listen to their dough and adapt.” — Ken Forkish, Author of *Flour Water Salt Yeast*
Conclusion: Rise to the Challenge
There’s nothing more satisfying than slicing into a sourdough loaf with an irregular, airy crumb and a crisp, caramelized crust. Achieving that result consistently starts with understanding why density happens—and having the tools to prevent it. From starter vitality to precise shaping and controlled baking, every step influences the final texture. You don’t need fancy equipment or years of experience. You need observation, patience, and a willingness to refine your method.


 浙公网安备
33010002000092号
浙公网安备
33010002000092号 浙B2-20120091-4
Comments
No comments yet. Why don't you start the discussion?