
Sourdough bread should be airy, with an open crumb structure and a light chew. When your loaf comes out flat, heavy, or compact like a brick, something in the process has gone off track. A dense crumb isn’t just disappointing—it’s a signal. Whether you’re new to sourdough or have been baking for years, diagnosing the cause requires understanding the interplay between your starter, dough development, fermentation, and baking method. This guide breaks down the most common reasons behind dense sourdough and offers practical, step-by-step solutions.
Understanding the Role of the Sourdough Starter
The foundation of any good sourdough loaf is a healthy, active starter. If your starter lacks strength or consistency, your bread will struggle to rise properly. A weak starter produces insufficient carbon dioxide, leading to poor oven spring and a tight, dense interior.
A mature sourdough starter contains a balanced ecosystem of wild yeast and lactic acid bacteria. These microorganisms ferment flour and water, producing gas that leavens the bread. But if the balance is off—due to underfeeding, temperature fluctuations, or improper hydration—the starter won’t perform.
Signs of a Weak or Inactive Starter
- Does not double in volume within 6–8 hours of feeding
- Lacks bubbles on the surface and throughout
- Smells overly alcoholic or rotten rather than tangy and yeasty
- Forms a thick crust or hooch (liquid layer) too quickly
If your starter exhibits these traits, it may not be strong enough to leaven bread effectively. Reviving it often involves consistent feeding, using quality flour (preferably whole grain to boost microbial activity), and maintaining a stable environment.
“Your starter should be predictable. If it’s inconsistent, your bread will be too.” — Richard Bertinet, artisan baker and author of *Dough*
Common Fermentation Mistakes Leading to Dense Crumb
Fermentation is where flavor develops and gas builds up in the dough. Under- or over-fermentation both lead to density, but for different reasons.
Under-Fermentation
When dough hasn’t fermented long enough, gluten hasn’t fully developed, and yeast hasn’t produced enough gas. The result is a dough that doesn’t expand well during proofing or baking.
Over-Fermentation
Too much fermentation weakens gluten structure. The dough becomes slack, collapses easily, and loses its ability to trap gas. Though it may look puffy initially, it bakes into a flat, gummy loaf.
Temperature plays a major role. Warmer environments speed up fermentation; cooler ones slow it down. Room temperature (70–75°F or 21–24°C) is ideal for most home bakers. In hotter climates, consider shortening bulk fermentation or using cooler water.
How to Judge Proper Fermentation
- Volume increase: Dough should rise 30–50% during bulk fermentation.
- Texture: It should feel aerated, jiggly, and hold an indentation slightly when poked.
- Timeframe: Bulk fermentation typically takes 3–5 hours at room temperature.
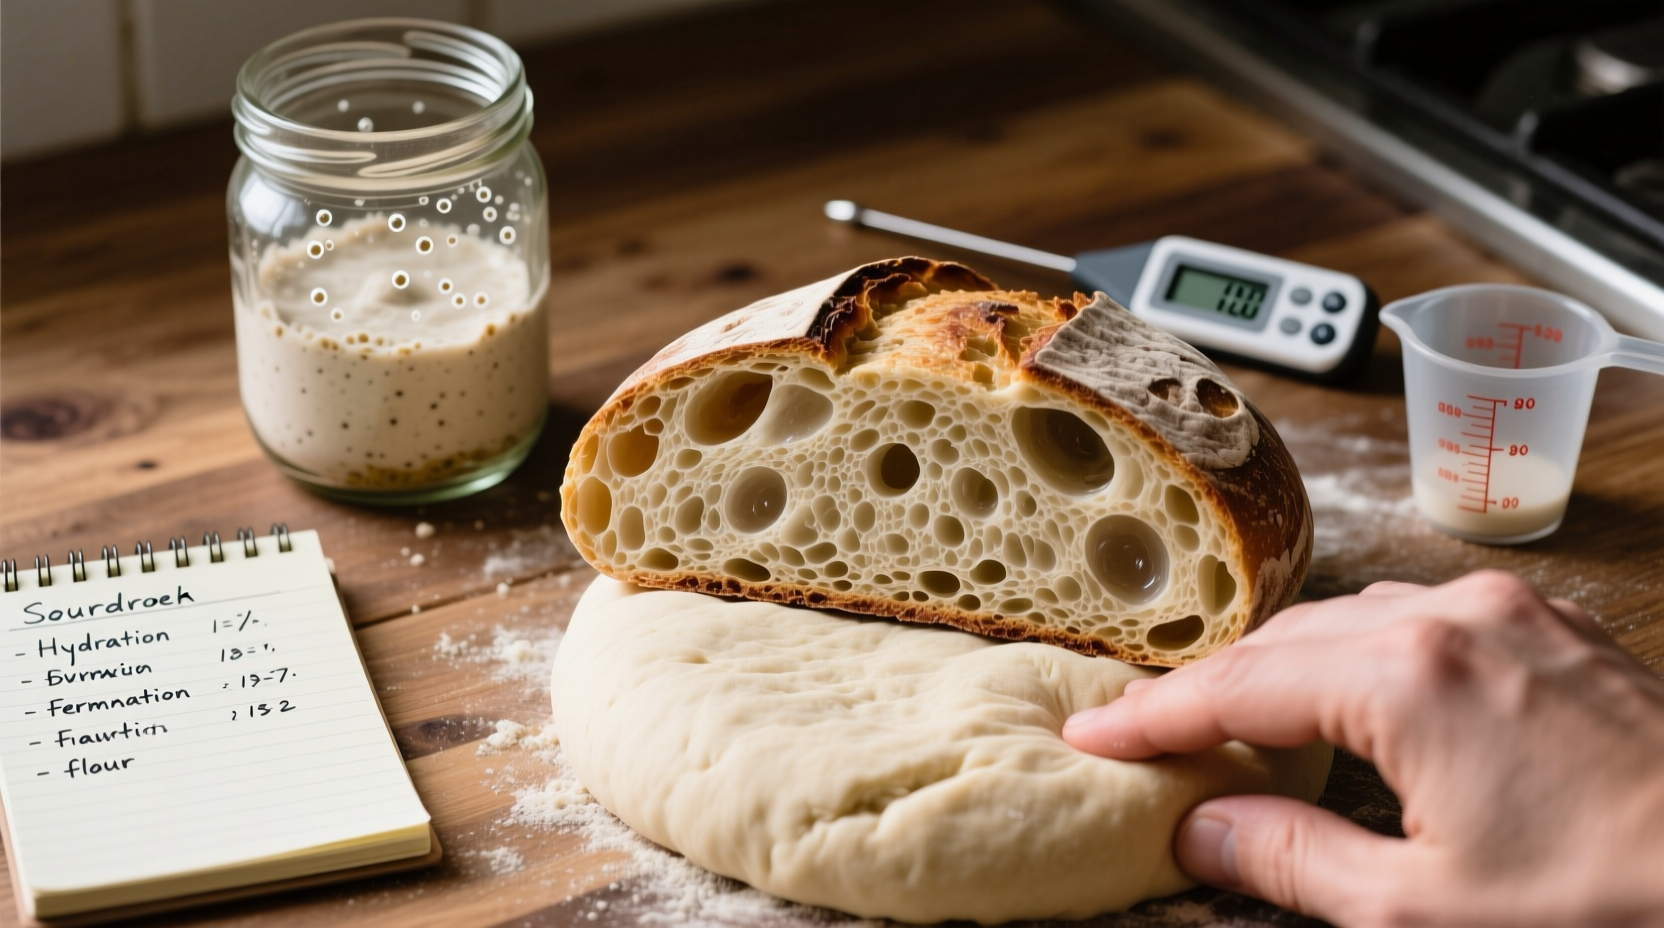
Dough Development: Gluten, Hydration, and Strength
Even with a strong starter and proper fermentation, poor dough development can result in a dense loaf. Gluten forms the network that traps gas. Without sufficient strength, the dough can’t expand during proofing or oven spring.
Hydration—the amount of water relative to flour—also affects texture. Too little water leads to stiff, dry dough that doesn’t stretch. Too much makes it hard to handle and prone to spreading rather than rising.
| Hydration Level | Flour : Water Ratio | Handling Characteristics | Effect on Crumb |
|---|---|---|---|
| Low (60–65%) | 100 : 60–65 | Firm, easy to shape | Tight, dense crumb |
| Medium (66–75%) | 100 : 66–75 | Soft, slightly sticky | Open, irregular crumb |
| High (76–85%) | 100 : 76–85 | Wet, challenging to handle | Very open, holey crumb (advanced) |
For beginners, a hydration level around 70% is ideal—wet enough for good oven spring, firm enough to manage without advanced shaping skills.
Building Gluten: Techniques That Work
- Autolyse: Mix flour and water and let rest for 20–60 minutes before adding salt and starter. This allows gluten to form naturally.
- Stretch and folds: Perform 3–4 sets during bulk fermentation, spaced 20–30 minutes apart. This strengthens the dough without overworking it.
- Bench rest: After preshaping, let the dough relax for 15–30 minutes before final shaping to prevent tearing.
“Gluten isn’t magic—it’s mechanics. You build it through time, tension, and technique.” — Ken Forkish, author of *The Elements of Pizza*
Shaping and Proofing: Where Structure Begins
Even perfectly fermented dough can turn dense if improperly shaped or proofed. Shaping creates surface tension, which helps the loaf hold its shape and rise upward instead of spreading out.
A poorly shaped loaf lacks internal structure. Gas escapes through weak spots, and the bread bakes flat. Conversely, over-handling can deflate the dough, collapsing all the air bubbles you worked so hard to create.
Proper Shaping Steps
- Gently degas the dough after bulk fermentation by folding it over itself once or twice.
- Preshape into a round (boule) or oval (batard) and let rest uncovered for 20–30 minutes.
- Final shape: Pull edges toward the center, rotate, and seal the seam underneath. Use the bench for tension.
- Place seam-side up in a floured banneton (proofing basket) for final proof.
Proofing duration depends on temperature and starter strength. A cold proof in the refrigerator (retarding) slows fermentation and enhances flavor. Most bakers proof overnight (10–14 hours) at 38–45°F (3–7°C).
To test readiness: press lightly on the dough with a fingertip. If the indentation slowly springs back halfway, it’s ready. If it fills in completely, it needs more time. If it stays indented, it’s over-proofed.
Real Example: From Brick to Boule
Marie, a home baker in Portland, struggled for months with dense sourdough. Her starter bubbled but didn’t double. She mixed her dough, let it sit 4 hours, shaped it, and baked—only to get a pancake-like loaf every time.
She began tracking variables: she switched from all-purpose to a mix of bread flour and 10% whole wheat, fed her starter 12 hours before baking, and introduced stretch-and-folds every 30 minutes during the first two hours of bulk fermentation. She also lowered her hydration from 78% to 70% temporarily to improve handling.
After adjusting her proofing—reducing room temperature proof from 3 hours to 2.5 and switching to a cold retard—her fourth attempt rose beautifully in the oven. The crumb was open, the crust crackled. She’d cracked the code: consistency in starter management and attention to dough development made all the difference.
Step-by-Step Troubleshooting Checklist
Use this checklist to diagnose and fix dense sourdough:
✅ Sourdough Density Fix Checklist
- Confirm your starter doubles within 6–8 hours of feeding.
- Feed starter with unbleached flour (rye or whole wheat boosts activity).
- Ensure dough increases by 30–50% during bulk fermentation.
- Perform 3–4 sets of stretch and folds during bulk fermentation.
- Shape with tension to create a taut surface.
- Proof in a banneton, either at room temp (1–3 hours) or cold (10–14 hours).
- Score deeply (½ inch) before baking.
- Bake in a preheated Dutch oven for steam and heat retention.
- Verify oven temperature with an independent thermometer.
- Let bread cool completely (2+ hours) before slicing.
FAQ: Common Questions About Dense Sourdough
Why is my sourdough dense even though my starter is bubbly?
Bubbliness doesn’t guarantee strength. Your starter may be active but not peaking at the right time. Try feeding it earlier in the day and using it exactly when it reaches maximum volume. Also, ensure it’s fed consistently for several days prior to baking.
Can I fix a dense loaf after baking?
No—but you can repurpose it. Dense sourdough makes excellent croutons, breadcrumbs, or bread pudding. The issue lies in process, not salvageability. Focus on adjusting your next bake.
Should I add commercial yeast to my sourdough?
Not necessary. A healthy starter alone can leaven bread fully. Adding yeast masks underlying issues. Work on improving your starter and technique instead.
Conclusion: Turn Density Into Delight
Dense sourdough isn’t a failure—it’s feedback. Each loaf teaches you something about timing, temperature, and technique. The path to airy, flavorful bread runs through consistent starter care, mindful fermentation, and deliberate dough handling. Don’t rush the process. Track your variables. Adjust one thing at a time. Celebrate small improvements.


 浙公网安备
33010002000092号
浙公网安备
33010002000092号 浙B2-20120091-4
Comments
No comments yet. Why don't you start the discussion?