
A sourdough starter is a living culture of wild yeast and lactic acid bacteria, and like any living thing, it needs the right conditions to thrive. When your starter isn’t rising—failing to double in volume or showing little to no bubbles—it can be frustrating, especially if you're eager to bake. But before you give up, understand that most issues are fixable with small adjustments. This guide dives into the science behind sourdough fermentation and offers practical, step-by-step solutions to revive a sluggish starter.
Understanding Sourdough Fermentation
Sourdough rise depends on two key processes: yeast activity producing carbon dioxide and bacterial fermentation creating acids. The gas gets trapped in the gluten network of the flour, causing the starter to expand. If either the yeast or bacteria are underperforming—or if environmental factors inhibit them—the starter won’t rise as expected.
Common signs of a healthy starter include:
- Bubbly surface within 4–8 hours after feeding
- Doubled or nearly doubled in volume
- Pleasant tangy or fruity aroma (not rotten)
- Smooth domed top when peaking
If your starter lacks these signs, it’s time to troubleshoot systematically.
Key Factors That Affect Starter Rise
Several interconnected variables influence whether your starter rises properly. Addressing each one increases the likelihood of restoring vitality.
1. Inconsistent Feeding Schedule
Wild yeast and bacteria need regular nourishment. Skipping feedings or going too long between them starves the culture, weakening its ability to ferment and produce gas.
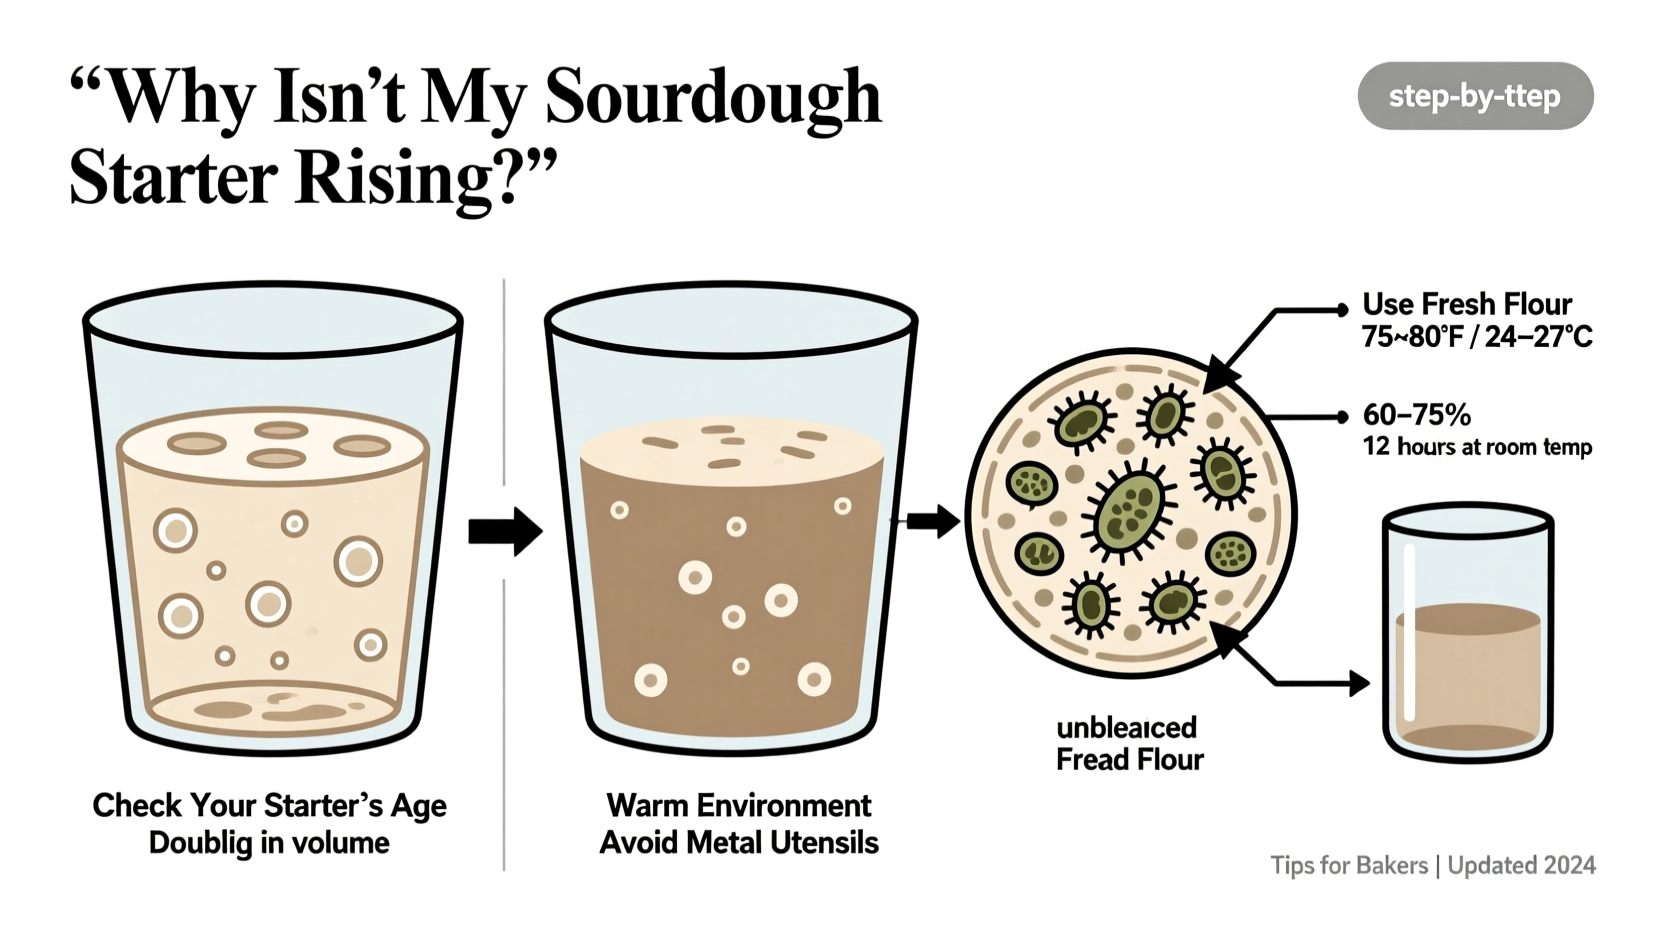
2. Incorrect Temperature
Yeast thrives between 70°F and 80°F (21°C–27°C). Below 65°F (18°C), activity slows dramatically; above 85°F (29°C), undesirable bacteria may dominate.
Cold kitchens, drafty windows, or seasonal drops in ambient temperature can stall fermentation. Conversely, overheating during summer can kill sensitive microbes.
3. Poor Flour Quality or Type
Not all flours are equal for sourdough. Whole grain flours (especially rye or whole wheat) contain more nutrients and microorganisms than refined white flour, making them ideal for jumpstarting or maintaining active cultures.
Using bleached, bromated, or old flour reduces food availability for microbes, leading to weak performance.
4. Chlorinated Water
Tap water treated with chlorine or chloramine can inhibit microbial growth. These chemicals are designed to kill pathogens—but they don’t distinguish between harmful bacteria and your beneficial sourdough culture.
5. Hooch Formation and Acidity Imbalance
Hooch—a dark liquid that forms on top—is alcohol produced by hungry bacteria. While not harmful, frequent hooch indicates underfeeding. Over time, excessive acidity can suppress yeast activity, stalling rise even if bacteria remain active.
Troubleshooting Checklist: Step-by-Step Recovery Plan
If your starter isn’t rising, follow this structured recovery protocol. Most starters respond within 3–5 days when given proper care.
- Discard down to 20g of existing starter. Remove any discolored or dry layers.
- Feed 1:1:1 ratio—20g starter, 20g flour, 20g water. Use unbleached all-purpose or whole wheat flour and filtered or bottled water.
- Maintain warm environment—place near a radiator (not touching), on top of the fridge, or use a proofing box set to 75°F (24°C).
- Feed every 12 hours, regardless of appearance. Do not skip feedings.
- Switch to rye flour for 2–3 feedings if no bubbles appear after 24 hours. Rye boosts microbial diversity.
- Stir starter thoroughly before each feeding to aerate and distribute microbes.
- Observe closely for small bubbles at the surface and sides, slight expansion, and a mild sour smell.
After three consistent feedings, you should notice increased bubbling. By day five, the starter should reliably double within 6–8 hours.
Do’s and Don’ts for Sourdough Starter Care
| Do | Don’t |
|---|---|
| Use filtered, spring, or boiled tap water | Use untreated chlorinated tap water |
| Feed regularly at consistent intervals | Feed sporadically or guess amounts |
| Store in a loosely covered jar (to allow gas escape) | Seal tightly with a screw-on lid |
| Keep starter in a warm spot (70–80°F / 21–27°C) | Leave it near cold drafts or refrigerate while reviving |
| Use whole grain flour occasionally for nutrition boost | Rely solely on low-nutrient white flour |
| Discard and feed daily during revival phase | Try to “save” every bit of old starter without refreshing |
Real Example: Reviving a Dormant Starter
Sarah had stored her starter in the refrigerator for six weeks while traveling. Upon returning, she found a layer of grayish hooch and no bubbles after feeding. She poured off the liquid, discarded most of the starter, and began feeding it twice daily with whole wheat flour and filtered water at 75°F (24°C).
By day two, tiny bubbles appeared around the edges. On day three, the starter rose about 50%. By day five, it doubled within seven hours and passed the float test. Sarah baked her first loaf successfully on day six.
Her key takeaway: patience and consistency matter more than speed. Even neglected starters often recover fully with routine care.
Expert Insight on Microbial Balance
“Many people mistake acidity for strength. But a very sour starter isn’t necessarily a strong one. True strength is consistent rise and gas production. Balance comes from regular feeding and temperature control.” — Dr. Laura Chen, Microbiologist & Artisan Baker
This quote highlights a common misconception: sourness doesn’t equal power. A starter can be highly acidic yet lack active yeast needed for leavening. Focus on visual rise and bubble structure, not just smell.
Frequently Asked Questions
How do I know if my starter is dead?
True death is rare. Signs include pink or orange mold, foul rotting odor, or complete inactivity after 7 days of proper feeding. Gray, black, or brown hooch is usually safe—just pour it off. If there's no mold and you see even a few bubbles, it’s likely salvageable.
Can I use my starter if it only rises 50%?
Possibly. A 50% rise suggests weak activity. Try increasing feeding frequency or switching to rye flour. For baking, extend bulk fermentation time and monitor dough behavior closely. However, for best results, wait until your starter doubles reliably.
Why does my starter rise then collapse quickly?
This typically means it’s overfermented—fed too early or left too long after peak. The gluten structure breaks down, and gas escapes. Feed at peak rise or slightly before. Also, ensure you’re not using too much starter in your ratio (e.g., 1:2:2 is gentler than 1:1:1 for maintenance).
Advanced Tips for Persistent Issues
If basic troubleshooting fails, consider these deeper interventions:
- Refresh with pineapple juice method: Mix 25g pineapple juice with 50g flour (no water) on day one. The acidity inhibits bad bacteria while allowing wild yeast to establish. Switch to water-only feedings after 48 hours.
- Double the feeding amount: Instead of 1:1:1, try 1:2:2 (starter:flour:water). This dilutes acidity faster and gives microbes more food.
- Use a clear container with measurement markings: Track exact volume changes. A 75% rise is easier to spot when you can read the line.
- Perform the float test correctly: Place a teaspoon of starter in room-temperature water after it appears bubbly and peaked. If it floats, it’s ready. But note: some active starters sink due to density, so use float as one indicator among others.
Preventing Future Problems
Once your starter is active, maintain it wisely:
- If keeping at room temperature, feed every 12 hours.
- If storing in the fridge, feed weekly and always reactivate with 2–3 room-temperature feedings before baking.
- Keep a backup—dry some starter on parchment and store in the freezer for emergencies.
- Record observations: smell, rise height, timing. Patterns reveal what works for your environment.
Remember, every kitchen has a unique microbial ecosystem. What works in San Francisco may differ in Minneapolis. Adapt based on your local conditions.
Conclusion: Trust the Process and Take Action
A sourdough starter that isn’t rising isn’t necessarily broken. More often, it’s signaling a need for adjustment—better flour, warmer temps, or more frequent feedings. With attentive care, nearly every starter can be revived. The journey teaches patience, observation, and respect for natural fermentation.
Don’t throw yours out at the first sign of trouble. Instead, apply these troubleshooting steps methodically. Document your progress, learn from each feeding, and celebrate small victories—like the first bubble or the first full rise.


 浙公网安备
33010002000092号
浙公网安备
33010002000092号 浙B2-20120091-4
Comments
No comments yet. Why don't you start the discussion?