
Sourdough bread is celebrated for its complex flavor, chewy crumb, and crisp crust. But when the loaf comes out heavy, compact, or more like a brick than an airy artisan creation, frustration sets in—especially for beginners. A dense sourdough isn’t necessarily a lost cause; it’s usually a sign of one or more preventable issues in the process. Understanding the root causes behind density allows bakers to adjust technique, ingredients, and timing for better results. This guide breaks down the most common beginner mistakes, explains why they lead to dense loaves, and offers practical fixes to help you bake light, open-crumbed sourdough with confidence.
Understanding Sourdough Density: What “Too Dense” Really Means
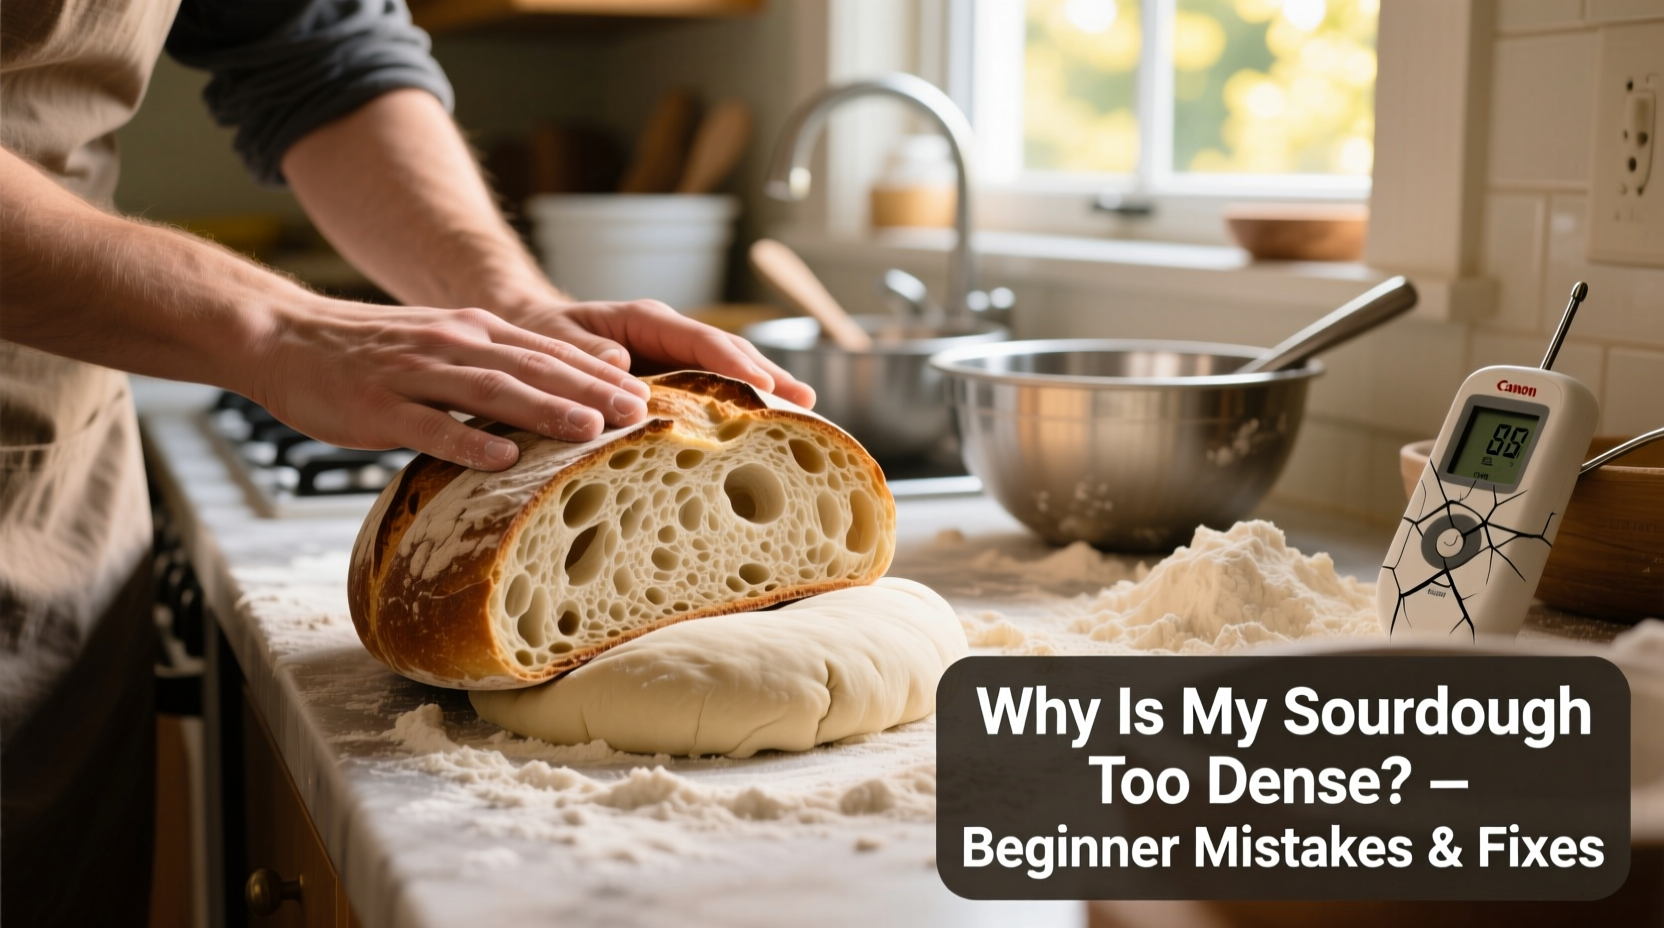
A dense sourdough lacks sufficient gas retention during fermentation and baking. Instead of an irregular, airy crumb structure with visible holes, the interior is tight, compact, and often gummy or undercooked in texture. While some styles of sourdough—like rye-based or whole grain loaves—are naturally denser, most home bakers aim for a balance between structure and openness.
Density arises when gluten development, yeast activity, steam production, or shaping doesn’t align properly. Unlike commercial yeast breads that rely on fast-acting leaveners, sourdough depends on wild yeast and lactic acid bacteria working slowly over time. Any disruption in this delicate ecosystem can result in poor oven spring and a collapsed or dense crumb.
“Sourdough isn’t about forcing the dough to rise—it’s about creating the right conditions so it wants to rise.” — Daniel Leader, author of *Local Breads*
Common Beginner Mistakes That Cause Dense Sourdough
1. Underdeveloped Gluten Structure
Gluten gives dough its elasticity and strength, allowing it to trap carbon dioxide produced by fermentation. Beginners often skip or underperform key steps like autolyse (resting flour and water before adding starter and salt) or neglect adequate kneading and stretch-and-folds. Without strong gluten, the dough can’t hold gas, leading to collapse and density.
2. Weak or Inactive Starter
Your sourdough starter is the engine of your loaf. If it’s sluggish, underfed, or not peaking at the right time, fermentation will be weak. Many new bakers use their starter straight from the fridge without refreshing it, which leads to poor rise and flat bread.
3. Underproofing the Dough
Underproofing means the dough hasn’t fermented long enough to develop gas and structure. The result? Minimal oven spring and a tight crumb. Signs include dough that springs back quickly when poked, feels tight, or hasn’t visibly risen.
4. Overproofing the Dough
Ironically, overproofing also causes density. When dough proofs too long, the gluten network breaks down and gas escapes. The loaf may look puffy but collapses in the oven, producing a gummy, dense center.
5. Poor Shaping Technique
Shaping creates surface tension, which helps the loaf hold its shape and expand upward rather than spreading out. Loose or rushed shaping fails to create this tension, resulting in flat, dense bread with poor volume.
Step-by-Step Guide to Fixing Dense Sourdough
Follow this structured approach to diagnose and correct the causes of density in your sourdough baking process.
- Assess Your Starter Health
Feed your starter with equal parts flour and water (by weight) daily for 3–5 days if it’s been dormant. It should double in size within 4–8 hours and smell pleasantly tangy, not alcoholic or rotten. Discard half, feed again, and use it when it’s at its peak—just before it starts to fall. - Use the Windowpane Test for Gluten Development
After bulk fermentation and stretch-and-folds, take a small piece of dough and gently stretch it between your fingers. If it forms a thin, translucent membrane without tearing, gluten is well-developed. If it tears easily, perform additional folds or extend bulk fermentation slightly. - Optimize Proofing Time and Temperature
Room temperature (72–78°F / 22–26°C) is ideal. Bulk fermentation typically takes 3–5 hours. Use the “poke test”: gently press the dough. If it slowly springs back and leaves a slight indentation, it’s ready. For final proof, refrigerate overnight (12–16 hours) for better flavor and controlled rise, or proof at room temperature for 2–4 hours. - Shape with Surface Tension
Pre-shape into a round ball and rest for 20–30 minutes. Then, shape tightly using a series of folds and tucks underneath. Rotate the dough while pulling it toward you to build tension on top. A well-shaped boule should feel taught and resist gentle pressure. - Bake with Steam and Proper Scoring
Preheat your Dutch oven for at least 45 minutes. Score the loaf deeply (½ inch) with a razor to allow controlled expansion. Bake covered for 20 minutes to trap steam, then uncovered for 20–25 minutes to develop crust. Internal temperature should reach 205–210°F (96–99°C).
Do’s and Don’ts: Table of Key Practices
| Practice | Do | Don’t |
|---|---|---|
| Starter Use | Use at peak ripeness, 4–8 hours after feeding | Use straight from the fridge without feeding |
| Flour Choice | Start with high-protein bread flour (12–14%) | Use only low-gluten flours like cake or all-purpose without adjustment |
| Hydration | Begin with 70% hydration (e.g., 700g water per 1000g flour) | Jump to 80%+ hydration without mastering lower levels |
| Proofing | Refrigerate for slow, controlled final proof | Leave dough to overproof on the counter for 6+ hours |
| Baking | Bake in a preheated Dutch oven with lid on first | Bake on a tray without steam or preheating |
Real Example: Sarah’s Journey from Brick to Bakery-Quality Loaf
Sarah, a home baker in Portland, struggled for weeks with dense sourdough. Her first five loaves were heavy, with little oven spring and a gummy center. She followed recipes exactly but overlooked her starter’s condition. After learning that her starter was being used 12 hours post-feeding—when it had already collapsed—she began feeding it earlier in the morning and baking in the evening. She also added two sets of stretch-and-folds during bulk fermentation and started cold-proofing her shaped dough overnight. On her sixth attempt, she pulled a golden, crackling boule from the oven with an open crumb and audible “tack” as it cooled. The transformation came not from changing the recipe, but from mastering timing and technique.
Essential Tips to Prevent Dense Sourdough
- Stick to a consistent feeding schedule. Feed your starter daily if kept at room temperature, or weekly if stored in the fridge.
- Weigh ingredients. Volume measurements vary widely; a kitchen scale ensures accuracy.
- Control fermentation temperature. Too cold slows yeast; too hot favors bacteria over gas production.
- Don’t rush the process. Sourdough rewards patience. Rushing bulk fermentation or skipping folds compromises structure.
- Score deeply and confidently. A shallow cut won’t allow proper expansion in the oven.
Troubleshooting Checklist: Is Your Sourdough at Risk?
Use this checklist before baking to catch issues early:
- ✅ Is my starter bubbly and doubled within 8 hours of feeding?
- ✅ Did I perform at least 3–4 sets of stretch-and-folds during bulk fermentation?
- ✅ Does the dough pass the windowpane test?
- ✅ Did the dough increase by about 50–75% during bulk fermentation?
- ✅ When I poke it, does it slowly spring back with a slight indentation?
- ✅ Is my Dutch oven fully preheated?
- ✅ Did I score the loaf deeply before baking?
Frequently Asked Questions
Can I fix a dense sourdough by baking it longer?
No. Extending bake time won’t improve crumb structure and may dry out or burn the loaf. Density is caused by fermentation and gluten issues, not baking duration. Focus on improving the process before baking.
Why is my sourdough dense in the middle?
A dense center often indicates underproofing or collapsing due to overproofing. It can also result from insufficient heat during baking. Ensure your oven and vessel are fully preheated, and verify proofing with the poke test. Cold fermentation helps prevent this issue.
Does using whole wheat flour make sourdough denser?
Yes. Whole wheat flour contains bran, which cuts gluten strands and absorbs more water. To maintain openness, use a blend (e.g., 20–30% whole wheat) and consider increasing hydration slightly. Autolyse helps hydrate bran and improve extensibility.
Conclusion: From Dense to Delightful – Take Action Today
Dense sourdough is a common hurdle, not a permanent failure. Most issues stem from manageable factors: starter vitality, gluten development, proofing control, and shaping precision. By focusing on consistency, observation, and incremental improvement, you’ll begin to see dramatic changes in your loaves. Remember, every dense loaf teaches you something valuable about fermentation, time, and technique. Don’t abandon the process—refine it.


 浙公网安备
33010002000092号
浙公网安备
33010002000092号 浙B2-20120091-4
Comments
No comments yet. Why don't you start the discussion?