
If you've ever taken a sip from your reusable water bottle only to feel an unpleasant, slippery film on the sides or noticed a cloudy residue clinging to the interior, you're not alone. That slimy texture isn't just gross—it's a sign of microbial growth. While reusable bottles are eco-friendly and convenient, they can become breeding grounds for bacteria, mold, and biofilm if not cleaned properly. Understanding what causes this slime and how to remove it safely—without harsh chemicals—is essential for maintaining both hygiene and long-term use of your bottle.
The good news? You don’t need bleach or industrial cleaners to restore your bottle to pristine condition. With simple, natural ingredients commonly found in your kitchen, you can eliminate slime, prevent future buildup, and ensure every drink stays fresh and safe.
What Causes the Slimy Film Inside Water Bottles?
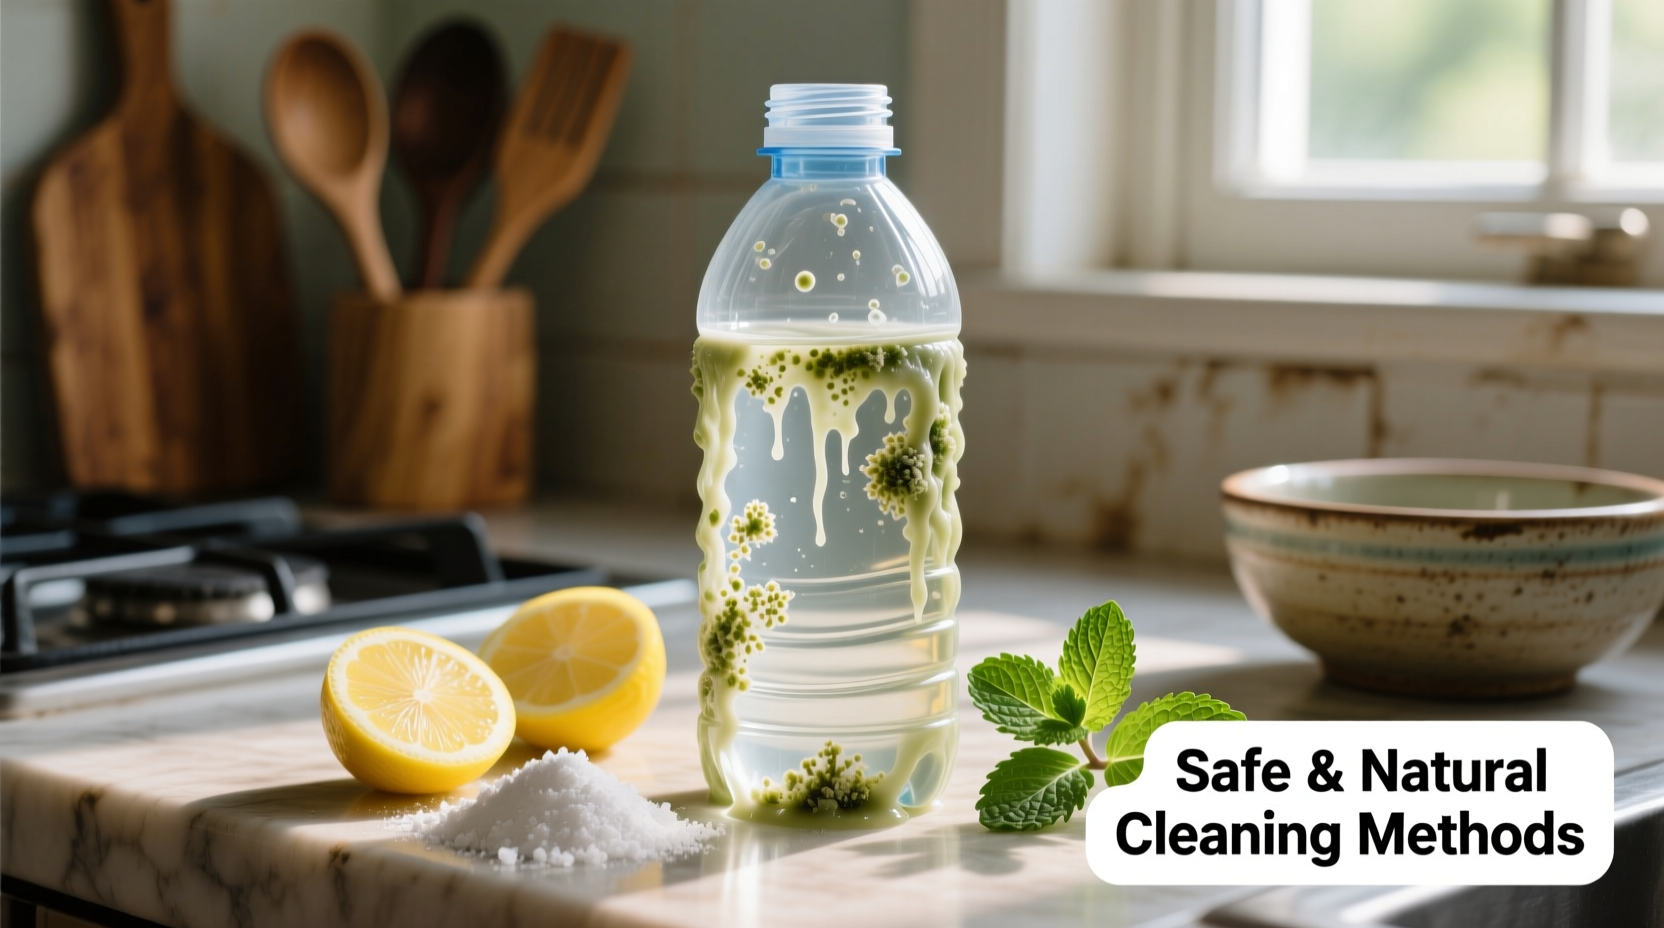
The slippery layer inside your water bottle is typically a form of biofilm—a complex community of microorganisms such as bacteria, fungi, and algae that adhere to moist surfaces. Biofilms develop when organic material (like saliva, sugars from drinks, or mineral deposits) accumulates in the bottle and combines with moisture over time.
Even if you only drink plain water, tiny particles from your mouth enter the bottle each time you take a sip. These microbes feed on residual nutrients and multiply rapidly in warm, damp environments. Over days or weeks, they secrete a protective, gel-like matrix that sticks stubbornly to plastic, stainless steel, or glass interiors.
Certain factors accelerate slime formation:
- Frequent use without thorough cleaning: Daily use without deep cleaning creates ideal conditions for microbial colonies.
- Storing sugary or flavored beverages: Juice, sports drinks, or tea leave behind residues that feed bacteria.
- Leaving water in the bottle for extended periods: Stagnant water encourages bacterial proliferation.
- Narrow necks or hard-to-reach areas: Many bottles have crevices where brushes can't reach, allowing biofilm to thrive unseen.
- Warm storage environments: Keeping your bottle in a hot car or near sunlight speeds up microbial growth.
“Biofilms are one of the most resilient forms of microbial life. Once established, they resist regular rinsing and require mechanical scrubbing combined with antimicrobial agents.” — Dr. Lena Patel, Microbiologist at the Institute for Environmental Health
Why Natural Cleaning Methods Are Safer and More Effective
While commercial disinfectants promise quick results, many contain chemicals like triclosan, quaternary ammonium compounds, or chlorine derivatives that may linger in microscopic crevices. Repeated exposure—even in trace amounts—can disrupt gut flora or cause sensitivities, especially in children or individuals with compromised immune systems.
Natural cleaning agents offer powerful antimicrobial properties without toxic side effects. Ingredients like white vinegar, baking soda, and hydrogen peroxide break down biofilm safely and leave no harmful residues. They’re also cost-effective, environmentally friendly, and compatible with all common bottle materials—including stainless steel, glass, and BPA-free plastics.
Unlike bleach, which can corrode metal or degrade plastic over time, natural solutions preserve the integrity of your bottle while ensuring hygiene. Plus, they neutralize odors caused by trapped bacteria, leaving your bottle smelling fresh instead of chemically treated.
Safest Step-by-Step Guide to Clean a Slimy Water Bottle Naturally
Eliminating slime requires more than a quick rinse. A structured approach combining soaking, agitation, and proper drying ensures complete removal of biofilm. Follow this detailed process weekly—or anytime you notice cloudiness or odor.
- Empty and pre-rinse: Pour out any remaining liquid and rinse the bottle thoroughly with warm water to remove loose debris.
- Prepare the cleaning solution: Mix 1 cup of distilled white vinegar with 1 cup of warm water. Alternatively, dissolve 1 tablespoon of baking soda in 1 cup of warm water for extra scrubbing power.
- Soak for 30–60 minutes: Fill the bottle completely with the solution. For narrow-necked bottles, use a funnel. Let sit undisturbed to allow the acid in vinegar or alkalinity in baking soda to penetrate the biofilm.
- Scrub with a bottle brush: After soaking, use a long-handled, soft-bristle bottle brush to scrub all interior surfaces. Pay special attention to the bottom, threads, and under the lid rim—common hiding spots for bacteria.
- Rinse thoroughly: Empty the solution and rinse multiple times with hot water until no scent of vinegar remains.
- Optional deep disinfection with hydrogen peroxide: To further sanitize, fill the bottle with 3% food-grade hydrogen peroxide, let sit for 20 minutes, then rinse well.
- Air-dry upside down: Place the bottle and lid on a clean towel or drying rack with the opening facing downward. Avoid using cloths inside the mouth, as fibers can introduce new contaminants.
Do’s and Don’ts of Water Bottle Maintenance
| Do’s | Don’ts |
|---|---|
| Wash your bottle daily with warm soapy water | Leave liquid sitting in the bottle overnight regularly |
| Use a dedicated bottle brush for scrubbing | Use steel wool or abrasive pads on plastic bottles |
| Disinfect weekly using vinegar or hydrogen peroxide | Microwave plastic bottles unless labeled microwave-safe |
| Dry bottles completely before reassembling | Store bottles with lids tightly sealed while still damp |
| Replace old or cracked bottles every 6–12 months | Use scented dish soaps that can leave chemical residues |
Real Example: How Sarah Fixed Her Persistent Slime Problem
Sarah, a fitness instructor in Portland, used her insulated stainless steel bottle throughout the day—filling it with water, electrolyte mixes, and occasionally lemon-infused drinks. Despite rinsing it nightly, she began noticing a faint slickness inside and a sour smell after a few weeks.
She tried dish soap and brushing but saw no improvement. Then, she discovered the vinegar soak method. She filled her bottle with equal parts white vinegar and warm water, let it sit overnight, and scrubbed with a new bottle brush the next morning. The slime came off in translucent sheets. After repeating the process biweekly and storing her bottle open-end down on a rack, the problem disappeared entirely.
“I didn’t realize how much gunk was hiding under the cap,” she said. “Now I take the lid apart every time and give it a full clean. It makes a huge difference.”
Best Natural Cleaning Solutions Compared
Not all natural cleaners work equally across different bottle types. Here’s a comparison of three effective options:
| Cleaning Agent | How It Works | Best For | Limitations |
|---|---|---|---|
| White Vinegar (5% acetic acid) | Breaks down biofilm and kills 90% of bacteria and mold | All materials, especially glass and stainless steel | Strong odor; may etch some plastics over time |
| Baking Soda (sodium bicarbonate) | Gentle abrasive with deodorizing properties | Removing stains and odors in wide-mouth bottles | Less effective against mold; needs scrubbing |
| Hydrogen Peroxide (3%) | Oxidizes microbes and breaks down into water and oxygen | Final sanitizing rinse; safe for all materials | Short shelf life once opened; must be fresh |
For best results, combine vinegar and baking soda: pour vinegar into the bottle first, then add a teaspoon of baking soda. The fizzing action helps lift grime from walls and seams. Wait until bubbling stops, then proceed with soaking and scrubbing.
Essential Checklist for Ongoing Bottle Hygiene
Prevention is easier than dealing with persistent slime. Use this checklist weekly to keep your bottle truly clean:
- ☑ Rinse bottle immediately after each use
- ☑ Wash with mild soap and warm water daily
- ☑ Disassemble lid, straw, and gasket for separate cleaning
- ☑ Perform deep clean with vinegar or hydrogen peroxide weekly
- ☑ Inspect for cloudiness, odor, or visible film
- ☑ Replace worn seals or cracked components promptly
- ☑ Allow full air-drying before closing or storing
- ☑ Rotate between two bottles to allow complete drying time
Frequently Asked Questions
Can I put my water bottle in the dishwasher?
Many reusable bottles are labeled as dishwasher-safe, particularly those made of stainless steel or durable plastic. However, high heat and prolonged moisture can warp plastic or degrade rubber seals over time. If using a dishwasher, place the bottle on the top rack and remove the lid components to hand-wash separately. Still, manual cleaning with natural agents gives better control over hygiene, especially in crevices.
Is it dangerous to drink from a slimy water bottle?
Occasional exposure is unlikely to make healthy adults seriously ill, but consistent consumption of water contaminated with biofilm increases the risk of gastrointestinal upset, throat infections, or allergic reactions. Some molds produce mycotoxins, and certain bacteria like Pseudomonas can thrive in wet environments and cause illness in vulnerable individuals. Children, elderly people, and those with weakened immune systems should avoid drinking from visibly slimy containers.
How often should I replace my water bottle?
Even with excellent care, bottles wear out. Plastic ones may become cloudy or scratched, harboring bacteria despite cleaning. Stainless steel and glass last longer but can develop seal degradation. As a general rule, replace plastic bottles every 6–12 months, and inspect metal or glass bottles annually for cracks, warping, or persistent odor. If cleaning no longer restores freshness, it’s time for a replacement.
Keep Your Hydration Healthy—Start Today
Your water bottle is meant to support your health, not compromise it. That slimy feeling isn’t just unsightly—it’s a warning sign of invisible microbial activity. By understanding how biofilm forms and adopting a simple, natural cleaning routine, you protect yourself and extend the life of your favorite bottle.
You don’t need expensive products or harsh chemicals. Vinegar, baking soda, and a little elbow grease do the job safely and effectively. Make cleaning part of your weekly ritual, pay attention to the small parts like lids and straws, and always dry thoroughly. These small habits lead to big improvements in hygiene and peace of mind.


 浙公网安备
33010002000092号
浙公网安备
33010002000092号 浙B2-20120091-4
Comments
No comments yet. Why don't you start the discussion?