
Wi-Fi should be a reliable utility, not a guessing game. Yet many homeowners experience frustrating dead zones or sluggish speeds in specific areas—like the basement, bedroom, or backyard. You might have top-tier internet service, but if your signal doesn’t reach every corner of your space, performance suffers. Understanding the root causes of inconsistent coverage is the first step toward fixing it. From structural interference to outdated hardware, several factors can degrade your wireless experience. The good news? Most issues are solvable with the right strategy.
Why Wi-Fi Weakness Happens: Common Causes
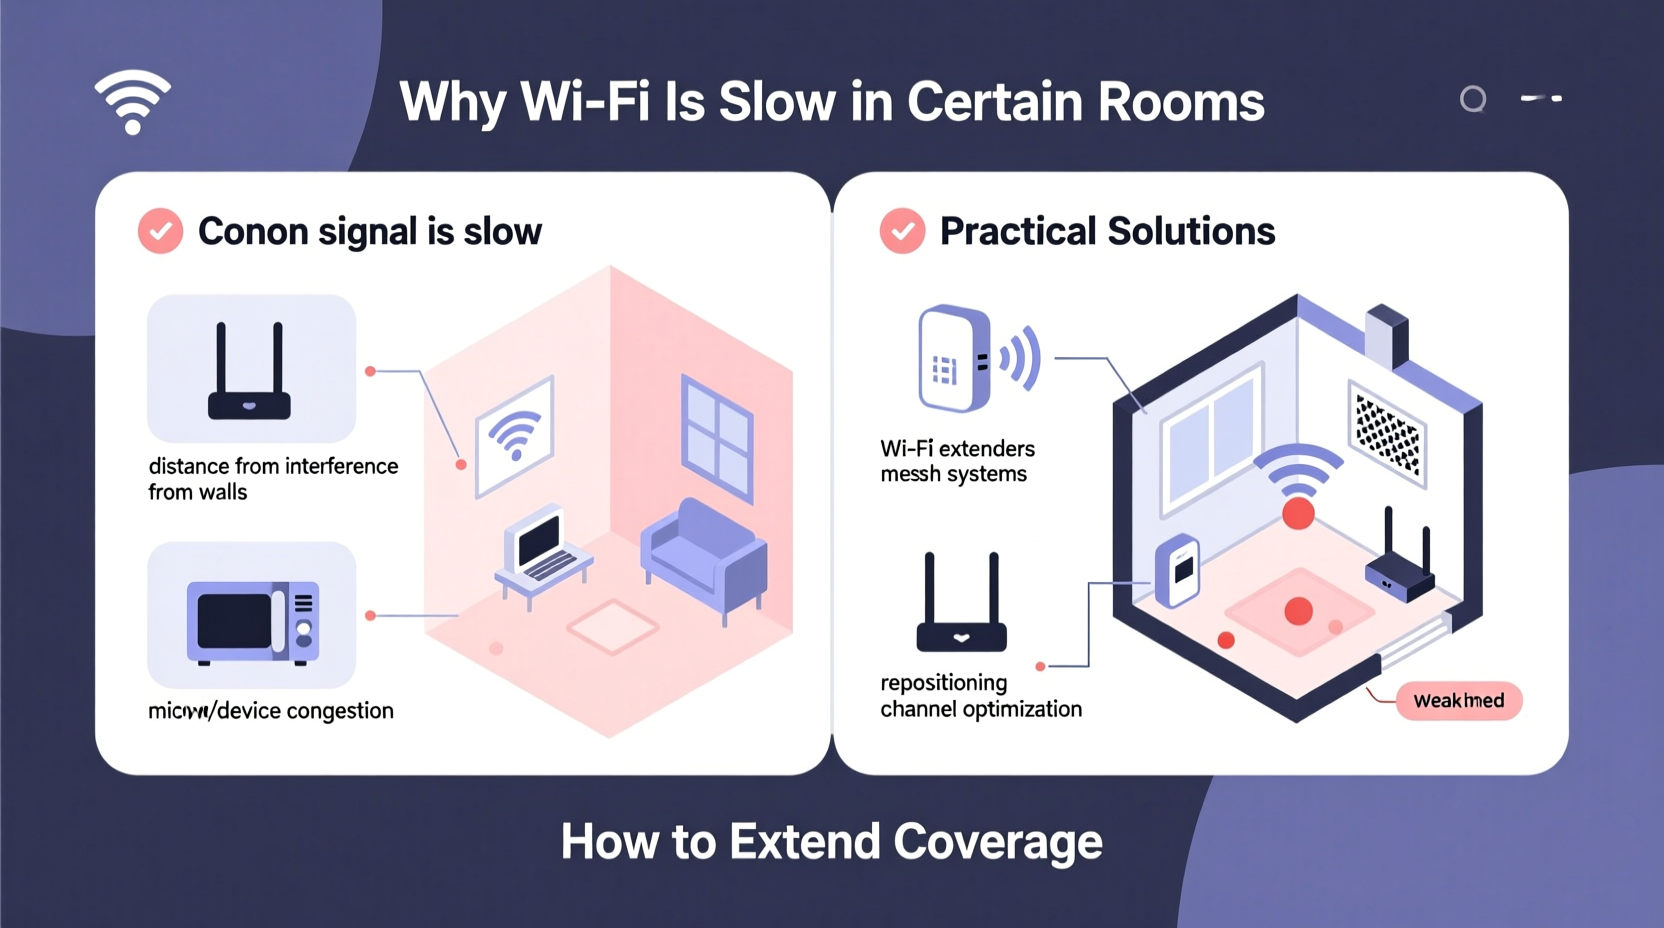
Before attempting solutions, it's essential to identify what’s interfering with your signal. Wi-Fi operates on radio frequencies (typically 2.4 GHz and 5 GHz), which behave like light—they can be blocked, reflected, or absorbed by physical materials and electronic noise.
- Building Materials: Concrete walls, metal studs, brick, and even thick plaster absorb or reflect signals. A single concrete wall can reduce signal strength by up to 70%.
- Distance from Router: Signal strength diminishes with distance. If your router is in the living room and you're trying to stream in a far bedroom, latency and buffering are likely.
- Interference from Appliances: Microwaves, cordless phones, baby monitors, and Bluetooth devices operate on the same 2.4 GHz band and can cause congestion.
- Router Placement: Placing your router in a closet, behind furniture, or near appliances limits its ability to broadcast effectively.
- Network Congestion: Multiple connected devices competing for bandwidth can slow down performance, especially during peak usage hours.
- Aged Equipment: Routers older than three to four years may lack modern standards like MU-MIMO or beamforming, limiting efficiency.
How to Diagnose Your Coverage Gaps
You can't fix what you don't measure. Start by mapping your current network performance across different rooms.
- Walk Test: Carry a smartphone or laptop through your home and check signal bars and actual speed using free tools like Speedtest.net or Google's \"Speed Check\" widget.
- Heatmapping Apps: Use apps like NetSpot (Windows/Mac) or Wi-Fi Analyzer (Android) to visualize signal strength and detect interference sources.
- Check Device Connection Quality: On most devices, you can view the Wi-Fi signal strength in dBm. Anything below -70 dBm is considered weak; -80 dBm or lower often results in disconnections.
- Note Physical Obstacles: Mark where thick walls, appliances, or metal structures lie between your router and problem areas.
This diagnostic phase helps determine whether the issue is due to layout, interference, or equipment limitations—guiding your next steps.
Solutions to Extend Wi-Fi Coverage
Once you've identified the problem zones, consider these scalable solutions based on your home size, layout, and budget.
1. Optimize Router Placement
The simplest and most cost-effective fix is repositioning your router. Place it centrally, elevated (on a shelf), and away from obstructions. Avoid basements or enclosed cabinets unless unavoidable.
2. Upgrade to a Modern Router
If your router is more than four years old, upgrading could dramatically improve performance. Look for models supporting Wi-Fi 6 (802.11ax), which offers better handling of multiple devices, improved range, and faster speeds under load.
Key features to prioritize:
- Dual- or tri-band support (2.4 GHz, 5 GHz, and optionally 6 GHz)
- Beamforming technology (focuses signal toward connected devices)
- MU-MIMO (allows simultaneous communication with multiple devices)
- OFDMA (improves efficiency in high-traffic environments)
3. Use a Wi-Fi Extender (Repeater)
Extenders pick up your existing signal and rebroadcast it, extending range. They’re affordable and easy to set up. However, they halve available bandwidth because they use the same channel to receive and transmit.
Best for: Small coverage gaps or secondary rooms just out of range.
Limitations: Can create a separate network name (SSID), leading to poor roaming. Performance degrades if placed too far from the main router.
4. Install a Mesh Wi-Fi System
Mesh networks use multiple nodes (units) placed throughout your home to create a seamless, unified network. Unlike extenders, mesh systems communicate over dedicated backhaul channels, preserving speed and stability.
Top brands include Eero, Google Nest Wifi, TP-Link Deco, and Netgear Orbi. These systems automatically route traffic through the strongest path and support seamless roaming.
Best for: Large homes, multi-story buildings, or homes with persistent dead zones.
“Mesh Wi-Fi has transformed how we think about whole-home coverage. It’s not just about extending range—it’s about creating an intelligent, responsive network.” — David Lin, Senior Network Engineer at Broadband Insights Group
5. Powerline Adapters with Wi-Fi
These devices use your home’s electrical wiring to transmit data. One adapter plugs into an outlet near your router and connects via Ethernet. A second adapter in a distant room emits Wi-Fi or provides Ethernet ports.
Advantages: Works well through thick walls where wireless signals struggle.
Caveats: Performance depends on the quality of your home’s electrical circuit. Older wiring or circuits split across breakers may limit effectiveness.
6. Ethernet Backhaul for Maximum Performance
For the best possible mesh or extender performance, connect satellite units via Ethernet cable instead of relying on wireless backhaul. This ensures full-speed connections between nodes and reduces congestion on the wireless spectrum.
Even running one Ethernet cable to a distant node can significantly boost reliability in that zone.
Comparison Table: Wi-Fi Extension Methods
| Method | Cost | Setup Difficulty | Performance Impact | Best For |
|---|---|---|---|---|
| Router Repositioning | Free | Easy | Low to Moderate | Minor signal drops |
| Wi-Fi Extender | $30–$80 | Easy | Moderate (halves bandwidth) | Single dead zone |
| Mesh Wi-Fi System | $150–$400+ | Easy to Moderate | High (especially with Ethernet backhaul) | Whole-home coverage |
| Powerline Adapter + Wi-Fi | $80–$150 | Moderate | Variable (depends on wiring) | Homes with poor wireless penetration |
| Ethernet + Access Point | $100–$200 (cabling labor extra) | Hard | Very High | Permanent, high-performance solution |
Mini Case Study: Solving Connectivity in a Two-Story Home
Consider Sarah, who lives in a 2,000-square-foot colonial house. Her ISP delivers 300 Mbps fiber, but her bedroom on the second floor struggled with buffering during video calls. Initial tests showed signal strength dropped to -78 dBm upstairs, and speed fell below 20 Mbps.
Her original router was tucked behind a TV stand in the basement. After moving it to the main floor hallway, signal improved slightly—but not enough. She then tested a Wi-Fi extender, which created a second network and caused devices to disconnect when switching zones.
Finally, she installed a three-node mesh system: one near the modem, one upstairs, and one in the backyard office. All units used wireless backhaul initially, but after connecting the upstairs node via Ethernet, speeds stabilized at over 180 Mbps throughout the house. Video calls became smooth, and smart devices responded instantly.
This case illustrates that while simple fixes help, layered solutions often yield the best long-term results.
Step-by-Step Guide to Improving Your Wi-Fi
Follow this sequence to systematically resolve slow Wi-Fi in certain rooms:
- Assess Current Setup: Note router model, placement, and internet plan speed.
- Conduct a Signal Walkthrough: Use a mobile app to test signal strength in each room.
- Reposition the Router: Move it to a central, elevated, open location.
- Update Firmware: Log into your router settings and check for updates.
- Reduce Interference: Turn off unused devices, switch to 5 GHz where possible, and avoid overlapping channels.
- Select an Extension Method: Based on home size and layout, choose between extender, mesh, or powerline.
- Install and Configure: Set up new hardware, ensuring all nodes are within optimal range.
- Test Results: Re-run speed and signal tests in previously weak areas.
- Optimize Further: Enable QoS (Quality of Service) settings to prioritize critical devices.
Frequently Asked Questions
Can thick walls really block Wi-Fi?
Yes. Materials like concrete, brick, stone, and metal are highly effective at blocking or attenuating Wi-Fi signals. Even insulated drywall or water-filled fish tanks can weaken signals significantly. This is why signal strength often drops sharply between floors or behind load-bearing walls.
Is Wi-Fi 6 worth it for extending coverage?
Absolutely. Wi-Fi 6 routers offer better range efficiency, improved handling of multiple devices, and stronger signal processing. While they don’t magically penetrate walls, their advanced technologies—like OFDMA and beamforming—make better use of available signal, resulting in more consistent performance at range.
Do I need a new internet plan to fix slow Wi-Fi?
Not necessarily. Slow speeds in certain rooms are usually due to local signal issues, not your internet plan. However, if your entire household streams 4K video, uses VR, or hosts cloud backups simultaneously, upgrading to a higher-speed tier (e.g., 500 Mbps or 1 Gbps) ensures sufficient bandwidth before distribution.
Final Checklist: Quick Wins to Try Today
- ✅ Move your router to a central, open location
- ✅ Restart your router and modem monthly
- ✅ Switch to the 5 GHz band for less interference (if within range)
- ✅ Update router firmware
- ✅ Use a mesh system for large or multi-floor homes
- ✅ Connect mesh nodes via Ethernet when possible
- ✅ Run a speed test in problem areas before and after changes
Take Control of Your Home Network
Slow Wi-Fi in certain rooms isn’t something you have to live with. With a clear understanding of signal behavior and the right tools, you can achieve consistent, high-speed connectivity everywhere you need it. Whether it’s repositioning your router, eliminating interference, or investing in a mesh system, each step brings you closer to a seamless digital experience. Don’t let dead zones disrupt your work, entertainment, or smart home functions. Assess your setup today, apply these proven strategies, and enjoy a stronger, smarter network tomorrow.


 浙公网安备
33010002000092号
浙公网安备
33010002000092号 浙B2-20120091-4
Comments
No comments yet. Why don't you start the discussion?