
If you’ve ever climbed the stairs only to find your video call freezing, your stream buffering, or your download speeds crawling, you’re not alone. Many homeowners experience significantly weaker WiFi signals on upper floors. The issue isn’t always with your internet provider—it’s often a matter of physics, placement, and environment. Fortunately, most causes are fixable at home, without technical support or expensive upgrades.
WiFi signals weaken as they travel through walls, floors, and appliances. Materials like concrete, metal, and even water in fish tanks or plumbing can block or reflect radio waves. Since routers are typically placed on the ground floor for convenience, upper levels naturally suffer from poor coverage. But understanding the root causes empowers you to make smart, low-effort adjustments that restore performance.
Understanding Why WiFi Weakens Upstairs
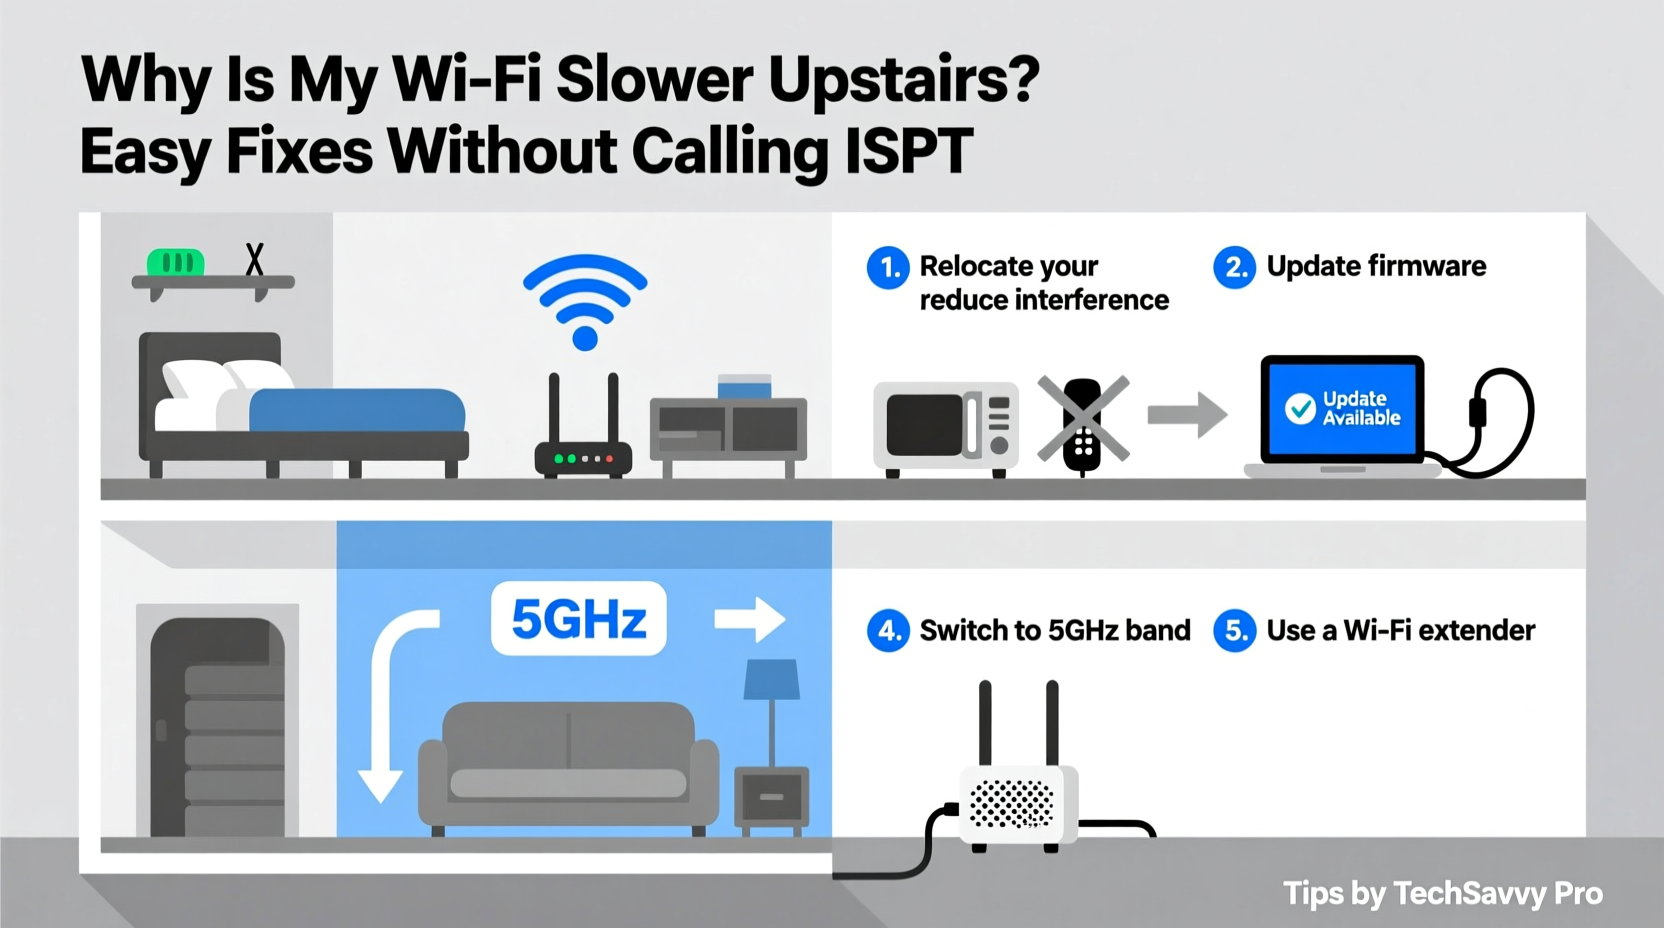
WiFi operates using radio waves, usually on the 2.4 GHz or 5 GHz frequency bands. While 2.4 GHz travels farther and penetrates obstacles better, it’s slower and more prone to interference. The 5 GHz band offers faster speeds but has shorter range and struggles with solid barriers like drywall, wood joists, and insulation found between floors.
When your router sits downstairs, its signal must pass upward through multiple layers: flooring, subflooring, furniture, and possibly metal reinforcement. Each layer absorbs or reflects some of the signal. By the time it reaches the second or third floor, strength drops dramatically. This phenomenon is known as attenuation.
“Signal degradation over distance and through materials is the leading cause of inconsistent WiFi performance in multi-story homes.” — Dr. Alan Zhou, RF Network Engineer
Add to this interference from neighboring networks, Bluetooth devices, microwaves, and baby monitors, and you have a perfect storm for slow connections upstairs.
Step-by-Step Guide to Boosting Upstairs WiFi
Before investing in new hardware, try these proven troubleshooting steps. Most take less than 30 minutes and cost nothing.
- Reposition Your Router: Move it closer to the center of your home and elevate it off the floor. Avoid placing it behind furniture, near appliances, or inside cabinets. Ideally, position it on a shelf midway up the main floor.
- Adjust Antenna Orientation: If your router has external antennas, point one vertically and one horizontally. This helps transmit both vertically and horizontally polarized signals, improving coverage across different device types.
- Switch to Less Congested Channels: Use a free app like WiFi Analyzer (Android) or NetSpot (Windows/Mac) to check which channels nearby networks are using. Switch your router’s channel to a less crowded one—especially on the 2.4 GHz band.
- Update Firmware: Log into your router’s admin page (usually via 192.168.1.1 or 192.168.0.1) and check for firmware updates. Outdated software can cause performance issues and security risks.
- Restart Regularly: Power cycle your router every few weeks. Unplug it for 30 seconds, then plug it back in. This clears memory leaks and resets network congestion.
Do’s and Don’ts of Router Placement
| Do | Don't |
|---|---|
| Place router centrally in the home | Keep it tucked in a corner or closet |
| Elevate it on a shelf or desk | Leave it on the floor or behind furniture |
| Ensure vents are unblocked for cooling | Stack books or electronics around it |
| Use both 2.4 GHz and 5 GHz bands appropriately | Disable 2.4 GHz if you need range over speed |
| Point antennas in varied directions | Keep all antennas pointing straight up |
Real Example: Fixing a Two-Story Home’s Dead Zone
Sarah lives in a two-story townhouse. Her router was tucked behind her entertainment center on the ground floor. She consistently had strong speeds in the living room but struggled with buffering and disconnections in her bedroom upstairs.
She started by downloading WiFi Analyzer and discovered her router was using Channel 6 on 2.4 GHz, which was heavily congested due to nearby apartments. She logged into her router settings and switched to Channel 1, which was clear. Then, she moved the router from behind the TV stand to a central bookshelf, raising it about five feet off the ground.
Next, she adjusted the dual antennas—one vertical, one angled at 45 degrees. After restarting the router, she tested speeds upstairs using a speed test app. Download speeds jumped from 8 Mbps to 47 Mbps. Video calls stabilized, and streaming resumed without interruption—all without spending a dime.
Upgrade Options That Actually Work
If basic fixes don’t resolve the issue, consider affordable hardware solutions. These are still DIY-friendly and eliminate the need for ISP intervention.
- WiFi Range Extenders: These devices repeat your existing signal to hard-to-reach areas. Choose a model with Ethernet backhaul for better stability. Place it halfway between your router and the weak zone.
- Mesh WiFi Systems: A mesh network uses multiple nodes to blanket your home in seamless coverage. Popular brands like Eero, TP-Link Deco, and Google Nest WiFi offer easy setup and automatic optimization. They’re ideal for homes over 1,500 sq ft or with thick walls.
- Powerline Adapters: These use your home’s electrical wiring to extend the network. Plug one adapter near the router (connected via Ethernet), and another upstairs. Connect your device or a secondary access point to the upstairs adapter. Works well in older homes where WiFi struggles with plaster walls.
- Access Points (APs): For tech-savvy users, installing a dedicated access point upstairs provides the strongest solution. Requires running an Ethernet cable from the router to the upper floor, but delivers full-speed, low-latency connectivity.
Checklist: Fix Slow Upstairs WiFi in One Hour
Follow this actionable checklist to improve upstairs speeds today:
- ✅ Move the router to a central, elevated location
- ✅ Reposition antennas for optimal dispersion
- ✅ Use a WiFi analyzer to switch to a less crowded channel
- ✅ Reboot the router and modem
- ✅ Test speed upstairs before and after changes
- ✅ Disable unused devices hogging bandwidth
- ✅ Consider a mesh system if signal remains weak
- ✅ Label your network SSIDs consistently (e.g., “Home” and “Home-5G”)
FAQ: Common Questions About Upstairs WiFi Issues
Can thick walls really block WiFi?
Yes. Materials like brick, concrete, plaster with lath, and insulated drywall significantly reduce signal strength. Metal studs and foil-backed insulation are especially problematic because they reflect radio waves.
Should I turn off 5 GHz to improve range?
Not necessarily. Keep both bands active. Use 2.4 GHz for devices far from the router (like smart plugs or thermostats) and 5 GHz for high-bandwidth activities (streaming, gaming) when close enough. Modern devices will connect to the best available band automatically.
Is it worth upgrading my old router?
If your router is more than 3–4 years old, yes. Newer models support WiFi 5 (802.11ac), WiFi 6, or WiFi 6E, which offer better range, speed, and efficiency. They also handle multiple devices more effectively—a critical advantage in modern households.
Expert Insight: When Physics Meets Practicality
“People expect WiFi to behave like light—filling every room equally. But radio waves interact with matter in complex ways. Small changes in placement or configuration can yield big improvements without any hardware upgrade.” — Lena Patel, Senior Network Architect at Urban Broadband Solutions
This insight underscores the importance of experimentation. Even minor adjustments, like rotating the router 90 degrees or moving it six inches forward, can enhance signal propagation upstairs.
Conclusion: Take Control of Your Home Network
Slow WiFi upstairs doesn’t mean you need a new plan or technician visit. In most cases, the fix lies in optimizing what you already own. From strategic router placement to smarter channel selection and affordable mesh systems, you have tools at your disposal to reclaim fast, reliable internet on every floor.
The key is understanding how WiFi behaves in physical space and making informed tweaks. Start with the simplest solutions—repositioning, rebooting, analyzing—and build toward hardware upgrades only if necessary. With patience and precision, you can eliminate dead zones and enjoy seamless connectivity throughout your home.


 浙公网安备
33010002000092号
浙公网安备
33010002000092号 浙B2-20120091-4
Comments
No comments yet. Why don't you start the discussion?