
If you’ve ever found yourself climbing the stairs only to lose your video call or watch Netflix buffer endlessly in your bedroom, you’re not alone. A weak Wi-Fi signal upstairs is one of the most common household frustrations—especially in two-story homes or buildings with dense walls. The issue isn’t just inconvenient; it can disrupt work, learning, and entertainment. The good news? You don’t need a full network overhaul to fix it. Often, small adjustments and smart upgrades can dramatically improve coverage and speed.
Wi-Fi signals weaken as they travel through space and obstacles. Materials like concrete, brick, metal, and even thick wood absorb or reflect radio waves. Add multiple floors, electronic interference, and outdated hardware into the mix, and it’s no surprise that upstairs rooms often suffer from poor reception. But understanding why this happens is the first step toward solving it.
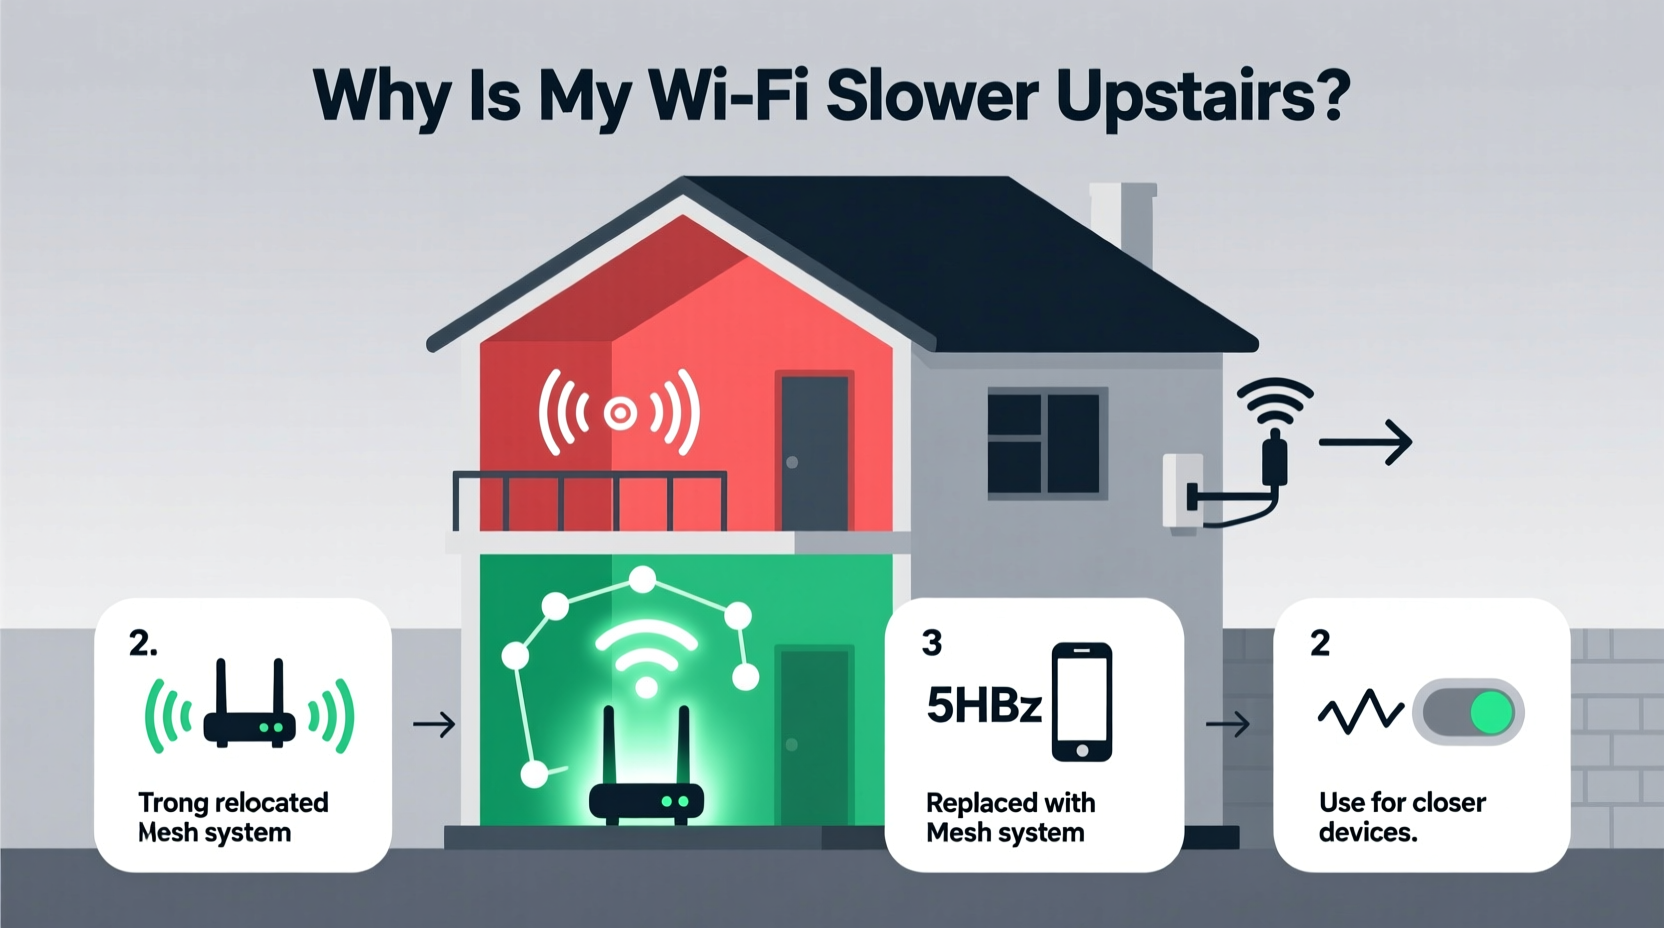
Why Wi-Fi Weakens Upstairs: The Physics Behind the Problem
Wi-Fi operates using radio frequencies—most commonly 2.4 GHz and 5 GHz—broadcast from your router. These signals spread out in all directions but lose strength over distance and when passing through solid objects. The higher frequency 5 GHz band offers faster speeds but has shorter range and poorer wall penetration. The 2.4 GHz band travels farther and penetrates obstacles better but is more prone to interference from other devices like microwaves and cordless phones.
When your router is located downstairs—often in a basement, living room, or entryway—the signal must travel upward against gravity (figuratively) and through multiple barriers. Each floor level introduces additional resistance. Floors contain joists, pipes, ductwork, and insulation—all of which degrade signal quality. In older homes, plaster walls with metal lath are particularly brutal for Wi-Fi. Even modern drywall with foil-backed insulation can act as a partial Faraday cage, blocking signals.
“Signal degradation isn’t random—it follows predictable patterns based on building materials and device placement. Strategic positioning and modern hardware can overcome most residential challenges.” — Dr. Lena Patel, Network Engineer at Broadband Insights Group
Step-by-Step Guide to Improving Upstairs Wi-Fi
Before investing in new gear, try these practical steps to maximize your existing setup. Many users see noticeable improvements after just one or two changes.
- Evaluate Your Router’s Location: Centralize it if possible. If your router is in the basement corner, move it closer to the center of the ground floor and elevate it (e.g., on a shelf). This reduces the angle and distance the signal must travel upward.
- Adjust Antenna Orientation: Most routers have external antennas. Position them vertically for horizontal coverage across floors, and tilt one slightly upward to beam signal upstairs.
- Reduce Interference: Keep the router away from cordless phones, microwaves, baby monitors, and Bluetooth speakers. These operate on similar frequencies and cause congestion.
- Update Firmware: Log into your router’s admin panel (usually via 192.168.1.1) and check for updates. Manufacturers release performance and stability patches regularly.
- Switch Wi-Fi Bands: Use the 2.4 GHz band for upstairs devices that need range over speed (like smart lights), and reserve 5 GHz for high-bandwidth tasks on lower floors.
Do’s and Don’ts of Home Wi-Fi Optimization
| Do | Don't |
|---|---|
| Place the router centrally and elevated | Hide the router in a closet or drawer |
| Use 2.4 GHz for long-range coverage | Assume 5 GHz is always better |
| Restart your router monthly | Leave it running indefinitely without reboots |
| Label and test access points | Install extenders without planning coverage zones |
| Secure your network with WPA3 encryption | Use default passwords or outdated security protocols |
When to Upgrade: Mesh Networks vs. Extenders vs. Powerline Adapters
Sometimes, location tweaks aren’t enough. That’s when hardware solutions come in. Three popular options exist: Wi-Fi extenders, mesh systems, and powerline adapters. Each has strengths and limitations.
- Wi-Fi Extenders: Affordable and easy to install. They rebroadcast your existing signal to dead zones. However, they halve bandwidth because they communicate with the router over the same channel they serve clients on. Best for light browsing or IoT devices.
- Mesh Wi-Fi Systems: Consist of multiple nodes placed throughout the home (e.g., Google Nest Wifi, Eero, TP-Link Deco). They create a single, seamless network with intelligent routing. Ideal for larger homes and whole-home coverage. More expensive upfront but offer superior performance and management apps.
- Powerline Adapters: Use your home’s electrical wiring to transmit data. One adapter plugs near the router (connected via Ethernet), another upstairs powers a Wi-Fi access point. Works well in homes with stable electrical circuits but can be inconsistent in older wiring setups.
Real Example: Fixing a Two-Story Family Home
The Thompson family in Portland struggled with spotty Zoom calls in their upstairs office and constant buffering in the master bedroom. Their router sat in a media cabinet behind the TV in the basement. After testing signal strength with the free app NetSpot, they found -78 dBm upstairs—barely usable.
They first moved the router to a central bookshelf on the main floor and updated its firmware. Signal improved slightly, but streaming still lagged. Next, they added a two-node mesh system: one unit connected to the main router, the second placed on the upstairs landing. Within minutes, all devices automatically connected to the stronger node. Speed tests showed upload speeds doubled, and latency dropped from 80ms to 22ms. The entire process took under an hour and cost less than $150.
“We assumed we needed faster internet, but really, we just needed better distribution.” — Sarah Thompson, homeowner
Checklist: Boost Your Wi-Fi Signal in 7 Actions
Follow this actionable checklist to diagnose and resolve upstairs Wi-Fi issues:
- ✅ Test current signal strength using a Wi-Fi analyzer app (e.g., Wi-Fi Analyzer for Android or AirPort Utility for iOS).
- ✅ Relocate your router to a central, elevated position away from obstructions.
- ✅ Orient antennas properly—vertical for horizontal spread, angled for vertical reach.
- ✅ Switch devices upstairs to the 2.4 GHz band if speed isn’t critical.
- ✅ Reboot your router and modem monthly to clear memory and refresh connections.
- ✅ Consider a mesh Wi-Fi system if you have persistent dead zones.
- ✅ Secure your network with strong encryption to prevent bandwidth theft by neighbors.
Advanced Tips for Tech-Savvy Users
If you're comfortable tinkering with settings, further gains are possible:
- Change Wi-Fi Channels: In crowded neighborhoods, overlapping networks cause interference. Use a tool like inSSIDer to find the least congested channel and manually set it in your router settings (especially on 2.4 GHz).
- Enable Quality of Service (QoS): Prioritize traffic for video calls or gaming during peak hours. Most modern routers allow you to assign bandwidth preferences by device or application.
- Use Ethernet Backhaul: When setting up mesh nodes, connect them via Ethernet cable if possible. This prevents wireless backhaul bottlenecks and maintains full-speed throughput.
- Replace Old Hardware: Routers older than 3–4 years likely support outdated standards (like 802.11n). Upgrading to Wi-Fi 6 (802.11ax) improves efficiency, capacity, and range—even on older devices.
Frequently Asked Questions
Can thick carpets or furniture affect Wi-Fi upstairs?
Yes. While not as obstructive as walls, dense materials like upholstered furniture, bookshelves, and thick rugs can scatter or absorb signals. Avoid placing devices underneath sofas or behind large wooden dressers.
Is it safe to leave a mesh Wi-Fi system running all the time?
Absolutely. Mesh systems are designed for continuous operation. They consume minimal power (typically 5–10 watts per node) and include automatic updates and security features. Like any electronics, occasional reboots help maintain performance.
Will upgrading my internet plan fix slow upstairs Wi-Fi?
Not necessarily. A faster plan increases maximum bandwidth but doesn’t improve signal strength or coverage. If your router can’t deliver the existing speed to upper floors, adding more won’t help. Fix the distribution first, then consider upgrading speed.
Final Thoughts: Take Control of Your Home Network
Poor upstairs Wi-Fi isn’t a fact of life—it’s a solvable engineering challenge. Whether you live in a historic townhouse or a modern split-level, the principles of signal propagation remain the same. By optimizing placement, reducing interference, and choosing the right tools, you can eliminate dead zones and enjoy reliable connectivity everywhere.
Start small: reposition your router, switch bands, and run a speed test. Then build from there. For most households, a well-placed mesh system pays for itself in reduced frustration and increased productivity. Remember, technology should serve you—not the other way around.


 浙公网安备
33010002000092号
浙公网安备
33010002000092号 浙B2-20120091-4
Comments
No comments yet. Why don't you start the discussion?