
If you’ve ever climbed the stairs only to watch your video call freeze or your streaming quality drop from 4K to pixelated mess, you’re not alone. Many homeowners experience weaker WiFi signals on upper floors, leading to frustrating slowdowns. The good news? In most cases, the issue isn’t your internet service provider (ISP) or your plan—it’s about how your signal travels through your home. With a few smart adjustments, you can restore strong, reliable WiFi upstairs without spending extra money or making a single support call.
Understanding Why WiFi Weakens Upstairs
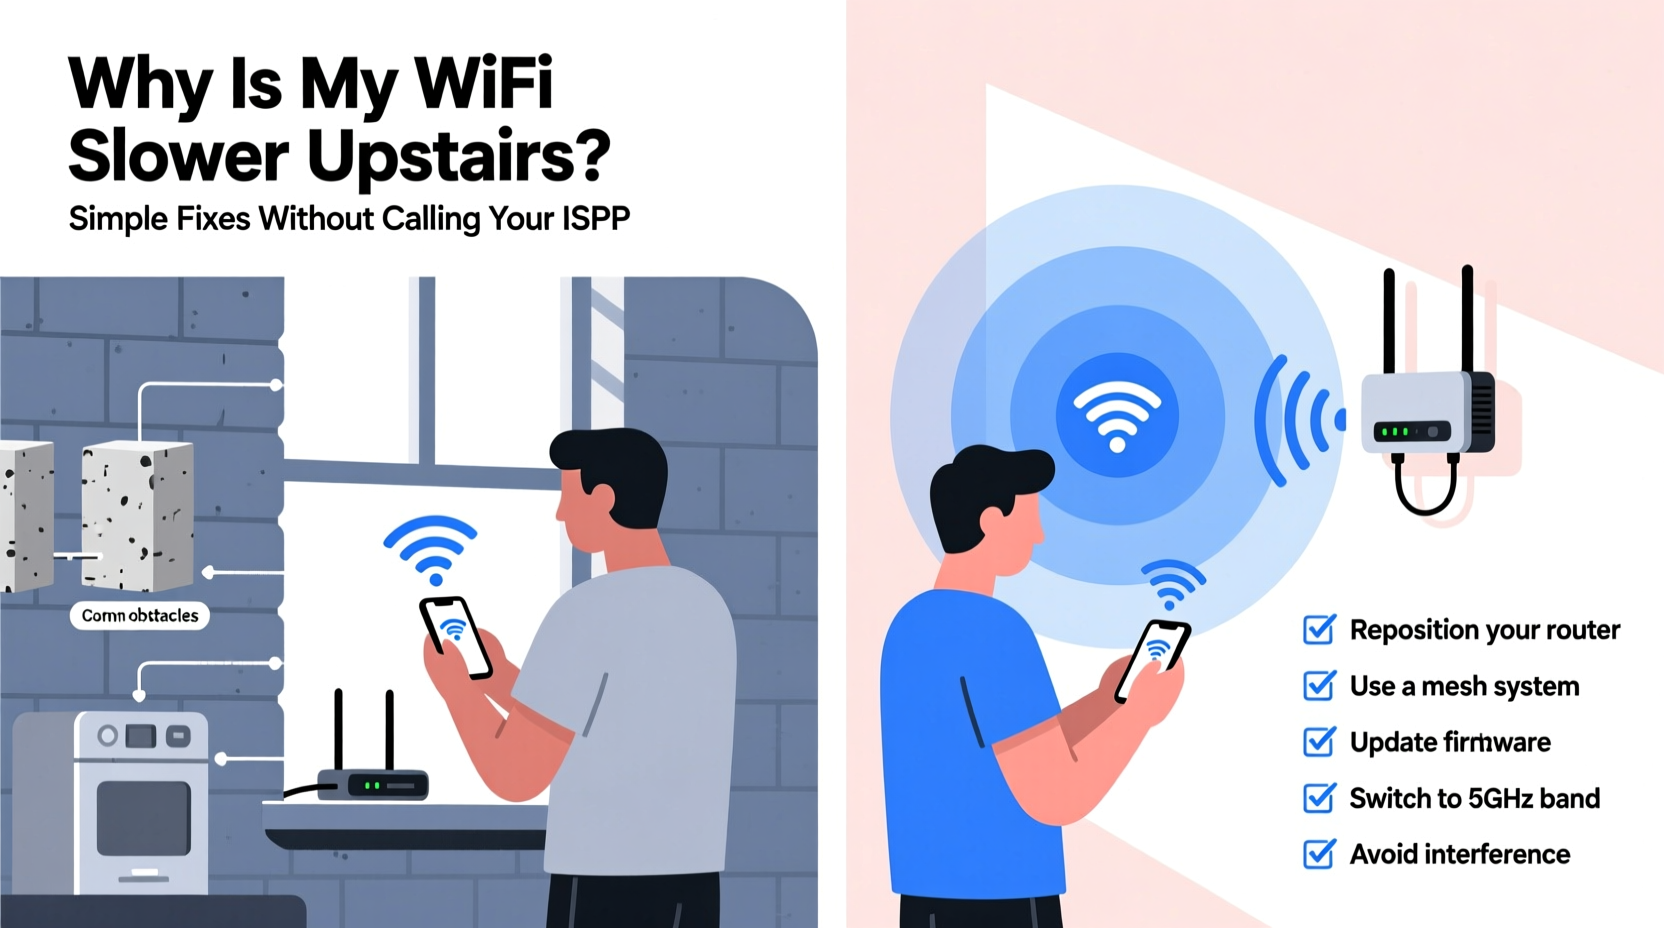
WiFi signals are radio waves that travel outward from your router in all directions. However, they don’t pass through walls, floors, and furniture as easily as light passes through glass. Each obstacle absorbs or reflects part of the signal, weakening it over distance and across levels. Since most routers are placed on the ground floor—often near the modem or utility closet—the upstairs areas tend to be furthest from the source and separated by at least one solid floor-ceiling structure.
Dense building materials like concrete, brick, metal framing, and even large appliances such as refrigerators or HVAC systems can severely block WiFi. Additionally, interference from neighboring networks, Bluetooth devices, microwaves, and cordless phones adds to signal degradation. The result? A spotty connection, low speeds, or complete dead zones upstairs.
“WiFi doesn’t just disappear—it gets absorbed, reflected, or scattered. Knowing where and why helps you redirect it effectively.” — Dr. Lena Patel, Wireless Network Engineer
Step-by-Step Guide to Boost Upstairs WiFi
Before investing in new hardware, try these proven, no-cost or low-cost methods to improve your upstairs signal strength and speed.
- Reposition Your Router Strategically
Place your router as close to the center of your home as possible, ideally elevated (on a shelf or desk) and away from walls and metal objects. If moving it upstairs isn’t feasible due to modem location, aim for a central ground-floor spot directly below the main upstairs usage area. - Adjust Antenna Orientation
Most routers have external antennas. For multi-story homes, orient one antenna vertically and one horizontally. This spreads signal both laterally and vertically, improving coverage between floors. - Update Firmware Regularly
Log into your router’s admin interface (usually via 192.168.1.1 or similar) and check for firmware updates. Manufacturers often release performance improvements and security patches that enhance stability and throughput. - Switch to Less Congested WiFi Channels
Use a free app like WiFi Analyzer (Android) or NetSpot (Mac/Windows) to scan nearby networks. If many neighbors use Channel 6 on the 2.4 GHz band, switch your router to Channel 1 or 11. On 5 GHz, choose non-overlapping channels like 36, 40, 44, or 48. - Enable Both 2.4 GHz and 5 GHz Bands
While 5 GHz offers faster speeds, it has shorter range and poorer wall penetration. Use 2.4 GHz for broader coverage upstairs, especially in distant rooms. Modern dual-band routers handle this seamlessly when properly configured.
Hardware Solutions That Actually Work
If repositioning and tuning aren’t enough, consider upgrading your setup with targeted tools designed to extend coverage.
| Solution | Best For | Pros | Cons |
|---|---|---|---|
| WiFi Extender/Repeater | Small to medium homes with one weak zone | Affordable, easy setup | Can halve bandwidth; may create separate network names |
| Mesh WiFi System | Larger homes, multiple dead zones | Seamless roaming, unified network, excellent coverage | Higher upfront cost ($150–$300) |
| Powerline Adapter with WiFi | Homes with older wiring, thick walls | Uses electrical circuits to transmit data; stable connection | Performance varies by circuit quality; not ideal for modern open-concept layouts |
| Access Point (AP) via Ethernet | Homes with existing wired infrastructure | Fastest, most reliable option; full-speed 5 GHz coverage | Requires running cables or hiring an electrician |
For most users frustrated by slow upstairs WiFi, a mesh system like Google Nest WiFi, TP-Link Deco, or Eero offers the best balance of ease, performance, and long-term value. These systems replace your old router with a primary node and satellite units placed upstairs or in problem areas, creating a unified, high-speed network.
Real-Life Example: Fixing Sarah’s Two-Story Home
Sarah lived in a 1,800-square-foot colonial house with her two teenagers. Her ISP-provided router sat in the basement near the cable jack. Upstairs, her family constantly complained about buffering during Zoom classes and interrupted gaming sessions. She called her ISP twice, but speed tests “at the source” showed full download rates, so no action was taken.
Instead of paying for a technician visit, she followed a structured approach:
- Moved the router from the basement storage room to the main floor hallway.
- Updated the firmware and switched the 2.4 GHz channel from 6 to 1.
- Purchased a budget mesh kit with two nodes—one stayed downstairs, one went upstairs near the bedrooms.
Within 30 minutes of setup, all devices upstairs connected to the stronger node. Speeds increased from 8 Mbps to 75 Mbps, and video calls stabilized. Total cost: $99. No ISP involvement required.
“People assume their ISP controls indoor coverage. But once the signal leaves the modem, it’s up to your home layout and equipment.” — Carlos Mendez, ISP Field Technician
Checklist: Quick Fixes to Try Tonight
Before buying anything, run through this checklist to maximize your current setup:
- ✅ Move the router to a central, elevated position
- ✅ Ensure antennas are oriented correctly (one vertical, one horizontal)
- ✅ Restart the router and modem (unplug for 30 seconds)
- ✅ Check for firmware updates in the router settings
- ✅ Switch to a less crowded WiFi channel using a scanning tool
- ✅ Disconnect unused devices hogging bandwidth
- ✅ Test speed upstairs using fast.com or speedtest.net
- ✅ Disable energy-saving modes on laptops and phones that throttle WiFi
Frequently Asked Questions
Can thick floors really block WiFi?
Yes. Floors contain joists, subflooring, insulation, and sometimes vapor barriers—all of which attenuate WiFi signals. Concrete or plaster ceilings are especially problematic. Wood and drywall are less obstructive but still reduce signal strength significantly over one or two levels.
Will a better router automatically fix upstairs speed?
Not necessarily. A high-end router improves broadcast power and efficiency, but physics still applies. If the router remains far from upstairs areas, gains will be limited. Pair a better router with strategic placement or mesh nodes for real improvement.
Is it safe to use a WiFi extender?
Yes, extenders are safe and widely used. However, poorly configured ones can create duplicate network names (e.g., “HomeWiFi” and “HomeWiFi_EXT”), confusing devices. Opt for models that support seamless roaming or integrate with mesh systems for smoother handoffs.
Final Thoughts and Action Plan
Slow WiFi upstairs is a common issue—but it’s rarely a fault with your internet plan. More often, it’s a matter of signal propagation, router placement, and network configuration. By understanding how WiFi behaves in multi-level homes, you gain control over your connectivity without relying on outside help.
Start with free optimizations: relocate your router, adjust settings, and eliminate interference. If those don’t suffice, invest in a mesh system tailored to your home’s size and layout. Unlike temporary fixes, mesh networks provide lasting, scalable performance that grows with your needs.
The strongest internet plan won’t help if the signal never reaches your bedroom. Take charge of your home network today—because seamless streaming, lag-free gaming, and clear video calls shouldn’t depend on which floor you’re standing on.


 浙公网安备
33010002000092号
浙公网安备
33010002000092号 浙B2-20120091-4
Comments
No comments yet. Why don't you start the discussion?