
When upgrading your vehicle’s visibility and safety, two popular options stand out: wireless backup cameras and rear view mirror monitors. Both enhance rearward vision, reduce blind spots, and help prevent accidents. But for most drivers, the deciding factor isn’t just performance—it’s how easy they are to install. After all, not everyone has time or expertise to spend hours wiring through their car’s interior. So, which system wins in terms of ease of installation? The answer depends on several factors, from technical requirements to vehicle compatibility and user confidence with DIY electronics.
This article breaks down both systems in practical terms, compares their installation processes, and helps you decide which solution fits your skill level and lifestyle—without requiring a mechanic’s toolkit or engineering degree.
Understanding the Systems
Before comparing installation difficulty, it's important to understand what each system entails.
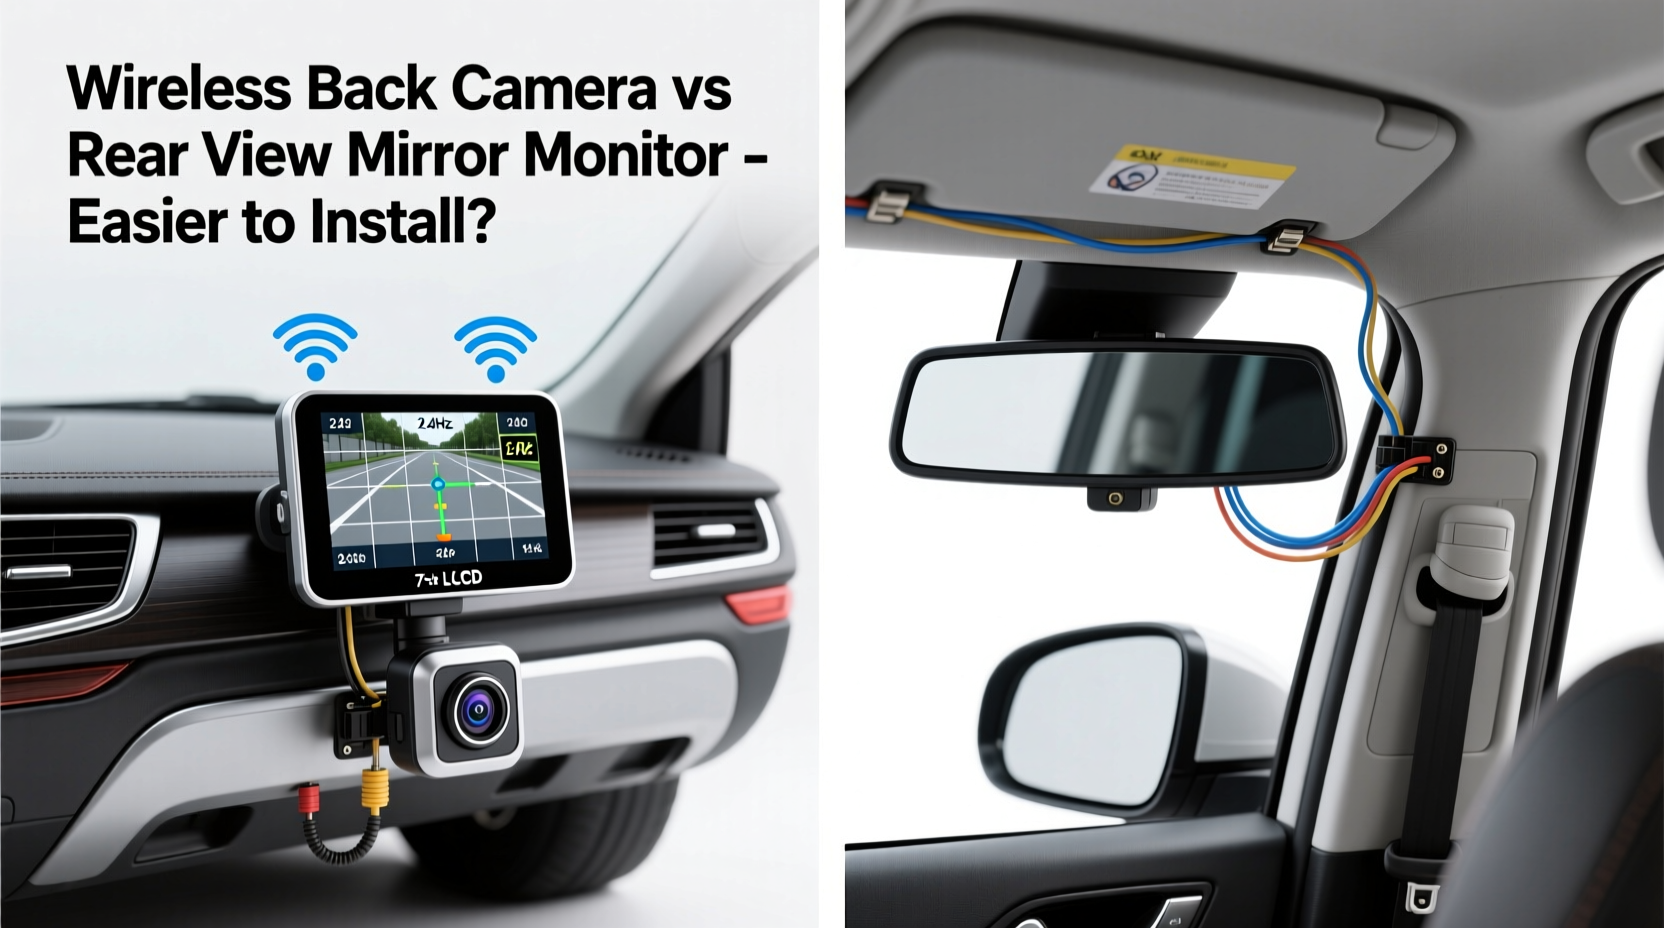
A wireless backup camera consists of a small camera mounted on the rear of the vehicle (typically near the license plate or on the tailgate) that transmits video via Wi-Fi or radio frequency to a separate display unit. This display can be a standalone screen, a headunit, or even a smartphone app. The key feature is the absence of a direct video cable between camera and screen.
A rear view mirror monitor, on the other hand, integrates a digital display directly into a replacement rearview mirror. When reverse gear is engaged, the mirror switches from reflecting the rear window to showing the live feed from a connected backup camera. These systems usually require a wired connection between the camera and the mirror unit, though power can often be tapped from existing circuits.
While both aim to improve safety, their physical integration into your vehicle differs significantly—and so does the complexity of getting them up and running.
Installation Complexity: Step-by-Step Breakdown
Installing a Wireless Backup Camera
The appeal of a wireless backup camera lies in its name: no video cable. That doesn’t mean it’s completely wire-free, but the absence of a long coaxial or HDMI-style cable dramatically simplifies routing.
- Mount the camera: Most models attach using adhesive, screws, or a license plate bracket. Placement is typically at the center of the rear bumper or tailgate.
- Connect power: The camera needs a 12V power source. Many users tap into the reverse light circuit so the camera activates only when backing up. This requires locating the correct wire in the tail light assembly, stripping insulation, and connecting via a tap connector or soldering.
- Install the display: The screen can be placed on the dashboard, windshield, or integrated into an aftermarket stereo. Power is usually drawn from the cigarette lighter or hardwired to a fused accessory circuit.
- Pair devices: Once powered, the camera and display automatically sync if using a dedicated system. For phone-based apps, Bluetooth or Wi-Fi pairing may be required.
No video cabling means fewer drilling points and less risk of damaging trim panels during installation. However, wireless systems aren't immune to interference, and signal quality can degrade in metal-heavy vehicles or areas with high RF noise.
Installing a Rear View Mirror Monitor
Rear view mirror monitors replace your factory mirror with a smart version that includes a built-in screen. Installation here is more involved due to the need for both power and video signal delivery to the mirror location—usually behind the windshield at the top of the cabin.
- Remove the factory mirror: Most OEM mirrors detach with a release tool or by prying off a cover to access mounting hardware.
- Route the video cable: The camera’s video cable must travel from the rear of the car, under trim panels, through the driver’s side door jamb, and up into the headliner to reach the mirror. This often involves removing door seals, pulling back carpet edges, and carefully feeding wires without pinching.
- Power the camera: Same as with wireless systems—connect to the reverse light circuit.
- Connect and mount the new mirror: Attach the new mirror, plug in the video and power cables, and ensure the display activates correctly when reversing.
While the final result looks sleek and factory-like, the process demands patience and precision. Misrouting wires can lead to chafing, short circuits, or broken trim clips.
“Mirror-integrated displays offer the cleanest look, but the wire run from trunk to cabin is the biggest hurdle for DIYers.” — Mark Tran, Automotive Electronics Installer with 12 years of field experience
Comparative Analysis: What Makes Installation Easier?
To determine which system is easier to install, consider four key factors: wiring complexity, tools required, time investment, and potential for error.
| Factor | Wireless Backup Camera | Rear View Mirror Monitor |
|---|---|---|
| Video Wiring | No video cable needed; uses wireless transmission | Requires full-length video cable from rear to front |
| Power Wiring | Camera + display each need power (often reverse light + accessory) | Camera needs reverse power; mirror powered via harness |
| Tools Required | Screwdriver, wire tap, possibly multimeter | Trim tools, fish tape, multimeter, crimpers |
| Time to Install | 30–60 minutes (average) | 2–4 hours (depending on vehicle) |
| Error Risk | Low (fewer connections, minimal disassembly) | Moderate to high (damaged trim, poor signal, routing issues) |
| Best For | Renters, DIY beginners, temporary setups | Owners seeking permanent, clean integration |
The table makes one thing clear: wireless backup cameras win on simplicity. They eliminate the most labor-intensive step—running a video cable through the entire vehicle. For someone with basic electrical knowledge and a weekend afternoon, a wireless system can be fully functional in under an hour.
Real-World Example: Sarah’s Weekend Upgrade
Sarah, a single mom and part-time rideshare driver, wanted better visibility in her 2015 Honda CR-V. She frequently parks in tight urban spaces and was frustrated by her narrow rear window. With no mechanical background, she researched options and chose a wireless backup camera with a 5-inch dashboard display.
On a Saturday morning, she used a YouTube tutorial to locate the reverse light wire in her tail light housing. Using a quick-tap connector, she linked the camera’s power line without soldering. She mounted the camera above her license plate with included screws and stuck the display to her dash with adhesive. Pairing was automatic.
Total time: 45 minutes. No removed panels, no frustration. The system worked flawlessly the next day during a pickup shift.
Had she chosen a mirror monitor, she would have had to route a cable from the rear bumper, through the left door channel, and into the headliner—a task she later admitted she “wouldn’t have known where to start.”
Actionable Checklist: Choosing the Right System for You
Use this checklist to determine which option aligns with your goals and skill level:
- ✅ I want something I can install in under an hour — wireless camera
- ✅ I don’t want to remove interior panels or trim — wireless camera
- ✅ I prefer a clean, factory-like appearance — mirror monitor
- ✅ I own my vehicle long-term and want a permanent upgrade — mirror monitor
- ✅ I’m uncomfortable working with wiring or using tools — wireless camera
- ✅ I drive a larger SUV or van with long wire runs — wireless camera (avoids signal degradation over distance)
- ✅ I already have a backup camera and just want a better display — mirror monitor
Expert Tips for a Smooth Installation
Frequently Asked Questions
Can I install a wireless backup camera myself?
Yes, most wireless backup cameras are designed for DIY installation. With basic tools and a clear understanding of how to connect to the reverse light circuit, anyone can set one up in under an hour. No advanced technical skills are required.
Do rear view mirror monitors require professional installation?
Not necessarily, but they are significantly more complex. While experienced DIYers can manage the job, those unfamiliar with automotive wiring or interior panel removal may benefit from professional help to avoid damage or poor signal quality.
Are wireless backup cameras reliable?
Modern wireless systems using 2.4GHz or 5.8GHz frequencies are generally reliable in typical driving conditions. However, heavy electromagnetic interference (e.g., near cell towers or industrial zones) or thick metal bodies (like trucks or armored vehicles) may affect performance. Wired systems remain more consistent over time.
Final Verdict: Which Is Easier to Install?
When it comes to ease of installation, the wireless backup camera is the clear winner. It eliminates the most challenging aspect of any backup system: running a video cable from the rear to the front of the vehicle. Without that obstacle, setup becomes faster, cleaner, and far more accessible to everyday drivers.
That said, “easier” doesn’t always mean “better for everyone.” If you value aesthetics, seamless integration, and a clutter-free cabin, a rear view mirror monitor may be worth the extra effort—even if it takes longer and requires more tools.
Your choice should reflect not just technical ease, but also your relationship with your vehicle. Renters, occasional drivers, or those who dislike tinkering will lean toward wireless. Long-term owners who prioritize a polished look and don’t mind a weekend project may prefer the mirror monitor.
Take Action Today
Improving your vehicle’s safety doesn’t have to wait for a service appointment or a big budget. With today’s technology, a reliable backup system is within reach—and for most people, the easiest path starts with a wireless backup camera. Whether you're backing into tight driveways, navigating parking garages, or hauling trailers, clearer rear visibility pays off every time you shift into reverse.
Pick a system that matches your comfort level, follow the steps carefully, and enjoy the peace of mind that comes with seeing exactly what’s behind you. Your next safe stop begins with the right view.


 浙公网安备
33010002000092号
浙公网安备
33010002000092号 浙B2-20120091-4
Comments
No comments yet. Why don't you start the discussion?