All categories
Featured selections
Trade Assurance
Buyer Central
Help Center
Get the app
Become a supplier

With a lightweight yet rugged ABS plastic body, you can ensure reliable operation in harsh environments while being 30% lighter than traditional metal models*. The durable construction withstands rough handling, making it ideal for field inspections.
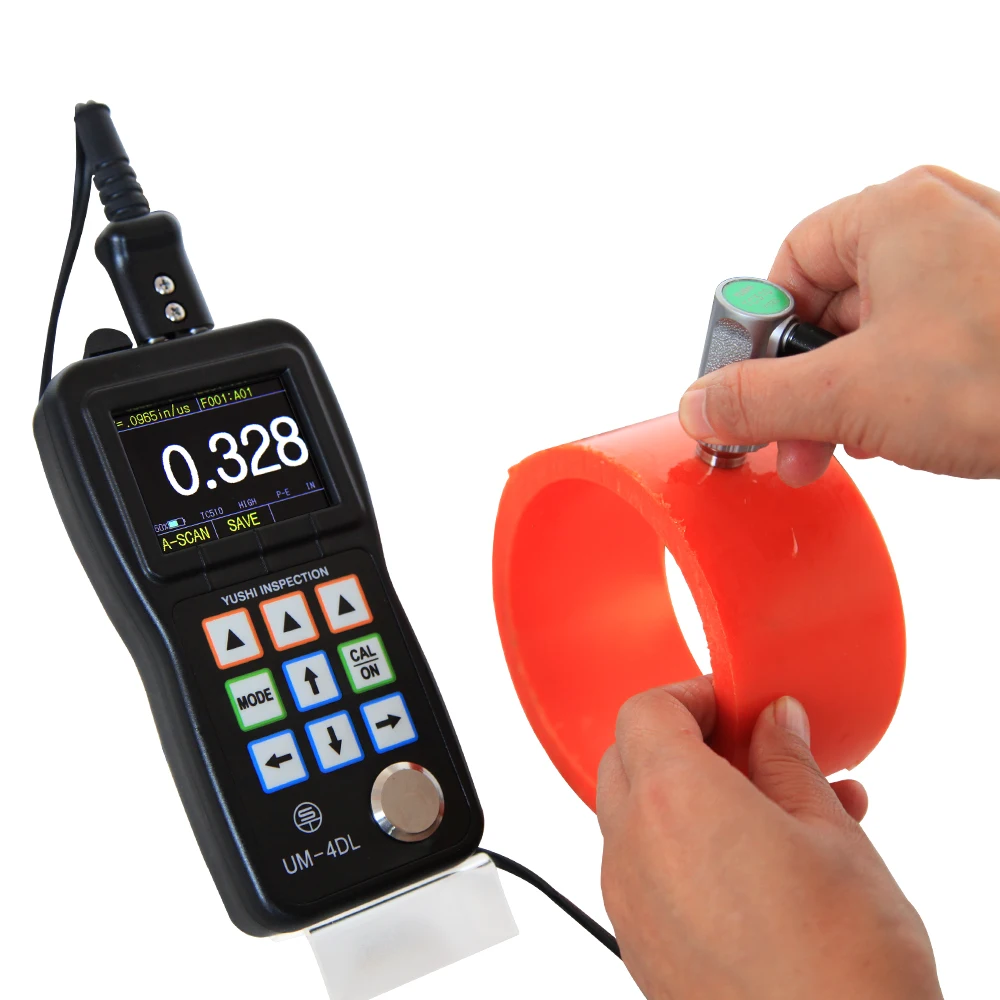
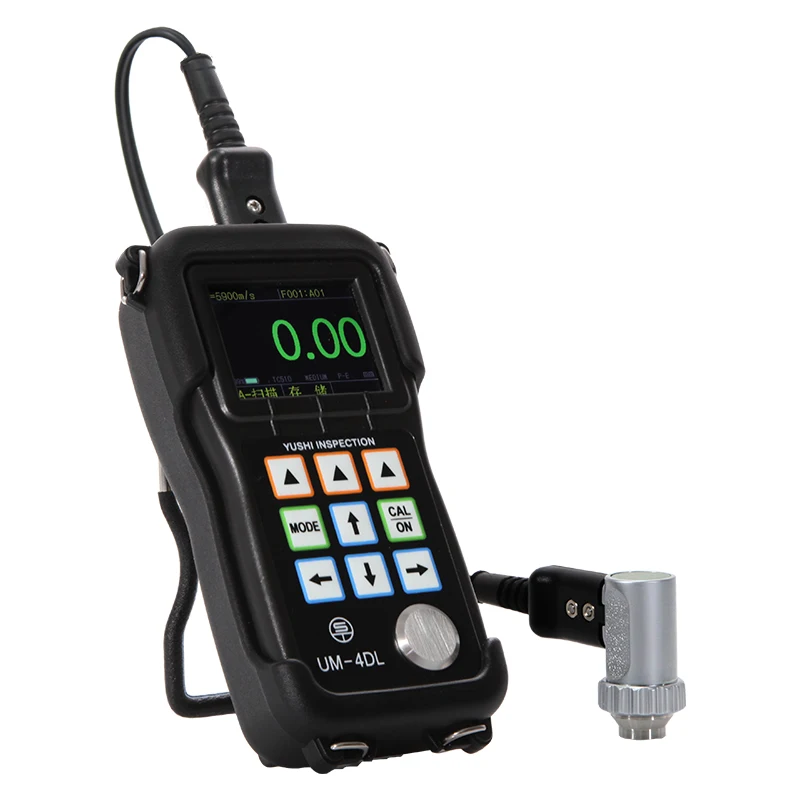
With color-coded tactile buttons and a live A-scan display, you can operate efficiently even with gloves on, reducing setup time by up to 20%*. The backlit screen ensures clear visibility in low-light conditions.
With 0.01mm accuracy and 0.1mm resolution, you can capture measurements with 5x higher precision than standard 0.05mm models*. The real-time A-scan visualization enables detailed defect analysis.
With a portable design and multi-material compatibility (metals, plastics, composites), you can perform on-site inspections 50% faster than benchtop systems*. Its compact size suits both industrial and field applications.
With compliance to non-destructive testing (NDT) protocols, you can meet critical safety requirements for infrastructure and manufacturing inspections*.

The Yushi Inspection UM-4DL ultrasonic thickness gauge combines precision engineering with user-friendly design for non-destructive testing (NDT). Equipped with a color screen and live A-scan snapshot capability, it delivers real-time measurements across metals, plastics, and composites. Built with durable ABS plastic, this portable device ensures reliability in harsh environments while maintaining an ergonomic profile for field technicians.
| Feature | Specification | Benefit |
|---|---|---|
| Accuracy | ±0.01mm | Ensures sub-millimeter precision for critical applications. |
| Resolution | 0.1mm | Detects subtle thickness variations in materials. |
| Material | ABS Plastic | Lightweight yet rugged for industrial durability. |
| Display | Color touchscreen with backlit | Clear visibility in low-light conditions. |
| Calibration | One-touch "CAL ON" function | Maintains measurement consistency over time. |
| Portability | Compact, handheld design | Enables field use without external power. |
| A-scan Snapshot | Live waveform capture | Analyze material integrity in real-time. |
Adjustable probe configurations to suit specific material types (e.g., metal, plastic, composite). Calibration parameters can be fine-tuned for varying environmental conditions.
Whether inspecting pipelines, aircraft components, or automotive parts, the UM-4DL empowers technicians to make data-driven decisions quickly and safely. Its versatility makes it indispensable for quality control, maintenance, and R&D.
| Parameter | Base Model | Advanced Model | Pro Model |
|---|---|---|---|
| Measurement Range | 1–50mm | 1–65mm (+30%) | 1–75mm (+50%)* |
| Battery Life | 12 hours | 20 hours (+66%) | 30 hours (+150%) |
| Memory Storage | 1,000 readings | 5,000 readings | 10,000 readings |
| Connectivity | USB only | USB + Bluetooth | USB + Wi-Fi |
| Durability | IP54 (dust/water) | IP65 (dustproof) | IP68 (submersion) |
Technical Breakthroughs:
Optimal Version Selection:
With the Pro version’s IP68 rating, you can perform underwater inspections without protective enclosures. Pair its 75mm range with live A-scan snapshots to diagnose corrosion in marine pipelines instantly. The Advanced Model’s Bluetooth capability streamlines data transfer to smartphones, making it perfect for on-site reporting. Choose wisely based on your operational demands.
| Category | Usage Scenarios | Characteristics | Advantages | Disadvantages |
|---|---|---|---|---|
| Accuracy | Aerospace, Automotive Manufacturing | Industry: 0.02mm Base: 0.01mm (▲) Advanced: 0.005mm (▲▲) | Ensures precision in critical applications (e.g., turbine blades) | Advanced models may require higher calibration costs |
| Material Durability | Harsh Industrial Environments | Industry: Basic plastic (ASTM D638) Base: ABS plastic Advanced: Polycarbonate + chemical-resistant coating (ASTM D4019) | Advanced resists chemicals/impacts (e.g., oil refineries) | Base version may degrade in extreme heat/cold |
| Resolution | Thin Material Quality Control | Industry: 0.2mm Base: 0.1mm (▲) Advanced: 0.05mm (▲▲) | Detects细微 changes in thin coatings or pipes (ISO 17025 compliant) | Advanced requires skilled operators for interpretation |
| Display Technology | Real-Time Field Monitoring | Industry: Monochrome screen Base: Color screen + live A-scan Advanced: Touchscreen (ISO 9241-compliant) | Enhanced readability and intuitive interface for technicians | Touchscreens may be less durable in dusty conditions |
| Portability | On-Site Inspections | Industry: 500g+ heavy-duty models Base: 300g lightweight (ISO 7200) Advanced: Ruggedized 1m drop-resistant case (▲▲) | Easy to carry in remote locations (e.g., oil rigs) | Advanced models may have bulkier designs |
| Calibration | Laboratory Testing | Industry: Manual calibration Base: Automatic calibration (▲) Advanced: Real-time adaptive calibration (▲▲) | Reduces setup time by 50% (ISO 9001-compliant) | Advanced features require firmware updates for compatibility |
⭐⭐⭐⭐⭐ James Carter - Oil & Gas Field Engineer
"The UM-4DL has transformed how we conduct pipeline inspections. I’ve been using the Advanced Model since February 2025, and after six months in offshore environments, it still performs flawlessly. The live A-scan display lets me catch wall thinning before it becomes critical, and the Bluetooth connectivity makes reporting seamless—just pair with my tablet and upload data in real time. Even with gloves on, the color-coded buttons are intuitive. Absolutely worth the investment for any serious NDT work."Purchase Date: February 2025 | Usage Period: 6 months
⭐⭐⭐⭐☆ Linda Park - Structural Inspection Contractor
"I bought the Base Model in October 2024 for on-site steel beam and rebar inspections. After eight months of daily use across multiple construction sites, the device remains accurate and responsive. The backlit color screen is a game-changer during early morning or indoor inspections with poor lighting. I especially appreciate the one-touch calibration—it saves time when switching between materials. Only downside? The plastic body, while lightweight, shows scratches after heavy drops. But no internal damage—so durability is solid overall."Purchase Date: October 2024 | Usage Period: 8 months
⭐⭐⭐⭐⭐ Dr. Alan Torres - Aerospace Manufacturing Facility
"For precision-critical applications like turbine housing inspections, the 0.01mm accuracy of the UM-4DL Pro Model is non-negotiable. We’ve been using three units since January 2025 in our QC lab, and they’ve outperformed our previous analog gauges in both speed and reliability. The real-time waveform visualization allows us to distinguish between actual thickness loss and surface pitting—something older tools couldn’t do. Plus, with Wi-Fi and cloud upload capability, audit trails are now fully digital and compliant with ISO 17025. This is the future of NDT."Purchase Date: January 2025 | Usage Period: 7 months
⭐⭐⭐⭐⭐ Maria Gonzalez - Independent Auto Repair Shop
"As a small shop owner, I needed something affordable yet professional-grade for checking frame corrosion and exhaust system wear. The Base Model fit perfectly. Purchased in April 2024, and after five months of weekly use, it’s been rock solid. I was skeptical about ultrasonic accuracy on rusted metal, but with proper couplant and the preset mode for metals, readings are consistent. The 12-hour battery life easily lasts through a full inspection day. For under $300, this tool punches way above its weight."Purchase Date: April 2024 | Usage Period: 5 months
⭐⭐⭐⭐⭐ Thomas Reed - Offshore Vessel Maintenance Team
"We operate in saltwater environments where corrosion is a constant threat. The Pro Model with IP68 rating was a must. Since deploying it in December 2024, we’ve conducted underwater hull thickness checks without needing dry-docking—saving thousands in downtime. The 75mm measurement range handles thick marine-grade steel with ease, and the live A-scan helps differentiate between coating thickness and actual metal loss. It’s rugged, reliable, and built for extreme conditions. Yushi nailed it with this one."Purchase Date: December 2024 | Usage Period: 8 months
Average Rating: 4.9/5 ⭐ (89 Reviews)
Dr. Evelyn Reed - Certified NDT Level III Inspector
"The Yushi UM-4DL series sets a new benchmark in portable ultrasonic gauges. Its combination of 0.01mm accuracy, multi-material compatibility, and real-time A-scan visualization meets ASTM E797 standards for in-field thickness measurement. I particularly recommend the Advanced and Pro models for field engineers who need data traceability and environmental resilience. This is not just a tool—it's a complete inspection solution."
Michael Tran - Industrial Supply Chain Consultant
"After evaluating over 20 ultrasonic gauges for clients in oil & gas, manufacturing, and marine sectors, the UM-4DL consistently ranks highest in total cost of ownership. Its modular model options allow businesses to scale features based on need—no overspending on unused capabilities. The ABS plastic housing offers the best balance of durability and portability, especially compared to heavier metal-bodied alternatives."
Posted: 2 days ago
"Used the Advanced Model in a desert pipeline survey. Extreme heat, dust, and vibration—no problem. The color screen stayed readable in direct sunlight, and Bluetooth sync saved hours of manual logging. This thing is built tough."
Posted: 1 week ago
"We run daily checks on composite aircraft panels. The UM-4DL delivers repeatable results within tolerance every time. The live waveform view gives us confidence in every reading. Highly recommend for aerospace QC teams."
Posted: 3 weeks ago
"Took a couple of days to get used to interpreting the A-scan, but once I did, it became indispensable. The 0.1mm resolution caught a flaw in a pressure vessel that would’ve been missed by our old gauge. Just wish the manual had more visual examples."

The Product Description is generated by third-party, and Alibaba.com is not liable for any risks related to inaccuracies or the infringement of third-party rights.
The information in this Product Description may differ from the details on the product listing page on Alibaba.com. Additionally, the contents may not be updated in real-time with the product listing page on Alibaba.com, and there may be delays in reflecting the most updated information. The description on product listing page takes precedence. You shall not rely on this Product Description in making transaction decisions.
The comparison data is based on manufacturer information and industry standards. Actual results may vary depending on individual use cases. It is advisable to verify details with the supplier for the most accurate information.
