
Images are powerful tools in digital communication, but their value diminishes if they remain invisible in search results. Millions of images are uploaded daily, yet only a fraction gain traction through Google Search. Achieving visibility isn’t about luck—it’s about strategy. By understanding how Google indexes and ranks visual content, you can ensure your images appear when users are actively searching for related topics. This guide outlines the precise steps to post images effectively, optimize them for discovery, and increase organic traffic from Google Images.
Why Image Visibility Matters in 2024
Google Images accounts for nearly 20% of all search queries, making it one of the largest non-text-based search channels online. Whether you're a blogger, e-commerce seller, or content marketer, appearing in image search results can drive targeted traffic, enhance brand recognition, and support content credibility. Unlike text, images provide immediate context—making them more likely to be clicked when relevant. However, Google doesn't “see” images the way humans do; it relies on metadata, surrounding content, and technical signals to interpret and rank them.
“Optimized images don’t just improve aesthetics—they serve as entry points to your website.” — Sarah Lin, SEO Strategist at VisualRank Labs
Step-by-Step Process to Maximize Image Visibility
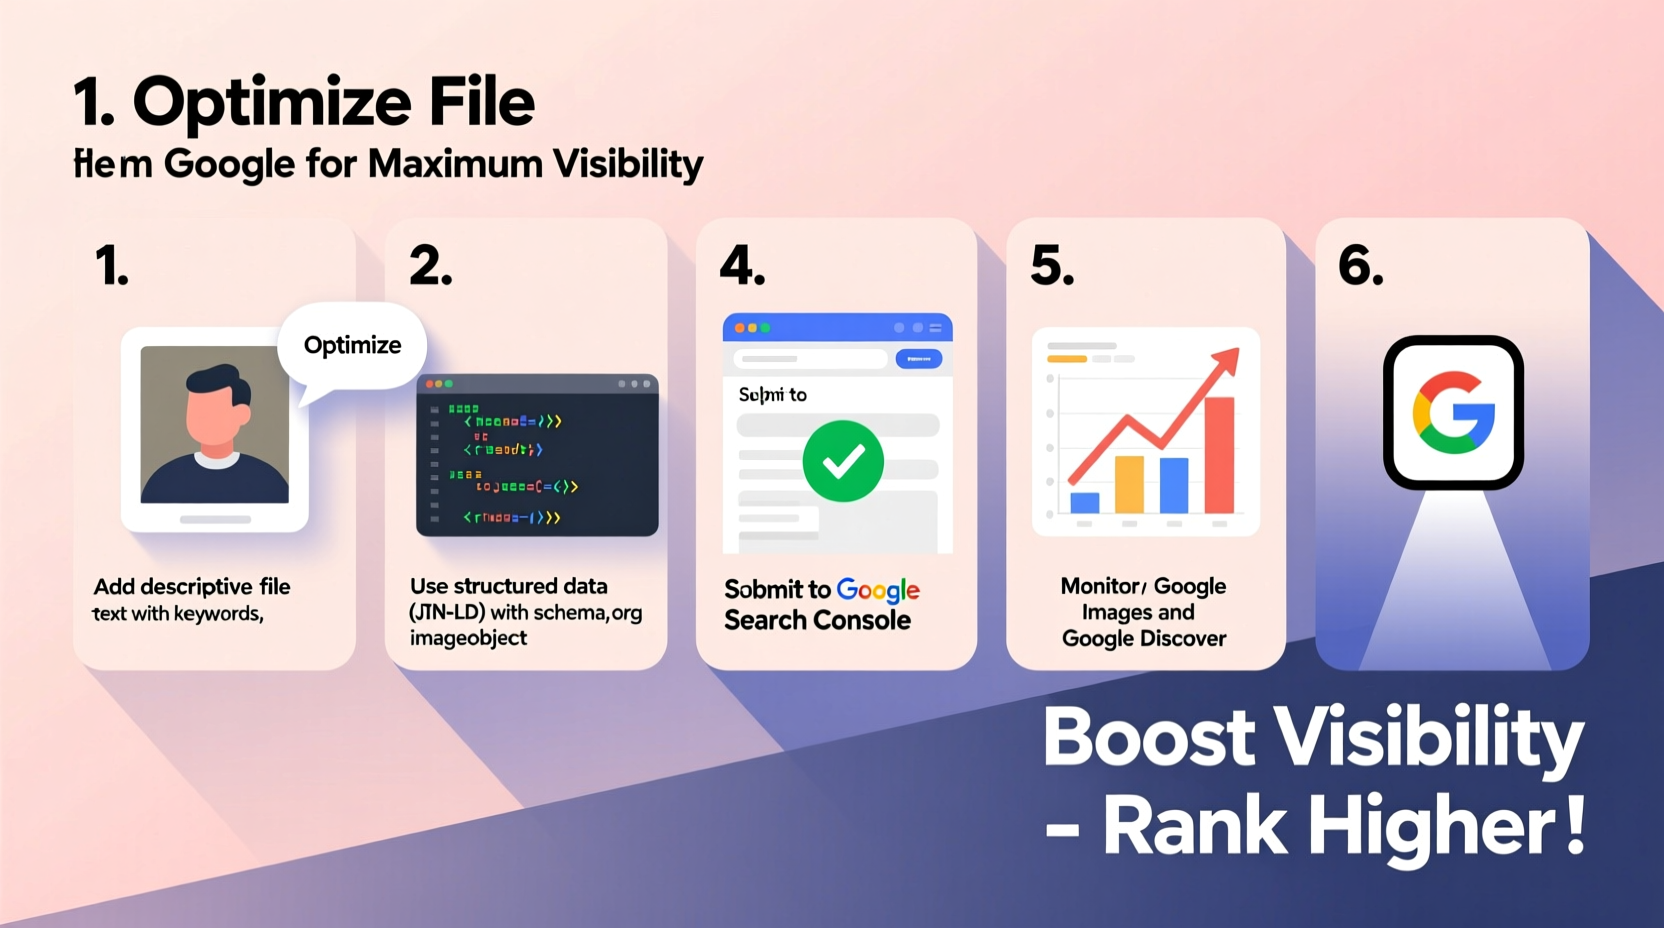
1. Prepare Your Image with SEO in Mind
Before uploading, every image should be optimized for both performance and discoverability. Start with high-quality visuals that are relevant to your content. Then apply these foundational optimizations:
- Use descriptive file names: Replace generic names like “IMG_1234.jpg” with keyword-rich alternatives such as “homemade-chocolate-cake-recipe.jpg”.
- Compress without sacrificing quality: Use tools like TinyPNG or Squoosh to reduce file size. Aim for under 500 KB where possible.
- Choose the right format: JPEG for photographs, PNG for graphics with transparency, and WebP for modern, lightweight alternatives supported by most browsers.
- Add alt text during creation: Even if not used immediately, embedding descriptive alt attributes into the image metadata improves consistency.
2. Upload Images to a Publicly Accessible Website
Google cannot index images stored solely on personal devices or private cloud folders. To appear in search results, images must be hosted on publicly accessible web pages. The best platforms include:
- Your own website or blog
- Content management systems like WordPress or Wix
- Dedicated media hosts such as Flickr (with public settings enabled)
When uploading, ensure the page where the image appears is crawlable. Avoid placing images behind login walls, JavaScript-heavy galleries without fallbacks, or in password-protected sections.
3. Optimize On-Page Elements Around the Image
Google evaluates the context surrounding an image to determine its relevance. Pair each image with strong supporting elements:
- Descriptive captions: Use clear, concise captions below the image that explain what it shows.
- Relevant heading structure: Include keywords in nearby headings (H1–H3) that align with the image topic.
- Surrounding content: Write at least 100–150 words of explanatory text near the image, naturally incorporating target keywords.
- Image title attribute: Set a meaningful title that appears on hover (different from file name or alt text).
| Element | Best Practice | Avoid |
|---|---|---|
| File Name | blue-hiking-boot-trail.jpg | DSC_00987.jpg |
| Alt Text | Blue hiking boot on rocky mountain trail | Image of product |
| Caption | This rugged blue hiking boot performs well on steep terrain. | Pictured above |
| Page Title | Hiking Boots for Rocky Trails – Durability Tested | Products – Home |
4. Submit Images via Sitemap and Structured Data
To accelerate indexing, explicitly tell Google where your images are located. Two methods stand out:
- Image Sitemaps: Extend your existing XML sitemap to include image tags. Example:
<url> <loc>https://yoursite.com/blog/hiking-boots-review</loc> <image:image> <image:loc>https://yoursite.com/images/blue-hiking-boot.jpg</image:loc> <image:title>Blue Hiking Boot on Trail</image:title> <image:caption>Durable hiking boot designed for mountain trails.</image:caption> </image:image> </url> - Schema Markup: Use JSON-LD schema on image-heavy pages (like product listings) to define image properties. While not always used for ranking, it reinforces context.
After updating your sitemap, submit it via Google Search Console under the \"Sitemaps\" section. Monitor the \"Coverage\" and \"Enhancements > Images\" reports to identify crawl errors or indexing delays.
5. Promote and Maintain Indexation Over Time
Indexing isn’t a one-time event. Google revisits pages periodically, so ongoing maintenance ensures long-term visibility.
- Regularly update old posts with refreshed images and improved metadata.
- Monitor broken image links using tools like Screaming Frog or Ahrefs.
- Encourage backlinks to pages hosting key images—external references signal authority.
- Use internal linking to connect image-rich articles, improving site architecture.
Real-World Example: How a Food Blogger Doubled Traffic
Jessica Tran, a recipe creator, noticed her baked goods photos weren’t appearing in Google Images despite high engagement on Pinterest. She revised her approach:
- Rename all image files using recipe-specific keywords (e.g., “gluten-free-carrot-cake-slice.jpg”).
- Added detailed alt text describing ingredients and presentation.
- Wrote 200-word intros before each recipe image.
- Submitted an updated image sitemap via Search Console.
Within six weeks, three of her dessert images ranked on the first page of Google Images for terms like “moist carrot cake slice” and “easy gluten-free desserts.” Organic traffic to those pages increased by 112%, with image clicks accounting for 38% of new visits.
Essential Checklist for Image Optimization
- ✅ Before Upload
- - Rename file with descriptive, keyword-rich name
- - Compress image for fast loading
- - Choose appropriate format (JPEG/PNG/WebP)
- ✅ During Publishing
- - Add accurate alt text
- - Write a contextual caption
- - Surround image with relevant content
-
- Use responsive image tags (
srcset) - ✅ After Publishing
- - Add image to XML sitemap
- - Submit sitemap to Google Search Console
- - Monitor indexing status and fix errors
- - Share page link to build visibility
Frequently Asked Questions
Can I use stock images and still rank on Google Images?
Yes, but original imagery has a significant advantage. If using stock photos, customize them (e.g., add overlays, text, or edit colors), and ensure the surrounding content is unique and valuable. Otherwise, you compete with thousands of identical copies.
How long does it take for images to appear in Google search?
Indexing typically takes between 4 days and 4 weeks, depending on site authority, crawl frequency, and whether sitemaps were submitted. New websites may experience longer delays. Use URL Inspection Tool in Google Search Console to request indexing of individual pages.
Does image size affect SEO?
Indirectly. Larger images offer better detail and user experience but slow down page speed if unoptimized. Google prioritizes Core Web Vitals, so balance resolution with performance. Ideal dimensions range from 1000px to 1600px wide, with compression to maintain quality.
Final Thoughts: Make Your Visuals Work for You
Posting images on Google isn’t just about uploading a picture—it’s about crafting a discoverable digital asset. From naming conventions to structured data, every layer contributes to visibility. The most effective image strategies combine technical precision with creative relevance. When done correctly, your visuals become gateways to your content, attracting users who might never have found you through text alone.


 浙公网安备
33010002000092号
浙公网安备
33010002000092号 浙B2-20120091-4
Comments
No comments yet. Why don't you start the discussion?