
Applying fake nails at home used to be a risky endeavor—uneven shapes, lifting edges, or glue mishaps could ruin the look in minutes. But with the right tools, technique, and patience, you can achieve a salon-quality manicure from your kitchen table. Glue-on nail tips are one of the most affordable and accessible options for beginners, offering durability and versatility without the need for UV lamps or filing. This guide walks you through every step, from prep to polish, so you can confidently create a flawless set that lasts.
Why Choose Glue-On Nail Tips?
While press-ons with adhesive strips have gained popularity, glue-on tips provide stronger adhesion and better customization. The liquid nail glue forms a secure bond between your natural nail and the artificial tip, making it less likely to lift during daily activities. They’re also easier to size correctly since you can choose the exact width and length for each finger.
According to celebrity nail technician Lina Lee, “Glue-on tips give clients more control over fit and finish. When applied correctly, they last just as long as salon gels—up to two weeks—with proper care.”
“Glue-on tips give clients more control over fit and finish. When applied correctly, they last just as long as salon gels—up to two weeks—with proper care.” — Lina Lee, Celebrity Nail Technician
Essential Tools and Materials
Before starting, gather everything you’ll need. Having all supplies ready prevents interruptions and ensures a smooth application process.
- Nail glue (cyanoacrylate-based, specifically for nails)
- Fake nail tips (multiple sizes recommended)
- Nail file and buffer
- Cotton pads or balls
- Acetone or non-acetone nail polish remover
- Tweezers or nail applicator tool
- Cuticle pusher
- Nail dehydrator or rubbing alcohol
- Top coat (optional but recommended)
Step-by-Step Application Guide
Follow this detailed timeline to ensure precision and longevity.
- Remove old polish: Clean your nails thoroughly with acetone-free remover to eliminate oils and residue.
- Shape and buff: Gently file your natural nails into a slightly squared shape to match the fake tips. Lightly buff the surface to create texture for better adhesion.
- Push back cuticles: Use a cuticle pusher to gently tidy the base of each nail. Avoid cutting unless necessary.
- Dehydrate nails: Wipe each nail with rubbing alcohol or a nail dehydrator. This removes moisture and grease, helping the glue adhere properly.
- Select correct tip size: Test different sizes on each nail. The ideal fit covers your nail bed completely without overlapping the sides.
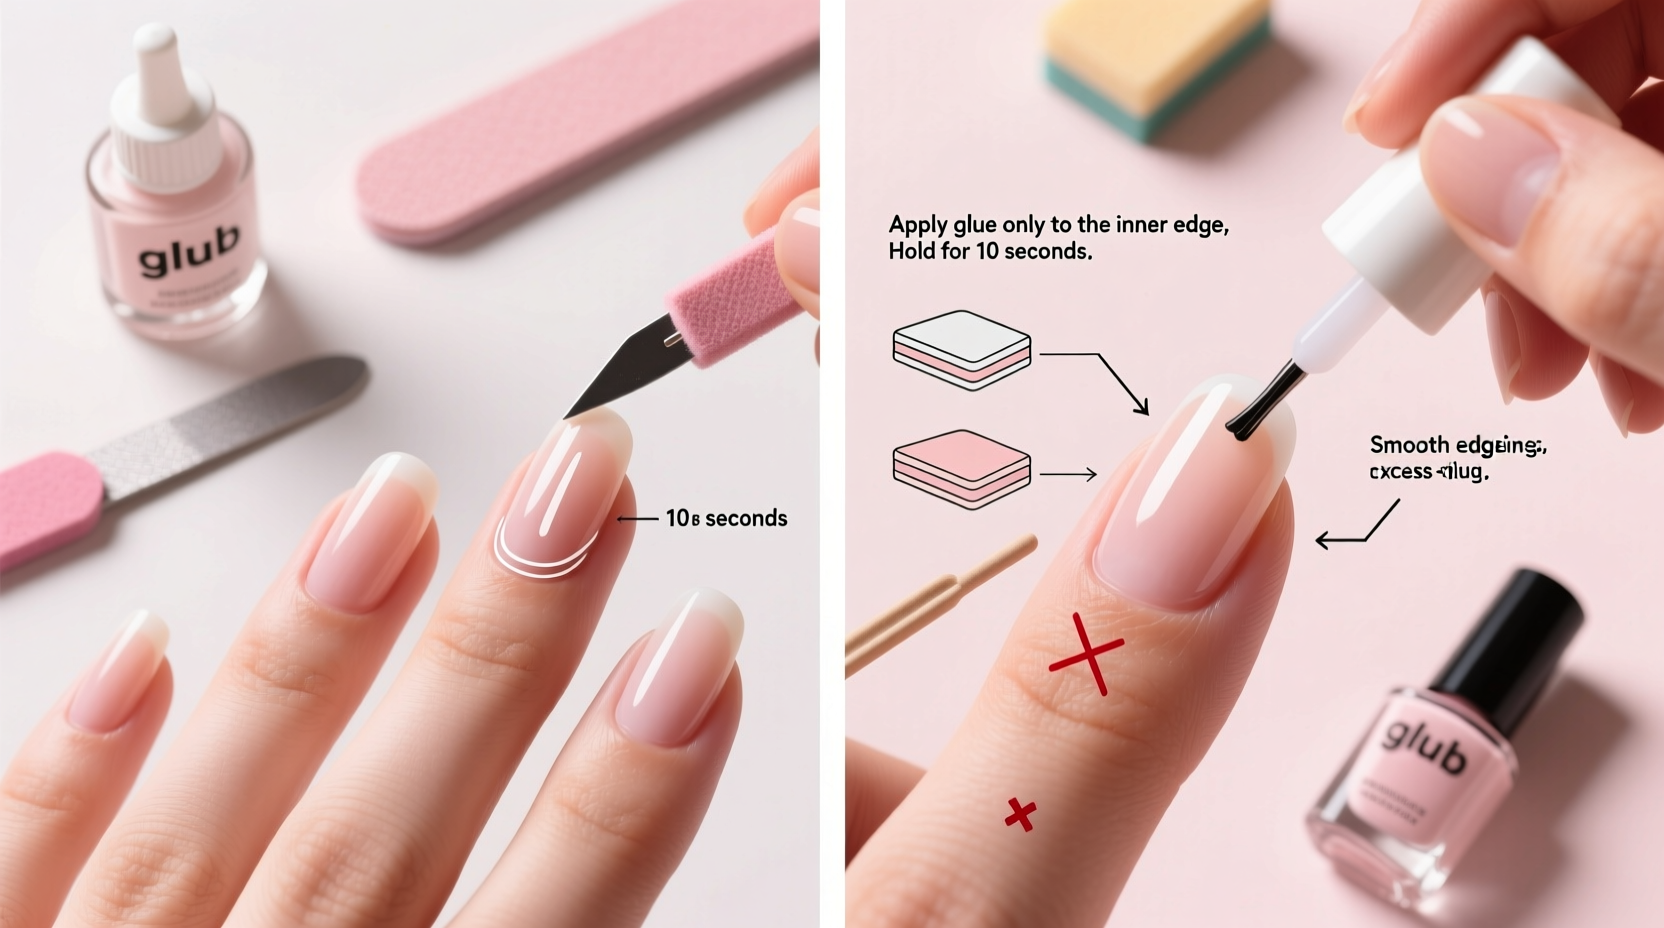
- Apply glue: Place a small drop of glue inside the well of the fake tip. Alternatively, apply a tiny dot directly onto your natural nail.
- Attach the tip: Press the fake tip firmly onto your nail, aligning it straight with your cuticle line. Hold for 15–20 seconds until secure.
- Seal the edges: Once all tips are attached, run a thin layer of glue around the base where the tip meets your natural nail for added strength.
- File and shape: Trim excess length if needed, then file the tips to your desired shape—almond, square, or stiletto.
- Finish with top coat: Apply a clear or glossy top coat to blend the seam and protect against chipping.
Timeline Summary
| Step | Time Required | Key Focus |
|---|---|---|
| Prep & Clean | 5–7 minutes | Oil-free surface |
| Size & Fit Tips | 3–5 minutes | Accurate alignment |
| Glue & Attach | 10–12 minutes | Firm pressure, no gaps |
| Shape & Finish | 8–10 minutes | Smooth transition |
| Total | ~30 minutes | Flawless, long-lasting result |
Common Mistakes and How to Avoid Them
Even experienced DIYers make errors. Knowing what to watch for can save time and prevent damage to your natural nails.
| Mistake | Consequence | Solution |
|---|---|---|
| Using too much glue | Leakage, longer drying, irritation | Use a pin-sized drop |
| Poor sizing | Lifting, discomfort, unnatural look | Test multiple sizes per finger |
| Rushing the bond | Weak attachment | Hold each tip for at least 15 seconds |
| Skipping dehydration | Early lifting | Always wipe with alcohol before gluing |
| Aggressive removal | Nail thinning | Soak in acetone; never pry |
Real Example: First-Time Success Story
Sophia, a college student in Austin, avoided fake nails for years after a bad press-on experience. “They popped off by day two,” she recalls. After watching tutorials and gathering proper tools, she tried glue-on tips for her sister’s wedding. She followed the prep steps carefully, sized each nail individually, and held each tip in place as instructed. The result? A sleek almond shape in soft rose pink that lasted nearly two weeks. “I got so many compliments. I didn’t even need touch-ups,” she says. Her key takeaway: patience during prep makes all the difference.
Pro Tips for Longevity and Comfort
A great manicure shouldn’t end after a few days. Extend wear time and comfort with these practical strategies.
- Moisturize cuticles daily: Dry skin pulls at the nail edge, increasing lift risk.
- Wear gloves when cleaning: Harsh detergents weaken glue bonds.
- Avoid using nails as tools: Don’t open cans or scratch surfaces—use your knuckles instead.
- Reinforce with top coat every 3–4 days: Helps seal the tip edge and prevents water infiltration.
- Store extra tips properly: Keep them in a sealed container away from heat and humidity.
FAQ: Your Top Questions Answered
How long do glue-on fake nails last?
With proper application and care, glue-on tips typically last 7 to 14 days. Factors like nail oiliness, daily activities, and exposure to water affect longevity.
Can I reuse fake nail tips?
Yes, if removed carefully. Soak fingers in acetone for 10–15 minutes until tips loosen, then gently slide them off. Clean off residual glue and store flat for future use.
Is nail glue safe for natural nails?
When used correctly, nail glue is safe. However, frequent application without breaks can lead to dryness or thinning. Allow your nails to breathe for a few days between sets.
Final Checklist Before You Begin
Run through this quick checklist to ensure success:
- ✅ Nails are clean, dry, and free of polish
- ✅ Cuticles are pushed back (not cut)
- ✅ Correct tip sizes selected for each finger
- ✅ Glue is fresh (not clumpy or dried out)
- ✅ Workspace is well-lit and clutter-free
- ✅ Top coat and file are ready for finishing
Conclusion: Master Your DIY Manicure
There’s no need to book a salon appointment every time you want polished, elegant nails. With glue-on tips and the right technique, you can achieve a professional-looking manicure in under an hour. The key lies in preparation, precision, and consistency. Whether you're dressing up for a special occasion or simply treating yourself to a weekly beauty ritual, mastering this skill gives you flexibility, creativity, and confidence.


 浙公网安备
33010002000092号
浙公网安备
33010002000092号 浙B2-20120091-4
Comments
No comments yet. Why don't you start the discussion?