
Repurposing old climbing ropes into functional keychains is more than just a craft—it’s a tribute to adventure, sustainability, and hands-on creativity. Climbing ropes are built to endure extreme stress, making them ideal for small, rugged accessories like keychains. For beginners, the process offers an accessible entry point into knot-tying and DIY gear customization. With minimal tools and a bit of patience, you can transform retired but still sturdy rope into a personalized keepsake that lasts.
This guide walks through every step of creating a durable climbing rope keychain, from selecting the right material to finishing techniques that prevent fraying. Whether you're a climber looking to honor a well-used rope or a craft enthusiast exploring sustainable projects, this method delivers both function and meaning.
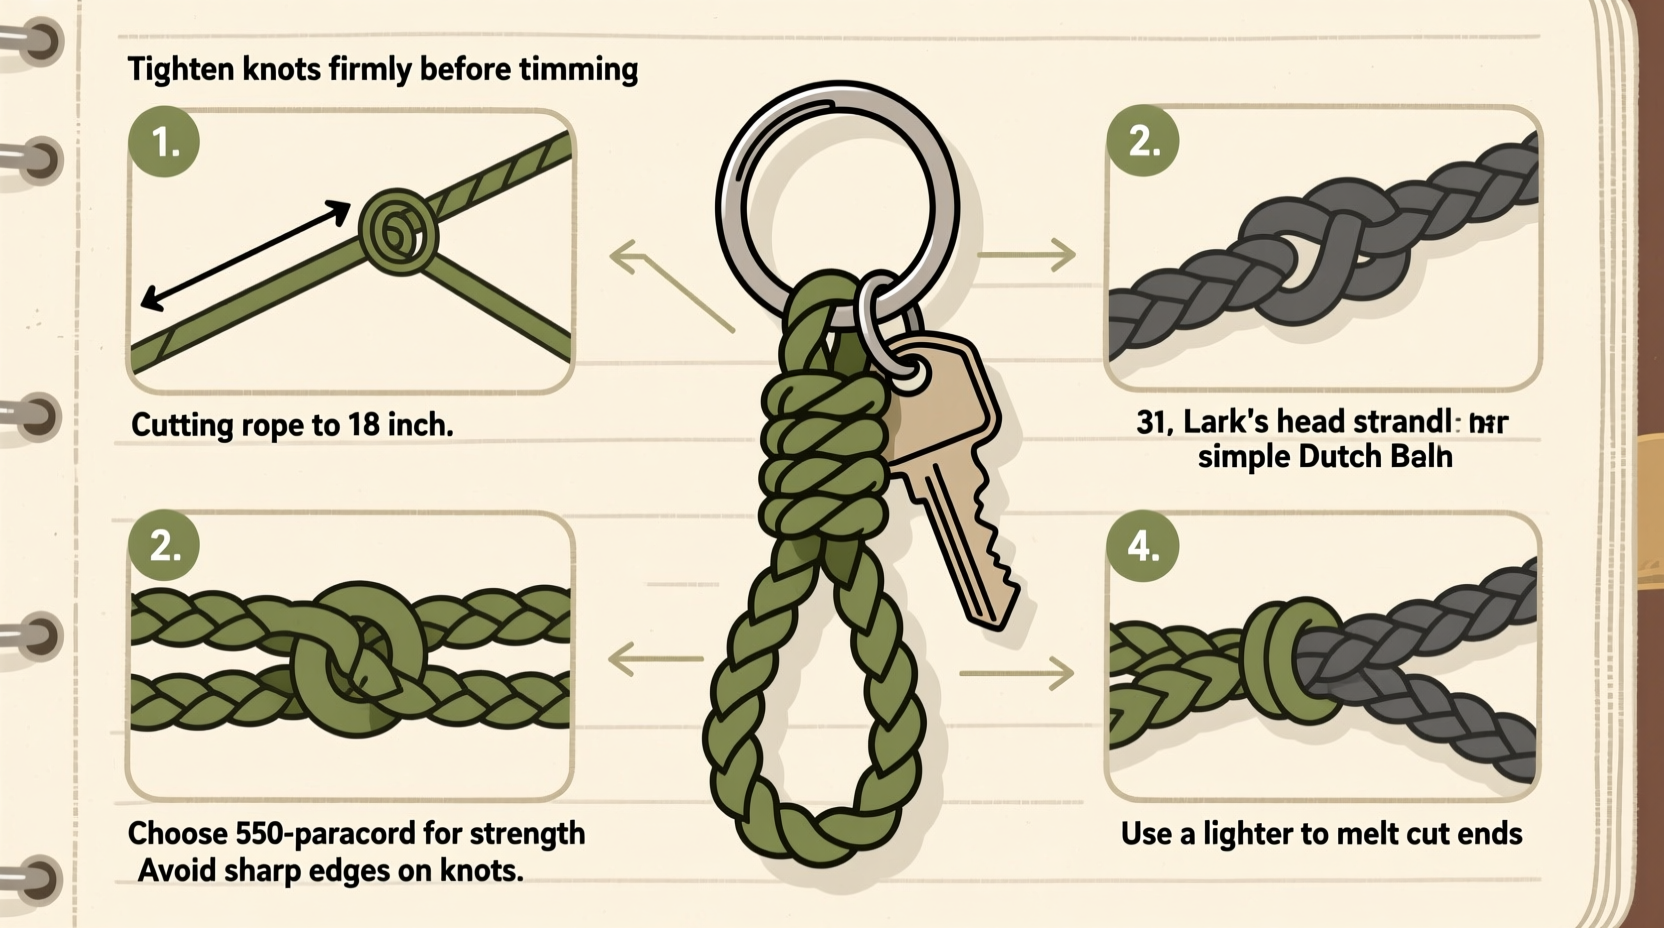
Selecting the Right Rope
Not all climbing ropes are suitable for repurposing. The first consideration is safety: retired ropes should never be used in active climbing, but they remain strong enough for decorative or light-duty applications. Look for dynamic kernmantle ropes that have been retired due to surface wear or core damage in specific sections—these often have long stretches of intact material perfect for crafting.
Avoid ropes with visible core shots (where the inner core is exposed), excessive stiffness, or chemical contamination. Ropes made from nylon or polyester blends offer the best balance of flexibility, abrasion resistance, and ease of handling.
Essential Tools and Materials
You don’t need specialized equipment to make a durable keychain. Most items are likely already in your toolkit. Here's what you’ll need:
- Retired climbing rope (6–12 inches depending on design)
- Sharp scissors or a hot knife (to prevent fraying)
- Lighter or heat source (for sealing cut ends)
- Keyring (stainless steel recommended)
- Ruler or measuring tape
- Masking tape or electrical tape (optional, for marking)
Using a hot knife or applying heat after cutting is critical. Untreated synthetic fibers will unravel over time, especially under daily use. Melting the ends slightly fuses the strands together, significantly extending the life of your keychain.
Step-by-Step Construction Guide
Follow these steps to create a compact, secure, and visually appealing keychain using a simple double loop design—a beginner-friendly structure that maximizes durability.
- Cut the Rope: Measure and cut a 7-inch piece from your retired climbing rope. This length allows room for knots and loops without excess bulk.
- Seal the Ends: Hold each cut end briefly in a flame until the fibers melt slightly. Press flat with pliers or a flat surface to smooth the seal.
- Create the Loop: Fold the rope in half to form a U-shape. Insert the folded end through the keyring, then pull the two loose ends through the loop created by the fold.
- Tighten the Lark’s Head Knot: Pull the loose ends firmly to cinch the knot snugly against the keyring. This knot is load-bearing and resists slipping.
- Add Finishing Knots (Optional): For added security and style, tie an overhand knot ½ inch from each end. Position them so they rest against the main knot to lock everything in place.
- Final Seal: Lightly apply heat to the outermost tips after knotting to prevent any future fraying.
The result is a clean, professional-looking keychain that holds up to daily jostling in pockets, bags, or carabiners.
| Step | Action | Pro Tip |
|---|---|---|
| 1 | Cut 7-inch segment | Use masking tape to mark cut points for precision |
| 2 | Seal both ends | Melt slowly; avoid charring the rope |
| 3 | Form lark’s head attachment | Ensure no twists in the loop before tightening |
| 4 | Tie stopper knots | Leave ¼ inch tail beyond knot before sealing |
| 5 | Final inspection | Test pull strength gently before use |
Dos and Don’ts for Longevity
To ensure your handmade keychain remains intact for years, follow these best practices:
| Do | Don't |
|---|---|
| Use heat to seal all cut ends | Leave raw, unsealed cuts exposed |
| Inspect periodically for wear | Assume it’s indestructible—check for thinning |
| Choose stainless steel keyrings | Use cheap zinc-coated rings that corrode |
| Add personal touches like colored thread wraps | Over-tighten knots until rope deforms |
| Store dry when not in use | Leave submerged in water or damp environments |
Expert Insight: Why Rope Integrity Matters
Knot strength and material integrity go hand-in-hand. Even minor degradation can compromise performance in high-stress scenarios. While a keychain doesn’t face climbing-level loads, understanding rope behavior enhances craftsmanship.
“Even retired ropes carry history—and strength. But respect their limits. A well-made knot multiplies utility, but only if the base material is sound.” — Daniel Reyes, AMGA-Certified Rock Guide and Gear Instructor
Reyes emphasizes that inspecting fiber condition before repurposing ensures both safety and satisfaction. “If the sheath slides over the core when compressed, that’s a red flag. Skip those sections,” he advises.
Real Example: Turning Memory Into Function
Sarah, a weekend climber from Colorado, retired her first lead rope after five seasons of use. Rather than discarding it, she saved several segments. One became a keychain for her partner, incorporating a small metal tag engraved with the route name “Lunar Slab – 2022.” Using the lark’s head method described here, she completed the project in under 20 minutes. Two years later, the keychain still hangs from her backpack zipper, showing only mild surface fading but zero structural wear.
“It’s not just about keeping keys together,” she says. “It’s about carrying a piece of what matters.”
Frequently Asked Questions
Can I use static rope for a keychain?
Yes. Static ropes are actually easier to work with because they’re less elastic. They hold knots better and maintain shape over time, making them excellent for crafts.
How do I clean a rope keychain?
Spot clean with a damp cloth and mild soap. Avoid soaking, as prolonged moisture can degrade synthetic fibers over time. Let air dry completely before reuse.
Is there a way to make the keychain adjustable?
While not common for keychains, you can incorporate a midshipman’s hitch or taut-line hitch if you want a sliding loop. However, fixed designs are more reliable for everyday carry.
Conclusion: Start Small, Build Meaning
Crafting a durable climbing rope keychain is a simple yet meaningful way to extend the life of gear that once supported your adventures. It requires little investment but rewards with lasting utility and emotional resonance. Every knot tied is a nod to self-reliance, sustainability, and the stories embedded in well-worn equipment.


 浙公网安备
33010002000092号
浙公网安备
33010002000092号 浙B2-20120091-4
Comments
No comments yet. Why don't you start the discussion?