
A standing desk can transform your workday—improving posture, energy, and overall well-being. But no matter how ergonomic your setup, tangled cords dangling from monitors, laptops, and power strips can ruin the aesthetic and create daily frustration. A clean workspace isn’t just about visual appeal; it reduces distractions, improves safety, and makes cleaning easier. The challenge lies in managing cables effectively while maintaining full functionality, especially with desks that move up and down.
Hidden cables don’t mean inaccessible ones. The goal is organization—not elimination. With the right tools and strategies, you can conceal cords without sacrificing flexibility or ease of access. Whether you're working from home or optimizing an office layout, these proven methods will help you achieve a sleek, professional look while keeping your tech fully operational.
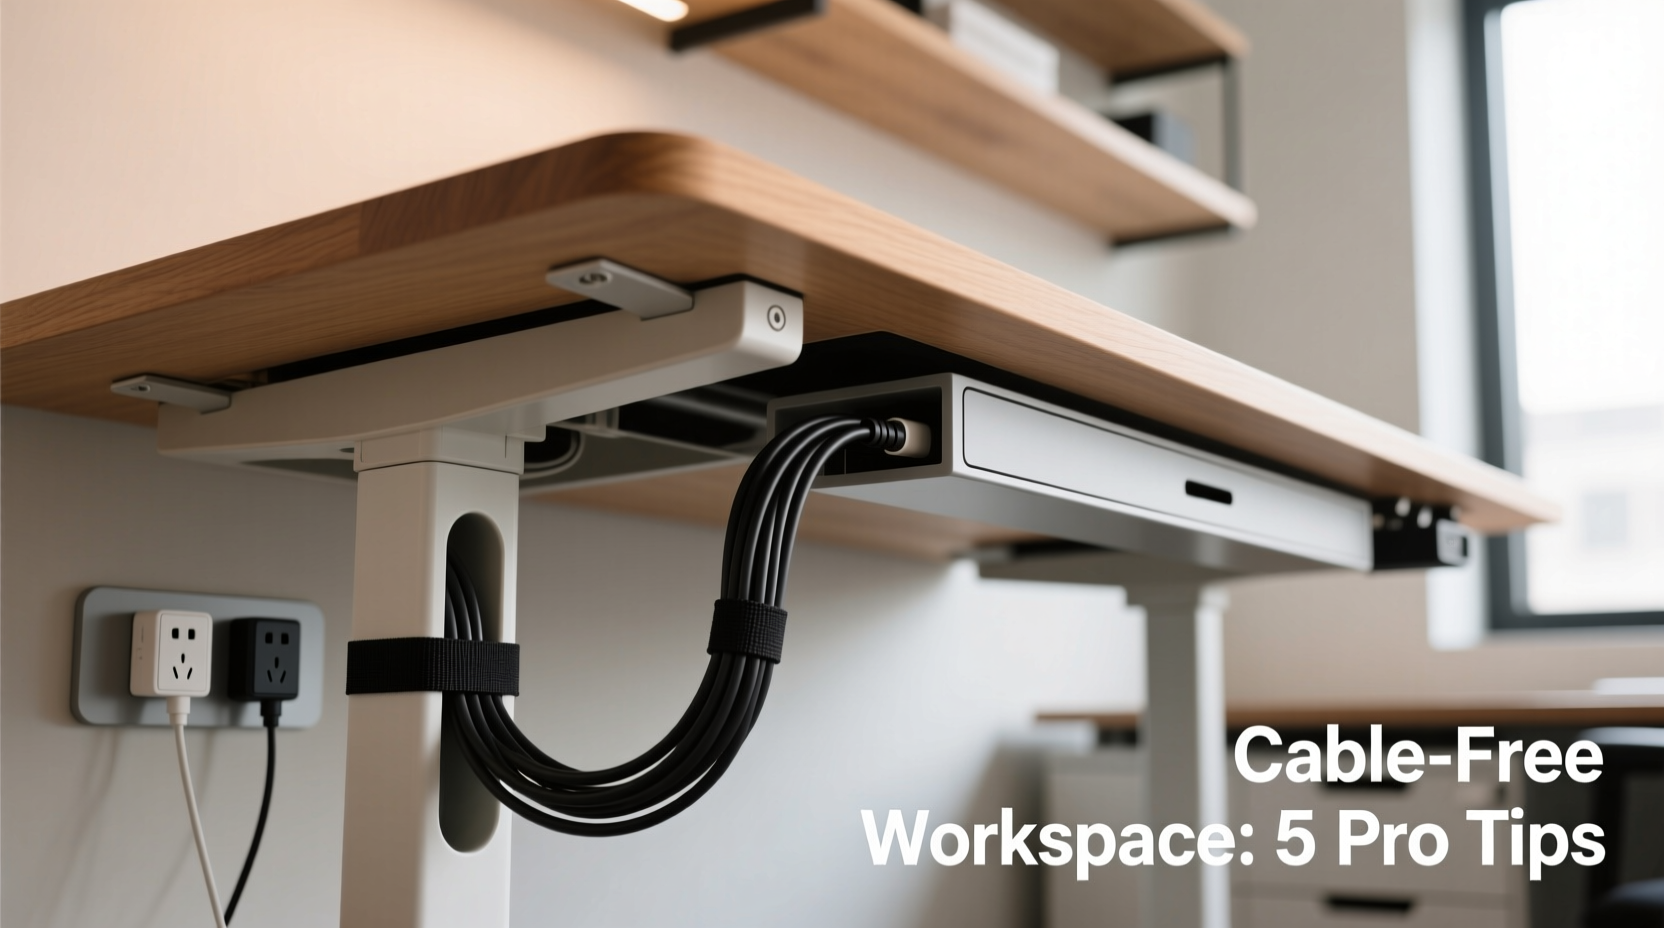
Why Cable Management Matters for Standing Desks
Standing desks introduce unique cable challenges. Unlike static desks, their moving parts require cords to accommodate vertical motion without strain, snagging, or disconnection. Poorly managed cables can:
- Increase tripping hazards under the desk
- Limit smooth transitions between sitting and standing positions
- Cause wear and tear on wires due to constant friction
- Create visual clutter that disrupts focus
According to interior designer and workspace consultant Marcus Lin, “A clean desk signals control and intentionality. When people see organized technology, they assume the user is efficient—even if that’s not always true.”
“Cable management isn't just cosmetic—it's a core component of ergonomic design. On adjustable desks, proper routing prevents mechanical interference and extends both desk and cable lifespan.” — Dr. Lena Patel, Ergonomics Researcher at HumanTech Lab
Investing time in hiding and organizing your cables pays off in long-term usability and mental clarity. Below are practical, tested solutions tailored specifically for standing desks.
Top 5 Methods to Hide Cables on a Standing Desk
1. Use Adhesive Cable Clips and Raceways
One of the simplest and most cost-effective solutions is using adhesive cable clips or plastic raceways. These small channels attach directly to the underside of your desk and guide cords along a fixed path.
For standing desks, choose flexible raceways or segmented clips that allow slight movement as the desk adjusts. Install them starting near your monitor arms or laptop dock, running toward the back edge of the desk. From there, connect to a wall outlet or floor-mounted power strip.
2. Install a Cable Management Tray or Under-Desk Basket
An under-desk cable tray mounts beneath the desktop surface and acts as a storage hub for excess cord length, adapters, and even small devices like USB hubs. These trays prevent cables from hanging freely and keep everything contained during height changes.
Look for trays with rubber-lined edges to protect wire insulation and models designed for dynamic desks. Some advanced versions include built-in grommets and Velcro straps for additional control.
Mount the tray toward the rear third of the desk to balance weight and avoid interference with leg movement. Bundle cords inside using twist ties or reusable silicone wraps before placing them in the basket.
3. Utilize a Cord Sleeve or Braided Wrap
If you have multiple cords running from your devices to power sources, bundling them neatly enhances both appearance and manageability. A braided nylon cord sleeve allows you to group USB, HDMI, power, and audio cables into one streamlined bundle.
Unlike rigid conduit, braided sleeves flex with desk movements and come in various colors to match your decor. Start by aligning all cables side by side, then feed them through the sleeve from end to end. Secure loose ends with Velcro straps or magnetic cable holders mounted to the desk frame.
This method works especially well when combined with a vertical cable channel attached to the desk leg.
4. Route Cables Through a Vertical Cable Duct
Some standing desks come with pre-drilled holes or integrated cable ducts. If yours doesn’t, consider adding a low-profile vertical cable duct along one leg. These slim enclosures snap or screw onto metal frames and provide a protected pathway from floor to desktop.
Feed all major cables—monitor power, laptop charger, Ethernet—through the duct. At the top, use a swivel joint or slack loop to allow movement without tension. This keeps cords completely out of sight and protects them from foot traffic and pets.
Pro tip: Run Ethernet and power separately if possible. Mixing high-voltage and data lines in tight spaces can sometimes cause interference.
5. Employ Magnetic Cable Holders and Modular Systems
Modern standing desks often support modular accessories. Brands like Uplift Desk and Fully offer magnetic cable management arms that attach to the desk frame. These arms extend slightly outward and hold bundled cords in place with gentle magnetic force, allowing natural swing during height adjustments.
Alternatively, use small magnetic hooks (rated for metal frames) to suspend coiled cords just above the floor. This prevents dragging while maintaining slack for full range of motion.
Modular systems may cost more upfront but deliver superior aesthetics and adaptability over time.
Step-by-Step Guide to Organizing Your Standing Desk Cables
Follow this sequence to systematically eliminate cable chaos:
- Unplug and remove all devices from the desk. Lay them on the floor for easy access.
- Identify essential cables: Keep only what you use daily. Replace frayed wires and discard old chargers.
- Measure cable lengths: Ensure each cord has enough slack to reach outlets at both lowest and highest desk positions—with about 6–12 inches of extra loop.
- Group similar cables using color-coded labels or tags (e.g., “Monitor,” “Laptop,” “Lamp”).
- Bundle cords together with Velcro straps or a braided sleeve, avoiding tight bindings that restrict movement.
- Install cable clips or raceway along the underside of the desk, following a straight route from device zone to desk edge.
- Add a vertical duct or magnetic holder on the desk leg to route bundles downward cleanly.
- Connect to a centralized power source, such as a surge protector mounted behind a baseboard or tucked into a floor box.
- Test full range of motion: Raise and lower the desk slowly, checking for snags, stretching, or noise from rubbing wires.
- Finalize with labeling: Mark each plug or port so future changes are quick and error-free.
This process typically takes 30–60 minutes but can save hours of frustration over months of use.
Do’s and Don’ts of Standing Desk Cable Management
| Do | Don’t |
|---|---|
| Leave slack in cords to accommodate height changes | Stretch cables taut between fixed points |
| Use soft ties like Velcro instead of zip ties | Secure wires too tightly, risking insulation damage |
| Label each cable near connectors | Wrap cords around sharp desk edges |
| Route high-frequency cables (like Ethernet) away from power lines | Ignore electromagnetic interference risks |
| Anchor moving bundles with magnetic or swivel mounts | Let cables dangle where legs or wheels can catch them |
Real-World Example: Transforming a Home Office Setup
Jamie, a freelance graphic designer in Portland, struggled with a messy dual-monitor station on her electric standing desk. Every time she switched from sitting to standing, her HDMI cable would snag on the desk mechanism, occasionally disconnecting her secondary screen.
She resolved it by purchasing a 3-foot braided cord sleeve and two magnetic cable arms compatible with her desk’s steel frame. She grouped her laptop charger, monitor power, HDMI, and USB hub into the sleeve, secured it mid-desk with a clip, then used the magnetic arms to guide the bundle down the left leg. She added a labeled surge protector inside a fabric floor bin nearby.
The result? A completely hidden cable run that moved smoothly with every adjustment. Jamie reported not only improved focus but also fewer neck strains from turning to reconnect loose cords.
Essential Checklist for a Clutter-Free Standing Desk
Before finalizing your setup, go through this checklist:
- ✅ All non-essential cables removed or stored
- ✅ Each cord has sufficient slack at maximum desk height
- ✅ Bundled wires are secured with flexible ties (not zip ties)
- ✅ No cables cross moving parts or pinch points
- ✅ Power strip or outlet is safely positioned and accessible
- ✅ Labels applied to plugs and ports for easy identification
- ✅ Full up/down cycle tested without obstruction
- ✅ Dusting access maintained under the desk
Frequently Asked Questions
Can I use zip ties to organize standing desk cables?
Avoid standard plastic zip ties—they’re too rigid and can damage insulation over time, especially with repeated movement. Instead, use reusable Velcro straps, silicone bands, or magnetic wraps that allow slight give during desk adjustments.
What if my standing desk doesn’t have grommet holes?
No problem. Most cable management solutions rely on adhesive mounts, clamps, or magnetic attachments that don’t require drilling. You can still achieve a clean look using under-desk trays, raceways, and vertical ducts mounted externally.
How do I hide cords without mounting anything permanently?
Try a combination of cord sleeves, under-desk mesh baskets (with clamp-on brackets), and a decorative floor box for your power strip. These are removable, renter-friendly options that maintain cleanliness without damaging furniture or walls.
Final Thoughts: Elevate Your Workspace, One Cable at a Time
A clean standing desk isn’t achieved overnight—it’s the result of thoughtful planning and consistent attention to detail. Hiding cables isn’t about perfection; it’s about creating a space that supports your workflow, minimizes stress, and reflects professionalism.
You don’t need expensive gear to start. Even basic adhesive clips and a few Velcro straps can dramatically improve your setup. The key is addressing cable movement proactively, especially on adjustable desks where neglect leads to frustration and hardware wear.


 浙公网安备
33010002000092号
浙公网安备
33010002000092号 浙B2-20120091-4
Comments
No comments yet. Why don't you start the discussion?