
Many creators using CapCut to edit videos for YouTube report a common frustration: their final product looks sharp in the app but appears blurry once uploaded. This issue can be disheartening, especially after investing time into crafting engaging content. The root cause isn’t always obvious—it often lies in mismatched export settings, improper aspect ratios, or YouTube’s compression algorithms amplifying low-bitrate footage. Understanding the technical interplay between CapCut's export options and YouTube’s upload standards is essential to preserving video clarity.
The good news is that this problem is almost always fixable with the right adjustments. By optimizing your editing workflow, export settings, and source media quality, you can ensure your videos maintain their intended sharpness when viewed on any device.
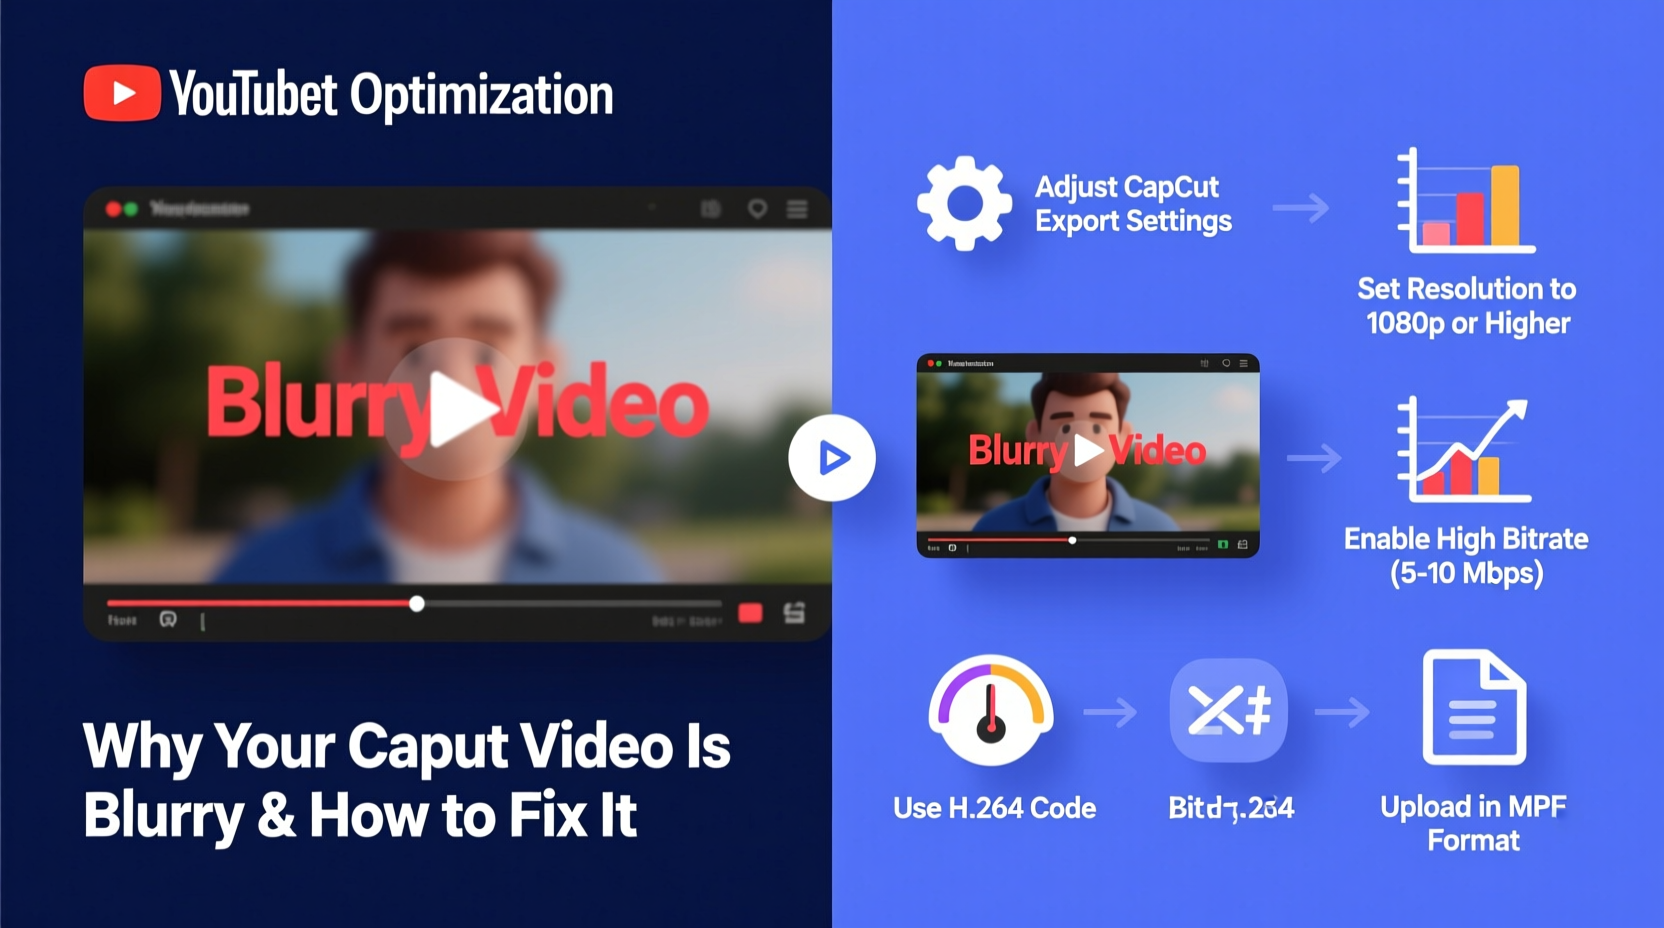
Understanding Why CapCut Videos Become Blurry on YouTube
YouTube automatically processes every uploaded video through its transcoding system. During this process, the platform generates multiple versions of your video at different resolutions and bitrates to accommodate various internet speeds and screen sizes. If your original file lacks sufficient resolution or bitrate, these compressed versions will appear soft or pixelated—even if the video looked fine in CapCut.
CapCut, while powerful and user-friendly, defaults to certain export settings that may not align with YouTube’s best practices. For example:
- Exporting at lower resolutions (e.g., 720p) even when source footage supports 1080p or 4K.
- Using aggressive compression to reduce file size, sacrificing detail.
- Mismatched frame rates or aspect ratios causing scaling artifacts.
- Overuse of digital zoom or cropping within CapCut, reducing effective resolution.
These factors compound during YouTube’s processing, leading viewers to perceive your video as “blurry” despite your efforts.
“Video quality loss from editing apps usually stems from under-exporting—not pushing the output to match the source material’s capabilities.” — Jordan Lee, Digital Media Engineer
Step-by-Step Guide to Fix Blurry CapCut Videos Before Uploading
To prevent blurriness, follow this optimized workflow before exporting from CapCut and uploading to YouTube:
- Start with high-quality source footage. Record in at least 1080p at 30fps or higher. Use proper lighting and avoid digital zoom during recording.
- Avoid over-cropping or zooming in post. Each 2x zoom reduces effective resolution by half. Limit digital zoom to 110–120% maximum.
- Set project resolution correctly. In CapCut, go to Settings > Project Settings and select 1080x1920 (for vertical) or 1920x1080 (horizontal), depending on your content format.
- Export at the highest compatible settings:
- Resolution: 1080p (or 4K if supported by your device and source)
- Frame Rate: Match your original footage (usually 30fps or 60fps)
- Bitrate: Choose “High” or “Ultra” if available; aim for at least 15 Mbps for 1080p
- Format: MP4 (H.264 codec recommended)
- Use “Link to YouTube” export option (if available). This preset optimizes metadata and encoding specifically for YouTube compatibility.
- Upload directly without re-compressing. Do not run the exported file through another converter or editor unless necessary.
- Wait for full processing on YouTube. After upload, YouTube shows a lower-quality preview first. Wait 10–30 minutes (depending on length) for 1080p/4K versions to become available.
Do’s and Don’ts: Export Settings Comparison
| Practice | Do | Don't |
|---|---|---|
| Resolution | Export at 1080p or 4K | Accept default 720p export |
| Aspect Ratio | Match source (9:16, 16:9, etc.) | Force stretch or crop unnecessarily |
| Bitrate | Select “High” or manually set ≥15 Mbps | Use “Low” or “Balanced” for long-term quality |
| File Format | MP4 with H.264 | AVI or MOV unless required |
| Post-Export Handling | Upload directly to YouTube | Compress again with third-party tools |
Real Example: From Blurry Vlog to Crisp Content
Sophia, a travel vlogger, noticed her scenic mountain clips looked hazy on YouTube despite looking vibrant in CapCut. Her initial exports were at 720p with medium bitrate to save phone storage. Viewers commented that distant details—like mountain ridges and signage—were indistinct.
After adjusting her workflow, she changed her CapCut export settings to 1080p at 60fps with high bitrate. She also stopped applying heavy digital zoom during editing. Upon re-uploading a new video with corrected settings, viewer feedback improved dramatically: “Finally, I can see the trail markers clearly!” one wrote. YouTube’s 1080p version loaded cleanly across devices, and retention increased by 18% due to better visual engagement.
This case illustrates how small technical changes yield significant perceptual improvements—even without upgrading cameras or software.
Essential Checklist for Sharp CapCut-to-YouTube Workflow
Use this checklist every time you prepare a video for YouTube:
- ✅ Recorded in 1080p or higher resolution
- ✅ Edited in a project matching source aspect ratio
- ✅ Minimal digital zoom or cropping applied
- ✅ Export resolution set to 1080p or 4K
- ✅ Frame rate matches original footage
- ✅ Bitrate set to “High” or “Ultra”
- ✅ File format is MP4 (H.264)
- ✅ Exported video reviewed on large screen
- ✅ Uploaded directly to YouTube without reprocessing
- ✅ Allowed time for full processing before judging quality
Frequently Asked Questions
Why does my video look fine in CapCut but blurry on YouTube?
CapCut previews use optimized rendering for your device, but YouTube applies compression based on your upload’s resolution and bitrate. If your export is below 1080p or uses low bitrate, YouTube’s scaled versions will lack detail. Additionally, YouTube takes time to process high-resolution versions—initial playback may appear soft until full processing completes.
Can I fix a blurry video after exporting from CapCut?
Once a video is heavily compressed, lost detail cannot be fully recovered. However, you can try re-exporting from CapCut with higher settings. Avoid using “enhancement” filters or AI upscalers—they often add artificial sharpness that creates noise rather than true clarity.
Does CapCut support 4K export for YouTube?
Yes, CapCut supports 4K export on most modern smartphones and desktop versions—if your source footage is 4K and your device has sufficient processing power. Look for “4K” or “2160p” in the export menu. Note: 4K files are significantly larger and may take longer to upload.
Final Thoughts: Quality Starts Before Export
Blurry videos aren’t just a technical nuisance—they impact viewer trust and engagement. A sharp, clear image signals professionalism and attention to detail. While CapCut is designed for simplicity, unlocking its full potential requires deliberate choices in both creation and export phases.
Remember: YouTube rewards high-quality uploads with better visibility, longer watch times, and stronger audience retention. By aligning your CapCut settings with YouTube’s technical expectations, you ensure your creative effort translates faithfully to your audience’s screen.


 浙公网安备
33010002000092号
浙公网安备
33010002000092号 浙B2-20120091-4
Comments
No comments yet. Why don't you start the discussion?