
Every cat deserves a safe, warm retreat—especially those spending time outdoors. Whether you're sheltering a stray, supporting a local colony, or building a snug hideaway for your own pet, a well-constructed cat house can make all the difference in their comfort and health during colder months. Inspired by proven techniques from popular YouTube DIY builders, this guide delivers a reliable, budget-friendly method to create a durable, insulated shelter that stands up to wind, rain, and freezing temperatures.
The best designs prioritize warmth, dryness, and ease of maintenance. This article walks through every phase—from planning to finishing touches—with real-world tested tips that ensure success even for beginners.
Selecting the Right Materials
The foundation of a warm cat house lies in material choice. Many online builds use repurposed plastic storage bins or wooden crates, but longevity and insulation matter most. Wood offers superior thermal mass and breathability compared to plastic, which can trap moisture and become brittle in cold weather.
Plywood (½ inch exterior grade) is ideal for walls and roof due to its resistance to warping and moisture. For insulation, rigid foam board (XPS or EPS) outperforms fiberglass or batting because it resists water absorption and maintains R-value over time. Avoid particleboard or MDF—they swell when damp.
| Component | Recommended Material | Avoid |
|---|---|---|
| Walls & Roof | Exterior-grade plywood | Particleboard, thin plastic bins |
| Insulation | 1-inch rigid foam board | Fiberglass, cotton batting |
| Floor Base | Pressure-treated wood on bricks | Direct ground contact |
| Entry | Flexible vinyl flap | Wide open openings |
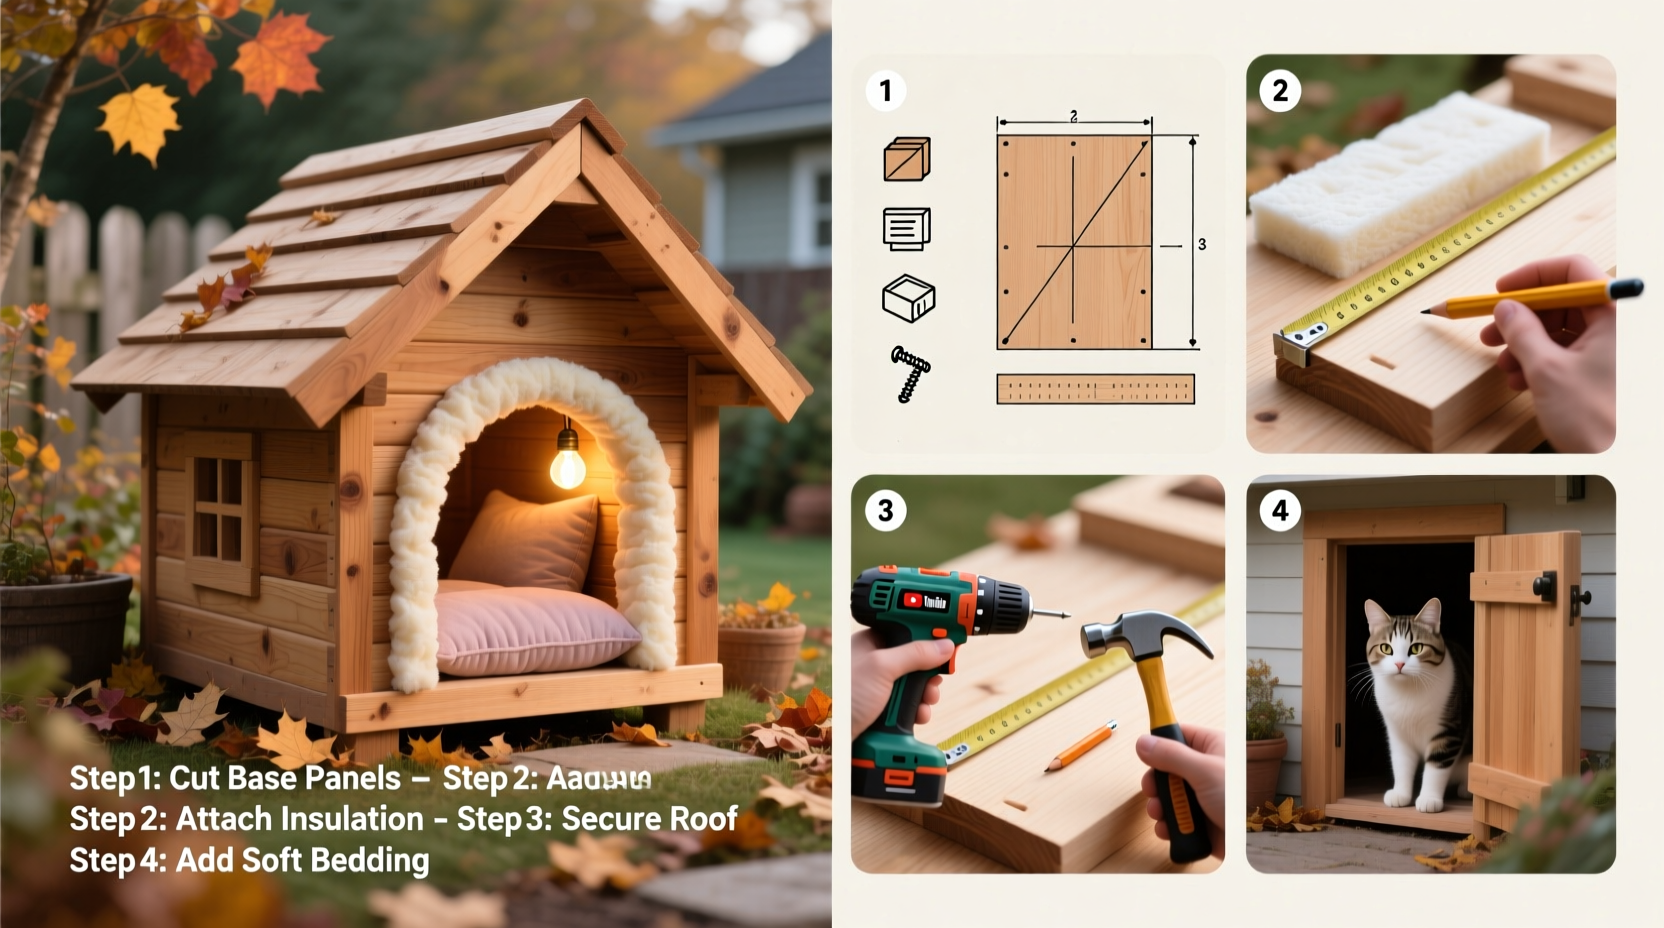
Step-by-Step Construction Process
- Design and Size Planning: A single-cat shelter should be roughly 18” x 24” with an interior height of 16”. Larger spaces lose heat faster—smaller is warmer. Sketch a simple box with a sloped roof for water runoff.
- Cut the Panels: Using a circular saw, cut six pieces: front, back, two sides, floor, and roof. The front panel includes a 6” diameter entry hole, placed low (3–4” from base) to block drafts.
- Add Insulation Layer: Trace each wall onto rigid foam and cut with a utility knife. Glue panels inside the structure using construction adhesive before assembling. Seal seams with aluminum tape to prevent convective heat loss.
- Assemble the Box: Use exterior-grade screws to join walls to the floor and each other. Apply silicone caulk at joints before screwing to waterproof seams. Leave the roof unattached until final stages.
- Elevate the Floor: Mount the entire structure on two concrete pavers or bricks. This prevents moisture wicking and keeps the interior dry.
- Attach the Roof: Slope it slightly backward for drainage. Secure with hinges or screws accessible from above for cleaning. Cover with roofing felt or paint with elastomeric coating for weatherproofing.
- Install Entry Flap: Cut a slit below the doorway and attach a piece of recycled rubber mat or heavy vinyl. This acts as a door, blocking wind while allowing easy access.
Thermal Optimization Tips
Heat retention is more important than size. YouTube creators like “Kitten Lady” and “DIY Cat Shelter Builds” emphasize minimizing air volume and sealing drafts. One effective trick: place a small straw bed inside rather than towels or blankets. Straw wicks moisture away and traps air, creating a passive heating layer. Unlike hay, it doesn’t mold easily and cats instinctively burrow into it.
“Cats conserve body heat best in confined, draft-free spaces. A shelter that’s too big will never stay warm.” — Dr. Rebecca Green, Feline Welfare Researcher, ASPCA
Real-World Example: Community Shelter Project
In Ithaca, NY, a volunteer group built 14 cat houses using this exact method after a harsh winter led to hypothermia cases among feral cats. They followed a YouTube tutorial that emphasized double-walled insulation and elevated bases. After six months, only one unit showed wear—and that was due to raccoon activity, not weather damage. Volunteers reported cats consistently using the shelters even at -10°F, with internal temperatures staying 25–30°F above ambient when occupied.
They modified the design slightly by adding a removable roof panel for cleaning and lining the interior walls with thin cedar boards to deter pests. Their feedback confirmed that simplicity, insulation quality, and elevation were the keys to success.
Essential Build Checklist
- ☐ Measure and sketch dimensions (18”x24” interior ideal)
- ☐ Cut exterior-grade plywood for all structural parts
- ☐ Cut and glue 1” rigid foam insulation to interior surfaces
- ☐ Drill entry hole 3–4” above floor on one side
- ☐ Assemble box with screws and waterproof caulk
- ☐ Elevate structure on bricks or pavers
- ☐ Attach sloped roof with weather-resistant sealant
- ☐ Install flexible entry flap
- ☐ Line interior with straw (not fabric)
- ☐ Place in sheltered location, facing away from prevailing winds
Frequently Asked Questions
Can I use a plastic storage bin instead?
You can, but with limitations. Plastic bins are quick to modify but conduct cold and may crack over time. If used, line the inside with rigid foam, elevate it, and insulate the floor heavily. Never rely on fabric alone for warmth—plastic lacks thermal mass and creates condensation.
How do I keep the house clean and hygienic?
Design for maintenance. A hinged or removable roof allows full access. Replace straw bedding monthly or when damp. Wipe interior surfaces with a mild vinegar solution (1:4 with water) if needed. Avoid strong cleaners—cats avoid shelters that smell unnatural.
Where should I place the cat house?
Choose a quiet, dry spot protected from wind and rain—under a porch, deck, or evergreen shrub works well. Face the entrance away from prevailing winds (usually north or northwest in the Northern Hemisphere). Avoid low areas where water pools.
Final Thoughts and Call to Action
Building a warm, functional cat house isn’t about complex tools or expensive materials—it’s about thoughtful design rooted in real-world needs. By following these proven steps inspired by trusted YouTube builders and animal welfare experts, you create more than shelter; you offer safety, dignity, and comfort to animals who depend on human kindness.
This project takes under a weekend, costs less than $50 in materials, and can save lives. Share your build online, tag local rescue groups, or teach others in your community. A single cat house multiplies in impact when knowledge spreads.


 浙公网安备
33010002000092号
浙公网安备
33010002000092号 浙B2-20120091-4
Comments
No comments yet. Why don't you start the discussion?