
Felt shoes are more than just cozy—they’re sustainable, customizable, and surprisingly simple to make at home. Unlike mass-produced footwear that often sacrifices comfort for style, handmade felt slippers allow you to design the fit, shape, and texture exactly how you want. With just a few basic materials and some patience, even complete beginners can create warm, durable, and uniquely personal footwear. This guide walks you through every stage of the process, from selecting wool to finishing your first pair.
Gathering Your Materials and Tools
The foundation of successful felt shoe crafting lies in choosing the right supplies. Unlike knitting or sewing, felting relies on natural fibers—specifically wool—that respond well to moisture, heat, and agitation. The transformation from loose fiber to solid fabric is both scientific and satisfying.
Here’s what you’ll need to get started:
- Raw wool roving (preferably 100% wool like Corriedale or Merino)
- Plastic bubble wrap (large sheet, ideally with small bubbles)
- A rubber mat or non-slip surface
- Lukewarm soapy water (use olive oil soap or pH-neutral dish soap)
- Spray bottle filled with warm water
- Towel for drying
- Scissors
- Cardboard or paper for tracing foot outlines
- Pencil or chalk
Creating Your Foot Template
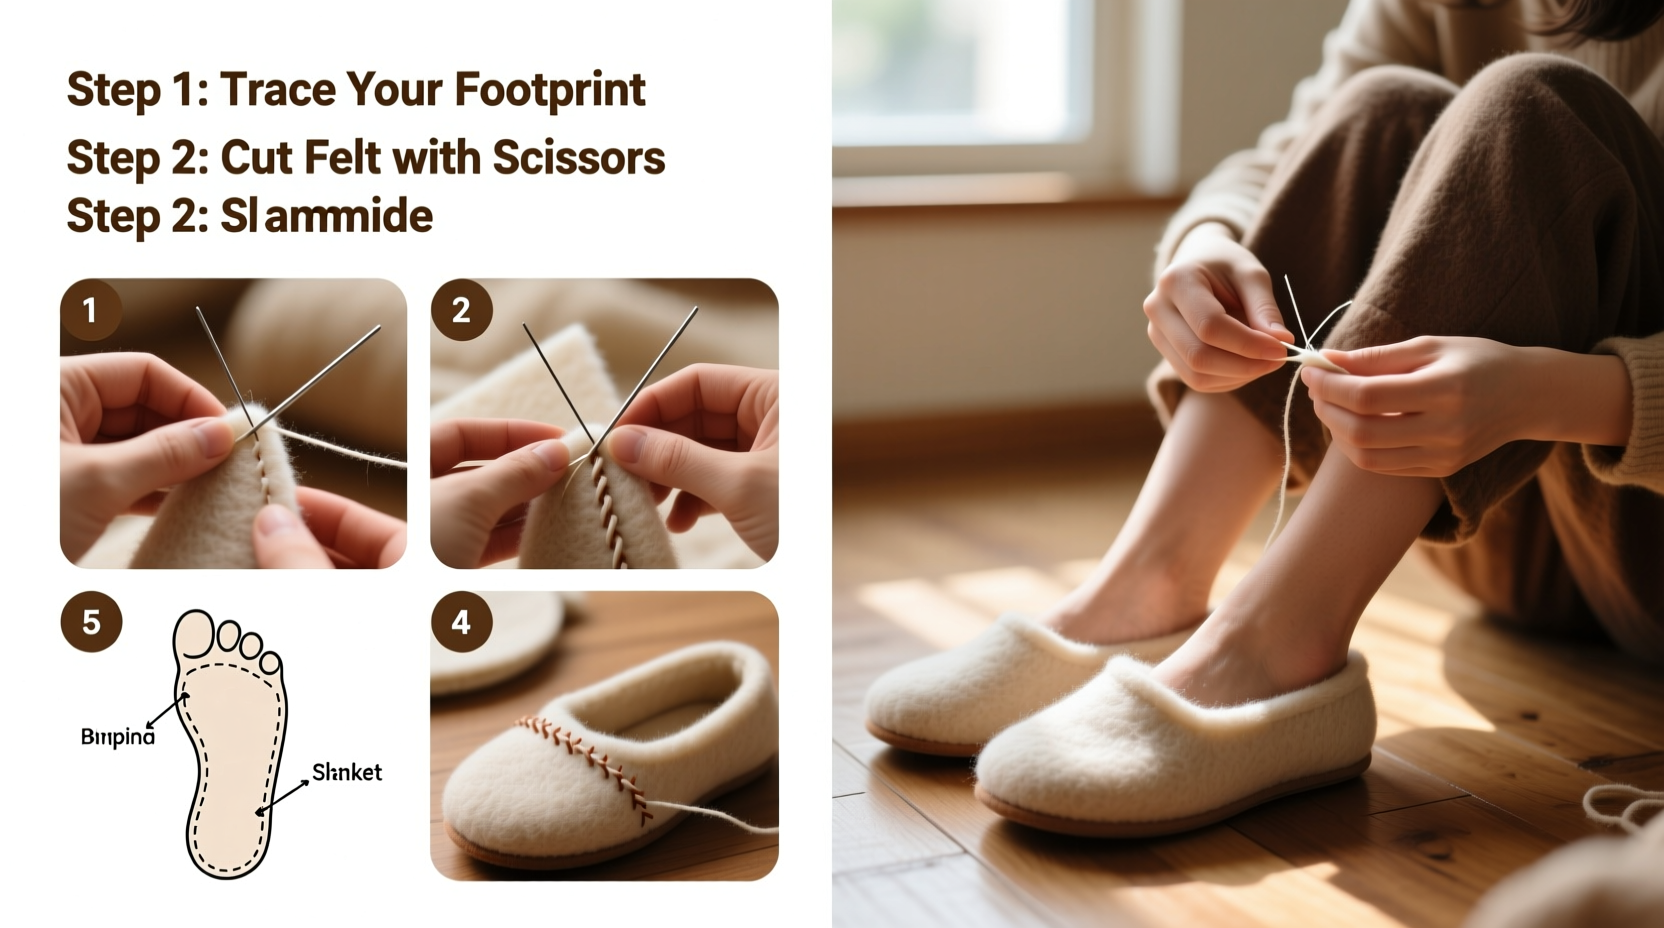
Comfort begins with accurate sizing. Begin by tracing the outline of your foot onto a piece of cardboard. Wear the socks you intend to use with the slippers, as thickness affects fit. Stand on the cardboard while someone else traces around your foot, keeping the pencil vertical to avoid distortion.
Add about 15–20% extra space around the entire outline. Felt shrinks significantly during fulling (the final stage of felting), and underestimating shrinkage leads to unusable shoes. For example, if your foot measures 10 inches long, aim for a template around 11.5 to 12 inches.
Cut out two identical templates—one for the left foot, one for the right. Label them clearly. These will serve as your base pattern throughout the layering process.
“Hand-felted footwear molds to your foot over time, offering a level of personalized comfort no factory-made shoe can replicate.” — Lena Peterson, Textile Artist & Natural Fiber Advocate
Layering Wool Roving: Building the Shoe Base
Now comes the tactile part—laying down the wool. Work on a flat, protected surface covered with plastic bubble wrap, bubble-side up. This provides friction essential for interlocking fibers.
Follow these steps to build a strong, even sole:
- Begin with a thin layer of wool roving placed horizontally across the template. Avoid gaps or thin spots.
- Add a second layer vertically, creating a crosshatch pattern for structural integrity.
- Repeat with diagonal layers at 45° and 135° angles. Four layers are usually sufficient for durability.
- Once layered, lightly mist the wool with warm water using a spray bottle. Do not soak it yet.
- Sprinkle a few drops of liquid soap over the surface to activate felting.
Gently press down with your palms to encourage initial fiber bonding. Be careful not to shift the layers out of alignment. Repeat the same process to create a second sole for the other foot.
Forming the Upper and Shaping the Slipper
After preparing the soles, move on to the upper part of the shoe. This can be made separately and later attached, or built directly on top of the sole for seamless construction.
To form the upper:
- Create a vertical wall of wool roving along the edge of the sole, standing the fibers upright and layering them in a ring.
- Gradually angle the fibers inward as you add height, shaping a gentle cup that will cradle your heel and ankle.
- For added warmth, include a second layer of insulation by laying thin sheets of roving inside the cup before wetting.
- Mist and soap the upper just like the sole, then begin rubbing gently with your fingertips to initiate felting.
This method, known as “resist felting,” allows you to maintain volume in the upper while fusing it securely to the sole. It takes practice to balance firmness and flexibility, but consistency improves with each pair.
The Felting Process: From Fiber to Fabric
Once your shoes are layered and dampened, the real transformation begins. Fulling—the process of agitating wet wool to cause fibers to tangle and compact—is where magic happens.
Follow this timeline for effective hand felting:
| Stage | Action | Duration |
|---|---|---|
| Initial Rubbing | Use fingertips to rub soapy areas in circular motions | 5–7 minutes |
| Rubbing Through Wrap | Roll bubble wrap over the piece, applying moderate pressure | 10–15 minutes |
| Agitation | Roll vigorously with hands, then knead like dough | 15–20 minutes |
| Rinsing | Rinse under cool water until soap runs clear | 3–5 minutes |
| Final Fulling | Continue rolling/kneading without soap to tighten structure | 10 minutes |
You’ll know the felting is complete when the fabric feels dense, doesn’t separate when pulled, and holds its shape without sagging. Test a small corner—if it resists tearing and shows no loose fibers, you’re done.
Drying and Finishing Touches
Shape matters during drying. Gently stretch the slippers back into form, ensuring the heel cup and toe box retain their intended dimensions. Place them over a rounded object like a mug or small bowl to maintain curvature.
Let them air-dry completely—this may take 24 to 48 hours depending on humidity. Avoid direct heat sources like radiators or hairdryers, which can cause warping or cracking.
Once dry, inspect for weak spots. If needed, spot-felt any thin areas by adding a small patch of roving, wetting it, and rubbing until fused.
Optional enhancements include:
- Adding a non-slip backing with suede fabric glued to the sole
- Embroidering decorative patterns using yarn
- Dyeing with natural dyes like onion skins or madder root for color
Mini Case Study: Sarah’s First Pair
Sarah, a hobby crafter from Vermont, had never worked with raw wool before. She followed this guide over a weekend, using locally sourced Corriedale roving. Her initial attempt shrank too much due to over-agitation, resulting in snug-fitting slippers. But instead of discarding them, she adjusted her next batch by reducing rubbing time and increasing starting size. By her third try, she produced a perfectly fitted pair with a soft upper and sturdy sole. Encouraged, she gifted matching sets to her family and now hosts monthly felting workshops at her local craft center.
Common Pitfalls and How to Avoid Them
Even experienced crafters encounter issues. Here’s a quick checklist to stay on track:
- ✅ Measure feet correctly with socks on
- ✅ Allow 15–20% extra for shrinkage
- ✅ Use layered fiber directions for strength
- ✅ Apply consistent, gradual agitation—not too fast
- ✅ Rinse thoroughly to remove all soap residue
- ✅ Dry slowly in open air, reshaped properly
Frequently Asked Questions
Can I make felt shoes with synthetic fibers?
No. Only animal-based protein fibers like sheep’s wool can truly felt. Synthetic fibers may hold shape temporarily but won’t undergo the chemical and physical changes required for durable felting.
How long do homemade felt slippers last?
With regular indoor use, a well-made pair can last 1–2 years. Adding a leather or rubber sole extends lifespan significantly. Avoid wearing them outdoors or on rough surfaces.
Is needle felting better than wet felting for shoes?
Needle felting is excellent for details and small projects but inefficient for large, thick items like shoes. Wet felting produces denser, more flexible fabric ideal for footwear. Many crafters combine both—wet felt the base, then needle felt reinforcements.
Start Crafting Today
There’s deep satisfaction in slipping your feet into a pair of shoes you’ve made yourself—shoes that fit perfectly, reflect your taste, and carry the imprint of your effort. Felt shoe crafting isn’t just a hobby; it’s a return to mindful making, resourcefulness, and personal expression. Every poke, rub, and rinse brings you closer to a wearable piece of art. Whether you're seeking a new creative outlet, aiming to reduce waste, or simply wanting cozier winters, this craft meets both practical and emotional needs.


 浙公网安备
33010002000092号
浙公网安备
33010002000092号 浙B2-20120091-4
Comments
No comments yet. Why don't you start the discussion?