
In an age dominated by digital precision, there’s something quietly captivating about a timer that operates on the slow dance of liquids. A water and oil clock is more than just a functional device—it’s a kinetic sculpture, a conversation piece, and a hands-on lesson in density, gravity, and time. By harnessing the natural separation between water and oil, you can build a visually striking timer that measures minutes through the steady flow of fluids. This guide walks you through every stage of constructing your own mesmerizing DIY timer using common household materials.
How a Water and Oil Clock Works
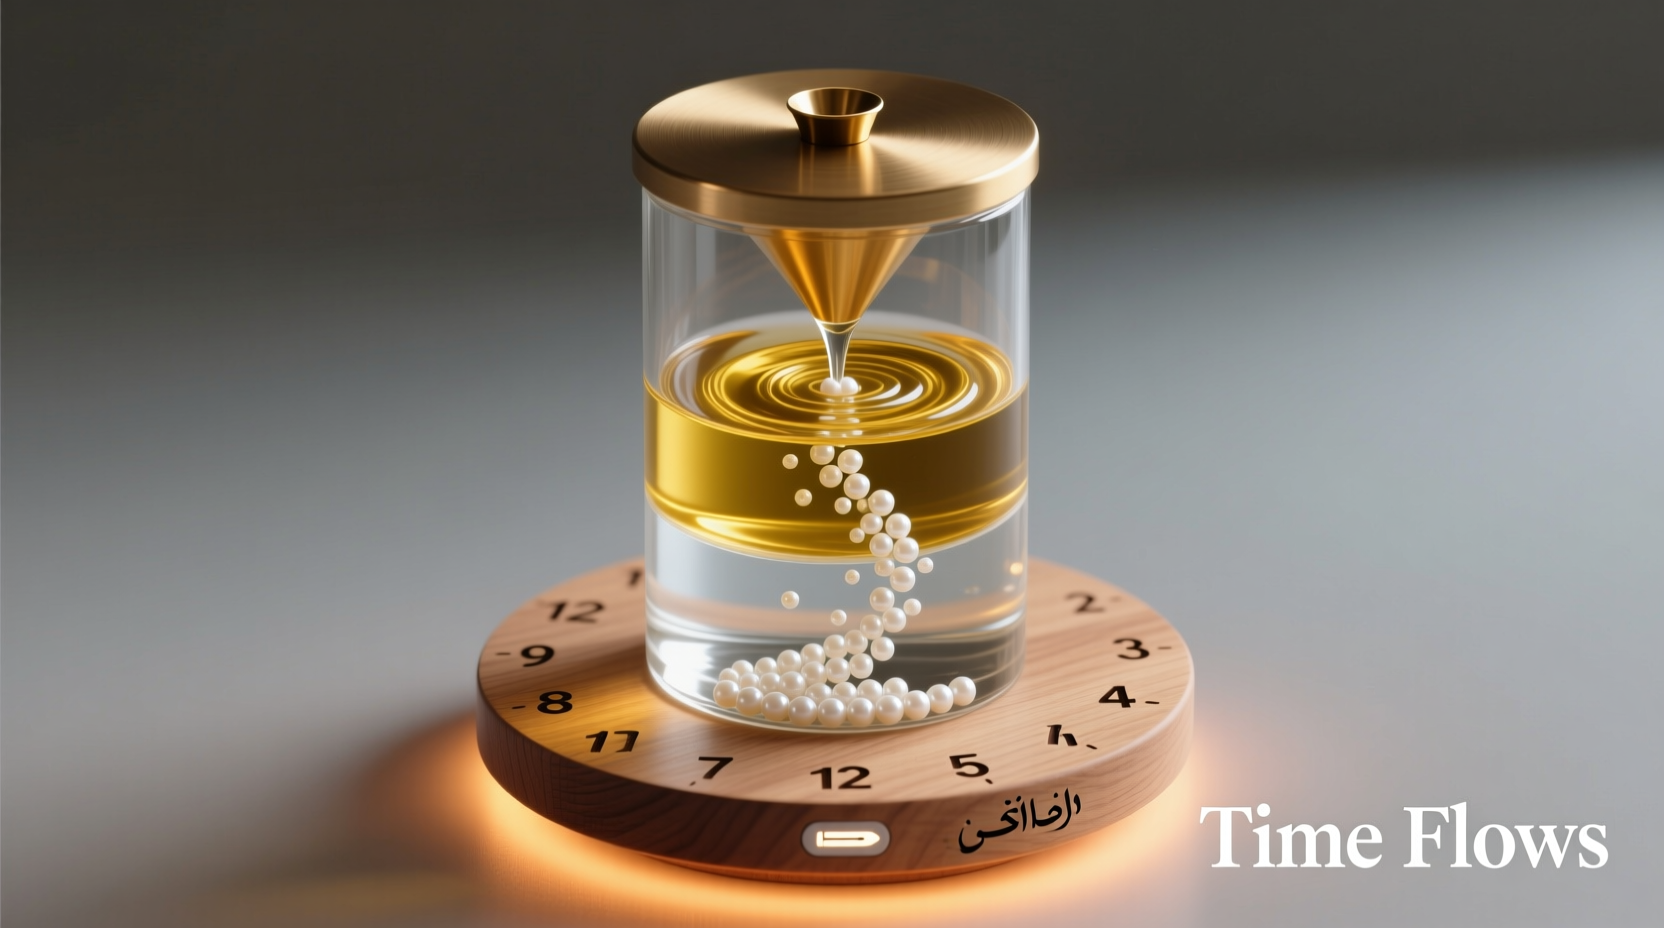
The principle behind a water and oil clock lies in the immiscibility and differing densities of water and oil. When placed together in a sealed system, oil floats atop water due to its lower density. By creating a controlled pathway—such as a narrow tube or siphon—you can allow water to slowly drain from one chamber to another, while the oil remains above, acting as a visual marker of time’s passage.
This type of clock doesn’t rely on electronics or mechanical gears. Instead, it uses fluid dynamics: as water exits the upper reservoir, the oil level appears to drop, even though it's the water beneath that’s moving. The result is a smooth, hypnotic descent that can be calibrated to measure specific intervals—say, 5, 10, or 30 minutes—depending on the size of the container and the diameter of the outlet.
“Simple physical systems often make the most elegant clocks. The beauty of a liquid timer is that it turns time into something you can see and feel.” — Dr. Lena Torres, Fluid Dynamics Educator, MIT Edgerton Center
Materials and Tools You’ll Need
Building a water and oil clock requires minimal investment but thoughtful selection of components. Below is a checklist of everything you’ll need before beginning construction.
Basic Materials
- Two transparent plastic or glass bottles (same size, 1–2 liter)
- Cooking oil (vegetable, canola, or mineral oil)
- Water (distilled preferred to prevent algae)
- Fine tubing or a small-diameter plastic straw (3–5 mm inner diameter)
- A drill or heated nail for making holes
- Sealant (silicone glue or waterproof tape)
- Food coloring (optional, for contrast)
- Timer or stopwatch (for calibration)
Optional Enhancements
- Graduated markings on the bottle for time measurement
- LED light strip for backlighting effect
- Wooden base or stand for stability and display
Step-by-Step Assembly Guide
Follow these steps carefully to assemble a functional and visually appealing water and oil clock.
- Prepare the Bottles: Clean both bottles thoroughly and remove labels. Choose one as the upper reservoir (source) and the other as the lower collection chamber.
- Drill Holes in Caps: Using a heated nail or small drill bit, make a hole in the center of each bottle cap just large enough to insert the tubing snugly. Avoid making the hole too wide.
- Insert Tubing: Cut a length of tubing approximately 15–20 cm long. Insert one end into the cap of the upper bottle, leaving a few centimeters protruding inside. Attach the other end to the lower bottle’s cap, ensuring a tight fit.
- Seal the Connections: Apply silicone sealant around the tubing where it meets each cap to prevent leaks. Allow the sealant to cure completely (usually 24 hours).
- Fill the Upper Bottle: Fill the upper bottle about two-thirds full with colored water. Then, gently pour oil on top until nearly full. The oil should form a distinct layer above the water.
- Assemble the System: Screw the cap onto the upper bottle. Invert it and connect it to the lower bottle by screwing it into the second cap with tubing. The entire system should now be upright with the upper bottle dispensing liquid into the lower one via the siphon.
- Start the Flow: Gently squeeze the tubing or tilt the system slightly to initiate the siphon. Once water begins flowing into the lower chamber, the oil will appear to descend slowly.
- Calibrate the Timer: Use a stopwatch to measure how long it takes for the interface between oil and water to reach certain points. Mark these times on the side of the bottle with a waterproof marker.
Tips for Optimal Performance
To ensure your water and oil clock runs smoothly and lasts longer, consider the following practical advice.
| Do | Don’t |
|---|---|
| Use distilled water to prevent microbial growth | Expose the clock to direct sunlight (can degrade plastic and promote algae) |
| Choose clear, lightweight oil like mineral oil | Use thick oils like motor oil—they won’t flow properly |
| Keep the tubing free of kinks or blockages | Over-tighten caps, which may crack plastic |
| Label time markers after testing multiple runs | Assume timing is consistent across different temperatures |
Real-World Example: A Classroom Timer That Captured Attention
In a middle school science classroom in Portland, Oregon, teacher Marcus Lin introduced a water and oil clock as part of a unit on fluid behavior. He built a large version using two 2-liter soda bottles and blue-dyed water beneath clear mineral oil. Mounted on a wooden frame with LED backlighting, the clock became a focal point during lab activities.
Students used it to time experiments, observing firsthand how changes in tube diameter affected flow rate. One student noted, “I never thought watching water move could be so relaxing.” The project sparked interest in physics and led to a student-led competition to design the most accurate 10-minute timer. This real-world application demonstrates how a simple DIY device can serve both aesthetic and educational purposes.
Frequently Asked Questions
Can I reuse the same clock multiple times?
Yes. Once the water has fully drained, simply disconnect the bottles, pour the contents back into the upper chamber, and reassemble. Make sure to maintain the oil-on-top, water-beneath order for proper function.
Why isn’t my siphon starting?
Siphons require initial priming. Try submerging the tubing in water first or gently sucking on the open end (then sealing it quickly) to start the flow. Alternatively, tilt the entire setup to allow water to enter the tube.
How accurate is a water and oil clock?
Accuracy depends on consistent temperature, tube diameter, and fluid viscosity. Under stable conditions, it can reliably measure intervals within ±10%. For greater precision, calibrate it under the conditions in which you plan to use it.
Conclusion: Bring Time to Life
A water and oil clock transcends mere functionality. It transforms the abstract concept of time into a visible, flowing experience. Whether used as a meditation aid, a teaching tool, or a decorative centerpiece, this DIY project blends science and art in a uniquely satisfying way. With patience and attention to detail, anyone can build a timer that doesn’t just count seconds—but makes them worth watching.


 浙公网安备
33010002000092号
浙公网安备
33010002000092号 浙B2-20120091-4
Comments
No comments yet. Why don't you start the discussion?