
Wearing a fanny pack is no longer just about convenience—it’s a fashion statement. Once dismissed as outdated, the fanny pack has made a strong comeback, embraced by designers and streetwear enthusiasts alike. What better way to stand out than by crafting one that reflects your personal style? Creating your own custom fanny pack allows you to choose every detail: fabric, color, size, closure type, and even pocket layout. This guide walks you through the entire process from concept to completion, tailored specifically for beginners with little or no sewing experience.
Gather Your Materials and Tools
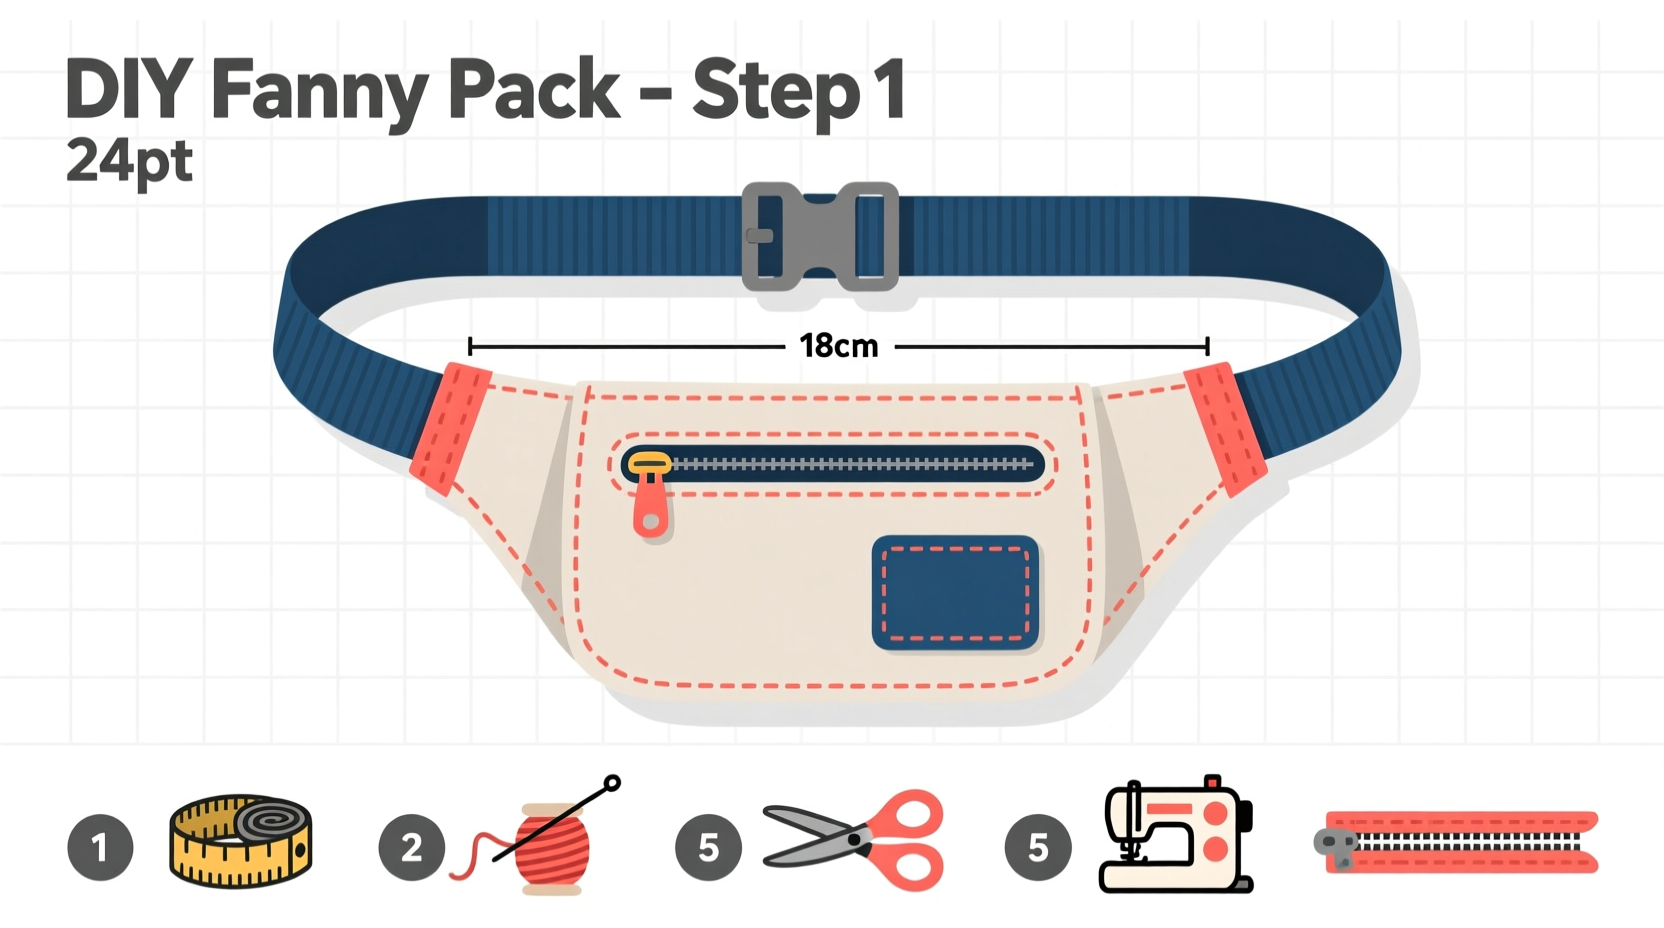
Before you begin stitching, assemble all the necessary supplies. The beauty of making your own fanny pack lies in customization, so take time to select materials that suit your intended use—whether it's for daily errands, outdoor adventures, or a bold fashion piece.
| Material/Tool | Purpose | Beginner-Friendly Options |
|---|---|---|
| Durable fabric (e.g., nylon, canvas, denim) | Main body of the pack | Cotton duck canvas (easy to sew, holds shape) |
| Lining fabric (polyester or cotton) | Interior finish | Quilting cotton with fun prints |
| Zipper or Velcro closure | Secure main compartment | 7–9 inch zipper for ease of use |
| Webbing strap (1–1.5 inches wide) | Adjustable waistband | Polypropylene webbing (lightweight, durable) |
| Buckle or slider hardware | Fastening mechanism | Plastic side-release buckle (no sewing required) |
| Sewing machine & thread | Construction | Basic home sewing machine with all-purpose thread |
| Scissors, pins, measuring tape | Preparation and assembly | Sharp fabric scissors and fine pins |
Design Your Fanny Pack Blueprint
Every great project starts with a plan. Sketch a simple diagram of your fanny pack, including dimensions. A standard adult-sized fanny pack measures approximately 13 inches wide by 6 inches tall, with a depth of 3–4 inches when padded or gusseted.
Decide on key features:
- Number of compartments: One main zippered section or multiple pockets?
- Front pocket: Ideal for quick-access items like keys or phone.
- Padding: Add fusible interfacing to give structure and durability.
- Style: Minimalist, retro, sporty, or bohemian? Let your personality guide the design.
Transfer your sketch into a paper pattern. Cut rectangles for the front, back, and sides. Include seam allowances of at least ½ inch on all edges. Use cardboard or cardstock to create reusable templates.
“Customization begins long before the needle hits the fabric. Thoughtful planning ensures both functionality and aesthetic appeal.” — Lena Ruiz, DIY Fashion Instructor
Step-by-Step Construction Guide
Follow these steps carefully. Work slowly and press seams with an iron as you go for a polished result.
- Prepare fabric pieces: Cut two outer panels (front and back), one bottom piece (if using a gusset), lining pieces to match, and a strip for the top closure flap if desired.
- Sew the outer shell: Place front and back outer panels right sides together. Sew along the sides and bottom using a ½-inch seam allowance. Finish seams with zigzag stitch or pinking shears to prevent fraying.
- Create the lining: Repeat the same process with lining fabric, but leave a 3-inch gap in the bottom seam for turning later.
- Add the closure: Attach the zipper between the outer shell and lining. Place the right side of the outer panel against the right side of the zipper tape, then repeat with the lining. Topstitch in place. Alternatively, use Velcro for easier installation.
- Join shell and lining: Turn the outer shell right side out. Insert it into the lining (which is still inside out). Align the top edges and pin them together. Sew around the top edge to close the bag.
- Turn and finish: Pull the entire pack through the gap in the lining. Push out corners gently with a blunt tool. Iron the top edge flat. Hand-stitch or machine-sew the gap closed.
- Attach the strap: Cut a 36–48 inch length of webbing. Slide each end through the side-release buckle, fold over ½ inch, and bar-tack securely with multiple stitches. Position the free ends at the back panel side seams and sew in place with a box stitch for strength.
Real Example: Sarah’s First Fanny Pack Project
Sarah, a college student new to sewing, wanted a unique accessory for her campus commute. She chose bright coral cotton canvas for the exterior and a tropical leaf print for the lining. Using a recycled backpack strap and a plastic buckle from a craft store, she followed this guide over a weekend.
Her first challenge was aligning the zipper, which she solved by basting it temporarily with hand thread before machine sewing. After finishing, she added a small loop on the front to clip her sunglasses. The final product held her phone, wallet, and earbuds comfortably and became a conversation starter. Within weeks, three friends asked her to make matching ones.
Sarah’s story shows that even imperfect first attempts can yield functional, stylish results—and often inspire others.
Essential Checklist Before You Begin
Use this checklist to ensure you’re fully prepared before cutting any fabric:
- ☑ Choose durable, washable outer fabric
- ☑ Select coordinating lining material
- ☑ Measure and mark all pattern pieces with seam allowances
- ☑ Test your sewing machine tension with scrap fabric
- ☑ Confirm strap length fits your waist (adjustable range: 28–44 inches ideal)
- ☑ Prepare hardware: buckle, zipper, and webbing
- ☑ Press all fabric pieces flat before cutting
Frequently Asked Questions
Can I make a fanny pack without a sewing machine?
Yes, though it will take longer. Use fabric glue or fusible bonding tape for seams, and reinforce critical areas like strap attachments with hand whipstitching. Note that glued seams may not withstand heavy use over time.
How do I clean my homemade fanny pack?
Spot clean with mild soap and water. If the fabric permits, remove the buckle and wipeable hardware, then hand wash gently. Air dry completely—never machine dry, as heat can damage adhesives and distort shape.
What if my strap keeps slipping open?
Ensure the webbing is threaded correctly through the buckle. Most side-release buckles have a specific orientation: the pronged half should face inward toward the body. Also, check that the webbing width matches the buckle size exactly.
Final Thoughts and Next Steps
Making your own fanny pack is more than a craft project—it’s a step toward mindful consumption and self-expression. You’ve learned how to choose materials, draft a design, assemble components, and troubleshoot common issues. Whether you wear it hiking, traveling, or simply navigating city life, your handmade accessory carries a sense of pride that mass-produced items can’t replicate.
Now that you’ve completed your first custom fanny pack, consider experimenting with upgrades: water-resistant coatings, RFID-blocking pockets, embroidered details, or modular add-ons. Share your creation online with beginner communities—your journey might inspire someone else to pick up a needle and thread.


 浙公网安备
33010002000092号
浙公网安备
33010002000092号 浙B2-20120091-4
Comments
No comments yet. Why don't you start the discussion?