
Finding the center of a room may seem like a trivial task, but it’s foundational for many home improvement and design decisions. Whether you're installing a chandelier, laying out tile, positioning a rug, or mounting a piece of art, knowing the exact center ensures symmetry, balance, and professional-looking results. While modern tools can help, not everyone has access to laser levels or digital measuring devices. The good news is that with basic tools and a bit of geometry, anyone can locate the center of a room—accurately and affordably.
Why the Center Matters in Room Design
The center of a room serves as an anchor point for visual and functional layout planning. In interior design, symmetry draws the eye and creates harmony. For example, placing a ceiling fixture directly above the center enhances both lighting efficiency and aesthetic appeal. Similarly, aligning furniture such as rugs, coffee tables, or media units around the central axis prevents a cluttered or off-balance appearance.
From a construction standpoint, knowing the center helps when tiling floors, where patterns often radiate outward, or when framing walls or partitions in renovations. Even in irregularly shaped rooms, identifying a functional center improves spatial organization.
Using the Diagonal Method: A Classic Geometric Approach
One of the most reliable and time-tested techniques for finding a room’s center involves drawing diagonals between opposite corners. This method works on any rectangular or square space and requires only a tape measure, chalk line (or string), and two willing helpers—or a few pieces of masking tape to hold one end of the line.
- Measure the length of two adjacent walls to confirm they form right angles. If not, this method still works but may require adjustment for trapezoidal layouts.
- Stretch a chalk line or string from one corner of the room to the diagonally opposite corner. Mark the midpoint along this line using tape or a pencil dot on the floor.
- Repeat the process with the other two corners, creating a second diagonal line across the room.
- The point where the two diagonal lines intersect is the geometric center of the room.
This approach leverages the principle that the diagonals of a rectangle bisect each other at the center. It's been used by carpenters, masons, and architects for centuries due to its simplicity and precision.
“Even without advanced tools, geometry gives us all the power we need to lay things out correctly. The diagonal method is foolproof when done carefully.” — Daniel Reyes, Master Carpenter and Renovation Consultant
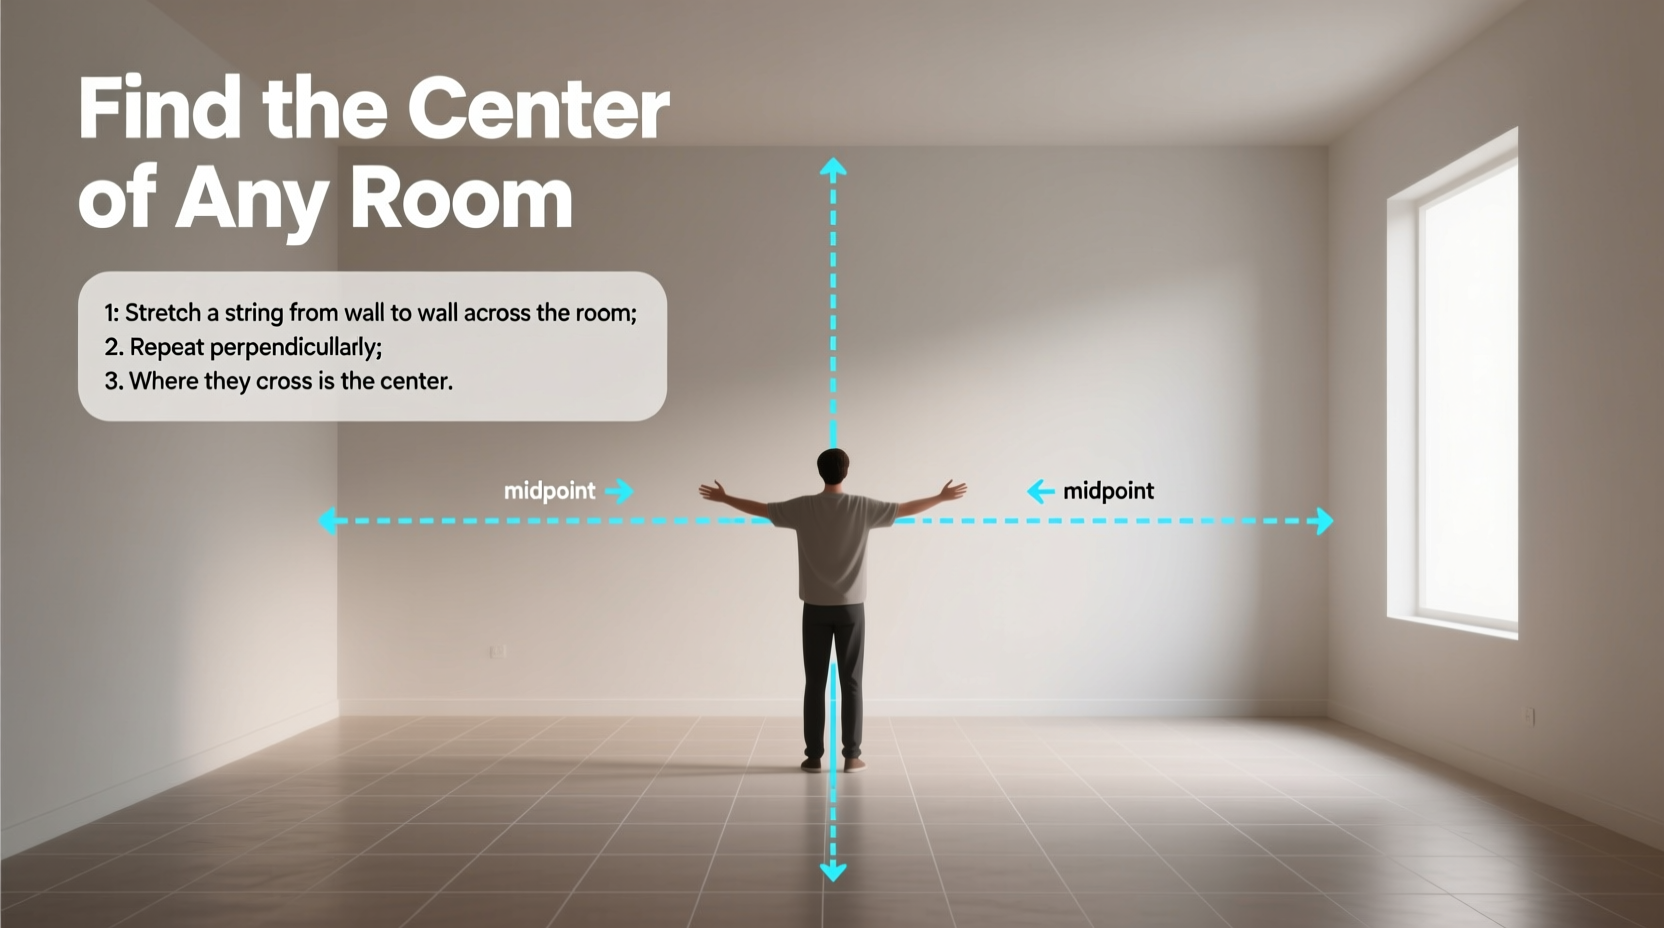
Step-by-Step Guide: Finding the Center Without Power Tools
Follow this detailed procedure if you’re working alone or lack specialized equipment:
- Clear the Space: Remove obstacles from the floor near the walls so you can stretch measuring tapes or strings freely.
- Measure Wall Lengths: Record the full length of two perpendicular walls (e.g., north-south and east-west).
- Find Midpoints: Divide each wall measurement by two and mark the midpoint on both walls using tape or a small pencil mark.
- String Alignment: Run a string from the midpoint of one wall to the midpoint of the opposite wall. Repeat for the other pair of walls.
- Intersection Point: Where the strings cross is the center. Use a level to ensure strings are straight and not sagging.
- Mark Permanently: Transfer the center point to the floor using a plumb bob or by carefully aligning a ruler vertically from the intersection.
This midpoint-crossing method is especially useful when installing light fixtures or drop zones for area rugs, where alignment with walls matters more than perfect geometric centering.
Adapting Techniques for Irregular Room Shapes
Not all rooms are perfect rectangles. L-shaped, trapezoidal, or multi-angled spaces require a different mindset. Instead of seeking a single mathematical center, focus on identifying a *functional* center based on usage.
- In an L-shaped living area, consider treating each leg as a separate zone and find centers individually.
- For trapezoidal rooms, use the diagonal method anyway—the intersection will still give a usable reference point, even if slightly offset.
- In open-concept spaces, define the “room” visually by imagining boundaries based on furniture groupings, then apply standard methods within those implied borders.
You can also average multiple center points. Measure several plausible configurations (diagonals, midlines) and place your final mark at the convergence of these estimates. Overlapping marks reveal a \"center cluster,\" which is often more practical than theoretical perfection.
Tool Comparison: What Works Best?
| Method | Tools Needed | Accuracy | Best For |
|---|---|---|---|
| Diagonal String Method | Tape measure, string/chalk line | High (in regular shapes) | Tiling, ceiling fixtures, rugs |
| Midpoint Cross Lines | Tape measure, string | Medium-High | Furniture layout, wall art |
| Laser Level Grid | Cross-line laser, tripod | Very High | Professional installations |
| Visual Estimation | None | Low | Temporary setups only |
| Plumb Bob + Ceiling Reference | Plumb bob, tape measure | High | Hanging lights, chandeliers |
Real Example: Centering a Chandelier in a Dining Room
Sarah was renovating her dining area and wanted to install a new chandelier over the table. She assumed placing it above the table would be enough—but realized the fixture looked lopsided. After measuring, she discovered the table wasn’t centered in the room, likely due to door swing clearance during prior setup.
She used the diagonal method: stretching strings from corner to corner, marking their intersection on the ceiling. To her surprise, the true center was 4 inches away from where the table sat. She repositioned the chandelier accordingly. Though the light now hung slightly off-center relative to the table, the overall room felt more balanced. Later, she adjusted the table’s position to align both with the light and the architectural center, achieving harmony between function and design.
Checklist: How to Accurately Find Any Room’s Center
- ☐ Clear floor and wall obstructions
- ☐ Gather tools: tape measure, string or chalk line, tape, pencil
- ☐ Confirm room shape (rectangle, square, irregular)
- ☐ Use diagonal corner-to-corner lines or midpoint wall crossings
- ☐ Mark intersection point clearly
- ☐ Verify with secondary method if possible
- ☐ Transfer point to ceiling or floor as needed
- ☐ Recheck after marking before drilling or installing
Frequently Asked Questions
What if my room isn’t a perfect rectangle?
Most homes have slight imperfections. Use the diagonal method anyway—it still provides a reliable approximation. For highly irregular spaces, define a primary zone and treat it as a standalone room for center-finding purposes.
Can I use a smartphone app instead?
Yes, some augmented reality (AR) measuring apps can estimate room dimensions and centers. However, they vary in accuracy and depend on camera calibration. For critical tasks, combine app data with physical verification.
Do I always need the exact geometric center?
Not necessarily. Sometimes the *visual* or *functional* center matters more—like centering over a dining table or sofa. Use geometry as a guide, but prioritize how the space will be used.
Final Thoughts and Action Steps
Finding the center of a room doesn’t require expensive gear or advanced training. With a tape measure, some string, and a few minutes, you can achieve results that rival professional work. Whether you're hanging a lamp, laying flooring, or arranging furniture, starting from the correct center sets the tone for precision and polish.
Take a moment before your next project to map out the room’s core point. You’ll save time correcting misalignments later and gain confidence in your DIY capabilities. Accuracy begins with intention—and a little geometry goes a long way.


 浙公网安备
33010002000092号
浙公网安备
33010002000092号 浙B2-20120091-4
Comments
No comments yet. Why don't you start the discussion?