
Transform your outdoor space with handmade cement flower pots that combine rugged durability with modern style. Unlike mass-produced plastic or ceramic containers, custom cement pots resist weathering, cracking, and fading—making them ideal for patios, balconies, and garden beds. With basic materials and a little creativity, you can craft unique planters that reflect your personal aesthetic while supporting healthy plant growth.
Cement is forgiving, affordable, and molds easily into geometric shapes, organic forms, or minimalist designs. Whether you're planting herbs, succulents, or ornamental shrubs, these DIY pots offer structural integrity and timeless appeal. This guide walks through every step—from material selection to finishing touches—with practical tips to ensure your creations last for years.
Materials and Tools You’ll Need
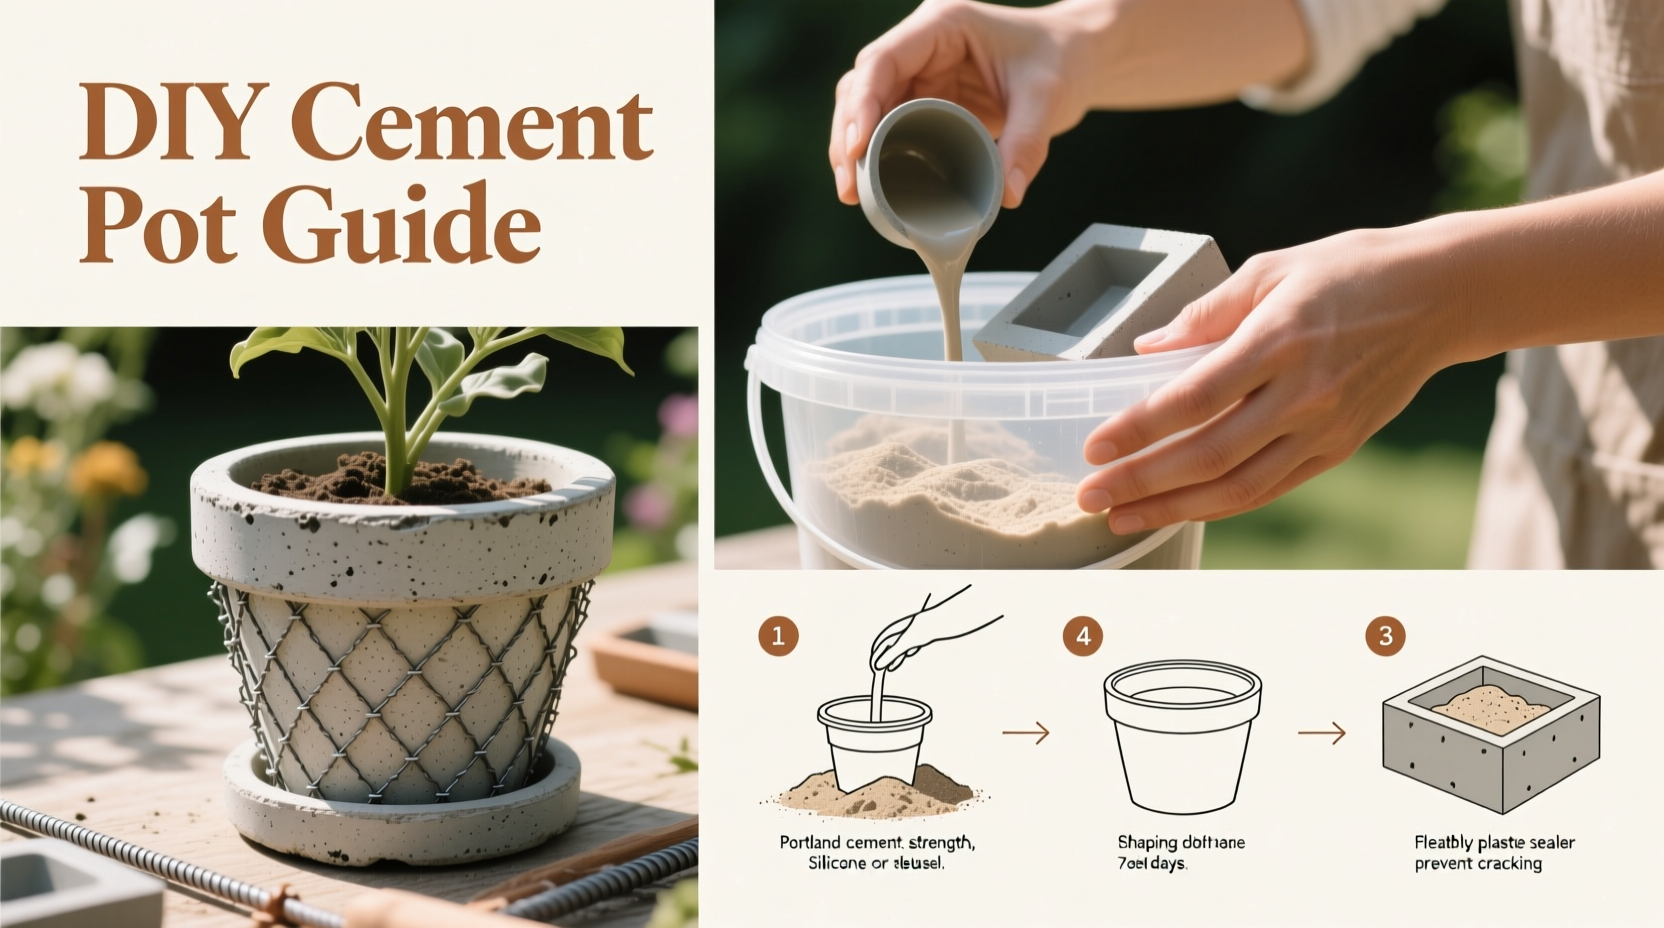
The beauty of this project lies in its simplicity. Most supplies are available at hardware stores or can be repurposed from household items. Here’s what to gather before starting:
- Portland cement (Type I or II)
- Sand (fine masonry sand preferred)
- Water
- Mixing container (plastic tub or bucket)
- Trowel or mixing stick
- Two plastic containers per pot (for mold system—one larger, one smaller)
- Non-stick cooking spray or mold release agent
- Gloves and safety goggles
- Optional: Fiberglass mesh, acrylic fortifier, pigment (oxide colors)
Step-by-Step Guide to Making Cement Pots
- Prepare the Mold: Select an outer container (like a large food storage bin) and a smaller inner one (such as a cup or bowl). Spray both with non-stick cooking spray to ease removal later.
- Mix the Cement: Combine 3 parts sand to 1 part cement in a dry mix. Gradually add water until the mixture reaches a thick oatmeal-like consistency. For added strength, mix in a small amount of acrylic fortifier or press fiberglass mesh into layers during pouring.
- Pour the Base Layer: Fill the outer mold halfway with cement mix. Tap gently on the table to release air bubbles.
- Insert Inner Mold: Place the smaller container into the center of the wet cement. Press down slightly so it sinks about halfway. Use spacers (like bottle caps) around the rim to keep it centered.
- Fill Around the Inner Mold: Carefully pour cement between the two molds, maintaining even thickness (ideally 1–1.5 inches). Tap again to settle the mix.
- Cure Slowly: Cover the mold loosely with a plastic bag and let cure undisturbed for at least 24 hours. Avoid direct sunlight or wind, which can cause cracks.
- Unmold and Finish: After 24–48 hours, remove the outer and inner molds. Sand rough edges with coarse-grit sandpaper. Cure the pot further by misting with water daily for 5–7 days to maximize strength.
Design Ideas and Creative Enhancements
One of the greatest advantages of DIY cement pots is the freedom to customize. Try these ideas to elevate function and style:
- Textured Surfaces: Press lace, burlap, or textured tiles against the inside of the outer mold before pouring to imprint patterns.
- Colored Accents: Add mineral oxide pigments to the mix for earthy reds, grays, or blues. Swirl colors for marbled effects.
- Integrated Feet: Attach small rubber bumpers or metal leveling feet underneath to prevent moisture absorption and improve drainage.
- Hanging Planters: Embed eye bolts into the sides before curing to create hanging points for wall-mounted greenery.
- Stacked Layers: Make multiple rings and stack them vertically for tiered herb gardens or sculptural interest.
| Design Feature | Benefit | Implementation Tip |
|---|---|---|
| Fiberglass reinforcement | Reduces cracking in freeze-thaw cycles | Add mesh between layers or mix strands into slurry |
| Acrylic fortifier | Improves adhesion and flexibility | Replace 20% of water with liquid fortifier |
| Drainage holes | Prevents root rot | Insert dowels through base before setting; remove after 12 hours |
| Beveled rim | Ergonomic handling and clean look | Sand top edge at a 45-degree angle |
Expert Insight: Why Cement Endures
“Cement planters outperform most alternatives when properly mixed and cured. Their thermal mass stabilizes root temperature, and their weight prevents tipping in wind—all while aging gracefully with a natural patina.” — Dr. Lena Torres, Landscape Architect & Sustainable Materials Researcher
This resilience makes cement especially valuable in climates with seasonal extremes. Unlike terracotta, which absorbs moisture and fractures in cold weather, or plastic that becomes brittle under UV exposure, well-made cement withstands decades of outdoor use. The key is attention to mix ratios and curing conditions.
Real Example: Urban Balcony Transformation
In Portland, Oregon, gardener Marcus Reed replaced his flimsy plastic containers with a series of hexagonal cement pots made using silicone baking molds. He incorporated gray oxide pigment and sanded each piece to a smooth matte finish. Over two growing seasons, the pots showed no signs of wear despite heavy rainfall and temperature swings. “They feel like permanent fixtures,” he said. “People stop to ask if I bought them from a design store.” His only adjustment was adding cork pads to protect his deck surface—a small trade-off for unmatched durability.
Common Mistakes to Avoid
Even experienced DIYers can fall into pitfalls that compromise quality. Watch for these errors:
- Using too much water: Weakens the final structure and increases shrinkage cracks.
- Skipping the curing phase: Premature drying leads to surface dusting and reduced lifespan.
- Ignoring drainage: Always drill or form holes to allow excess water to escape.
- Reusing flexible molds: Thin plastic containers may warp during pouring, resulting in uneven walls.
FAQ
Can I paint cement flower pots after they cure?
Yes, but use exterior-grade masonry paint or concrete stain designed for porous surfaces. Seal with a clear concrete sealer afterward to protect against moisture and UV damage.
How do I prevent my pot from staining my patio?
Lift the pot periodically to check for moisture buildup, or place a saucer beneath it. Applying a penetrating sealer to the bottom also minimizes mineral leaching and efflorescence.
Are cement pots safe for edible plants?
Generally yes, but avoid using additives like fly ash or industrial byproducts. Stick to pure Portland cement and sand. For extra safety, coat the interior with a food-safe epoxy liner or plant in a removable plastic insert.
Final Checklist Before You Begin
- Choose sturdy, dimensionally stable molds
- Wear gloves and eye protection when handling dry cement
- Mix to proper consistency—no runny slurry
- Center inner mold carefully to maintain even wall thickness
- Cure slowly over 5–7 days with consistent moisture
- Sand sharp edges and seal if desired
Conclusion
Handmade cement flower pots blend craftsmanship with functionality, offering gardeners a sustainable alternative to disposable planters. With thoughtful design and correct technique, your DIY creations won’t just survive the elements—they’ll enhance your garden’s character for years. These pots age beautifully, developing a soft weathered tone that complements greenery without competing for attention.


 浙公网安备
33010002000092号
浙公网安备
33010002000092号 浙B2-20120091-4
Comments
No comments yet. Why don't you start the discussion?