
Dog leashes are more than functional tools—they reflect the bond between pet and owner. While store-bought options abound, few offer the personal touch, strength, and aesthetic appeal of a handmade flat kumihimo braid leash. Kumihimo, the Japanese art of braiding cords, has been used for centuries in kimono sashes and samurai armor lacing. Today, its principles can be adapted to create a leash that’s not only beautiful but also remarkably strong and comfortable to hold.
This guide walks through the process of transforming simple cords into a robust, flat-knit dog leash using modified kumihimo techniques. The result is a lightweight yet resilient leash with an ergonomic grip, customizable length, and unique visual texture—ideal for everyday walks or outdoor adventures.
Why Flat Kumihimo Works for Dog Leashes
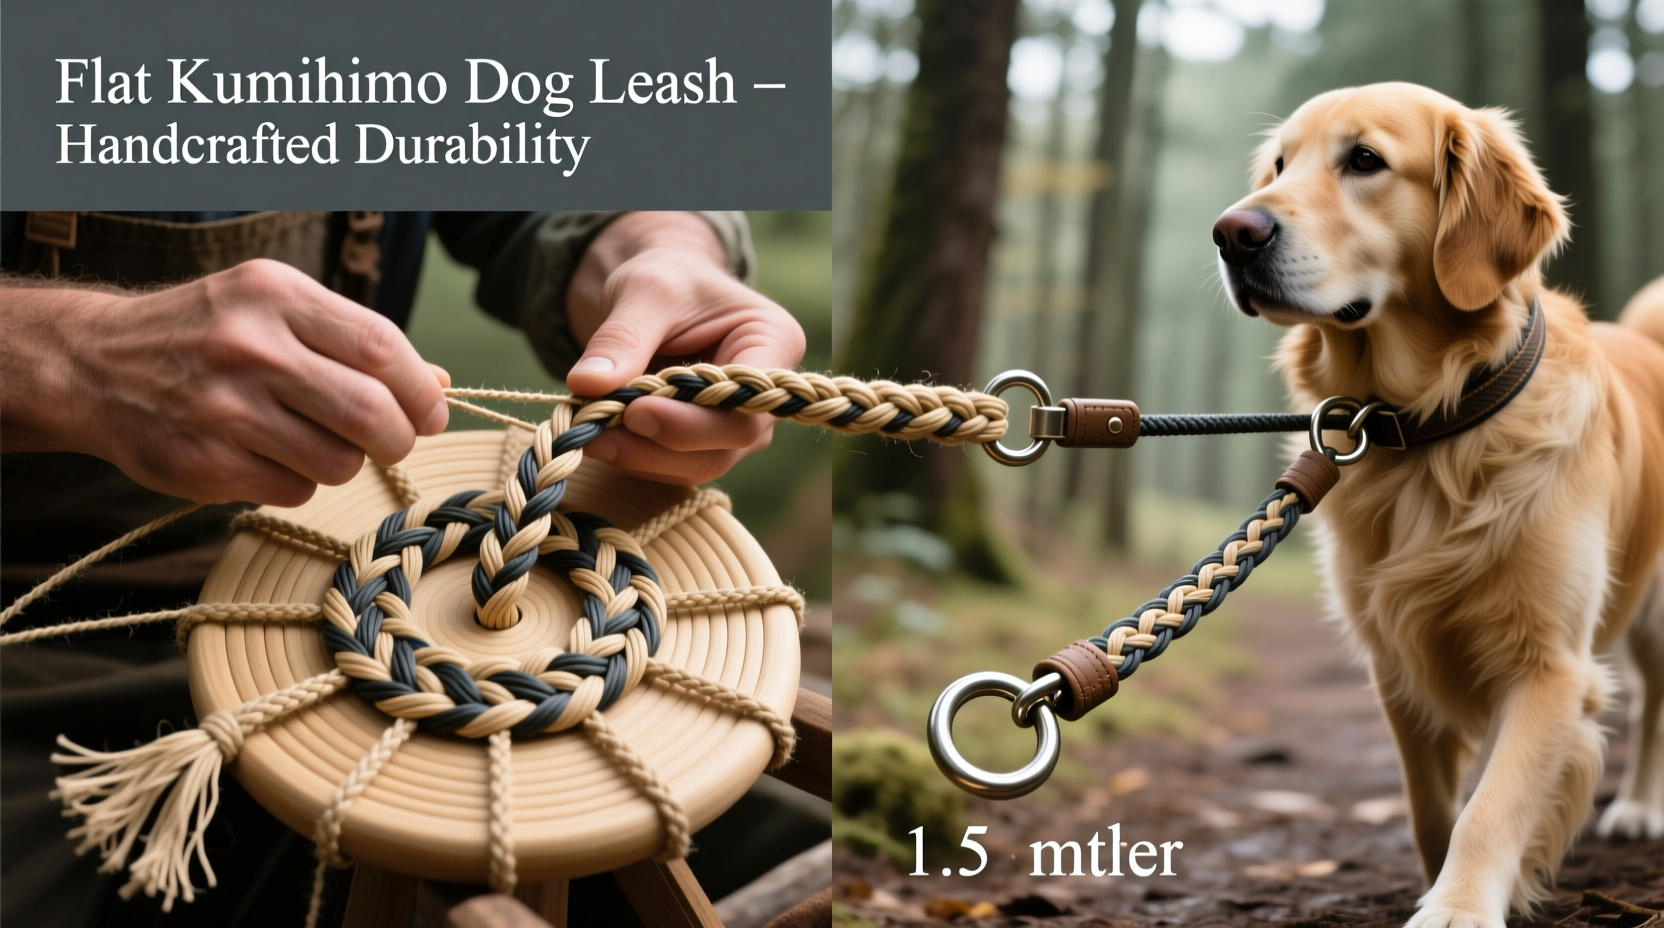
Traditional kumihimo produces round braids on a marudai or foam disk. However, adapting the technique to create a flat, wide braid offers distinct advantages for leashes:
- Improved grip: A flat profile lies comfortably in the hand, reducing slippage and pressure points.
- Higher tensile strength: Multiple strands interlock tightly, distributing force evenly across the braid.
- Customizable width: Adjust strand count and tension to achieve desired thickness—from slim ¾-inch leads to wide 1.5-inch control leashes.
- Aesthetic versatility: Combine colors and textures for a one-of-a-kind design that expresses your dog’s personality.
“Kumihimo isn’t just decorative—it’s structural. The interlaced symmetry creates balanced load distribution, making it ideal for high-stress applications like pet gear.” — Dr. Lena Matsuda, Textile Historian & Craft Engineer
Materials and Tools You’ll Need
Selecting the right materials ensures durability, comfort, and longevity. Avoid soft embroidery floss or silk; instead, opt for industrial-grade fibers designed for tension.
| Material/Tool | Purpose | Recommended Options |
|---|---|---|
| Braiding Cord (4–8 strands) | Main leash body | Paracord (Type III), polyester marine rope, or nylon webbing core wrapped in braided sheath |
| Kumihimo Disk (Adjustable or DIY) | Holds threads in place during braiding | Foam disk with center hole and notches; or cardboard template with punched slots |
| T Clips or Paper Clips | Secure working strands | Essential for maintaining tension while braiding |
| Measuring Tape & Scissors | Cutting and sizing | Use sharp fabric scissors to prevent fraying |
| Leash Hardware | Attachment points | Heavy-duty bolt snap (3/4” minimum gate opening), swivel clasp, or metal loop end |
| Lighter or Heat Tool | Sealing cut ends | Prevents unraveling of synthetic fibers |
Step-by-Step: Crafting Your Flat Kumihimo Leash
The flat kumihimo braid uses a variation of the traditional 8-strand square braid, compressed into a planar structure. Follow this sequence to build a 4-foot standard leash (adjustable to any length).
- Measure and cut cords: Cut eight strands of paracord, each 10 feet long. This allows for braiding, tapering, and hardware attachment. Use consistent lengths to maintain balance.
- Prepare the disk: Arrange the disk vertically. Place two strands in each of the four cardinal directions (top, bottom, left, right), securing them with T clips beneath the disk.
- Begin the braid: Take the bottom-right strand and move it diagonally to the top position. Then move the bottom-left to the right. Continue alternating sides in a clockwise motion: left → bottom, top → left. Maintain even tension throughout.
- Check alignment: After every 10–15 moves, pause to ensure the braid remains flat and symmetrical. Gently pull downward on the emerging braid to tighten.
- Braid to desired length: Work until the braid reaches 4 feet (or preferred length minus 6 inches for finishing). Keep movements smooth and rhythmic.
- Secure the end: Tie a temporary overhand knot at the end of the braid to prevent unweaving.
- Create the loop end: Fold the last 6 inches back onto itself. Sew or melt the fold point securely, then attach a heavy-duty bolt snap using a reinforced bar tack or metal ring.
- Finish the handle end: Optionally, leave the terminal end loose for a slip-style grip, or braid it into a wrist loop. Seal all cut ends with heat to prevent fraying.
Reinforcement Tips for High-Stress Zones
The connection point between leash and collar/harness bears the most strain. Reinforce this area by:
- Using double-thickness cord in the final 6 inches of braid.
- Adding a drop stitch or locking knot before attaching hardware.
- Wrapping the base of the snap with tight whip stitching using upholstery thread.
Real Example: Max’s Mountain Trail Leash
Sarah, a dog trainer from Colorado, needed a reliable leash for her energetic Australian Shepherd, Max, who often pulls during steep trail hikes. Off-the-shelf leashes wore out within months. She turned to flat kumihimo using military-grade paracord in blaze orange and charcoal gray.
After mastering the diagonal transfer pattern, she crafted a 5-foot leash with a built-in traffic handle (a short loop braided midway). The flat profile prevented twisting, and the dense weave resisted abrasion from rocks and brush. Two years later, the leash shows minimal wear despite weekly mountain use. “It’s lighter than leather, doesn’t absorb water, and I love showing people how it’s made,” Sarah says.
Do’s and Don’ts of Handmade Pet Leash Crafting
| Do’s | Don’ts |
|---|---|
| Use UV-resistant cord for outdoor durability | Use cotton or wool—these weaken when wet |
| Test braid strength with gradual tension before use | Attach hardware without reinforcing the knot |
| Wash occasionally with mild soap and air dry | Machine wash or tumble dry—this damages fiber integrity |
| Incorporate reflective thread for nighttime visibility | Ignore manufacturer weight limits for clasps |
Frequently Asked Questions
Can I make a leash for a large breed like a German Shepherd?
Absolutely. Increase strand count to 12 or 16 using thicker cord (e.g., Type IV paracord). Ensure the bolt snap is rated for at least 500 lbs. tension. Wider braids (1.25”+) provide better grip and load distribution.
How long does it take to braid a full leash?
For an experienced braider, about 1.5–2 hours. Beginners may take 3–4 hours, including setup and finishing. Practice on shorter samples first to build rhythm and consistency.
Is flat kumihimo stronger than round braiding?
Not inherently stronger in tensile tests, but flatter profiles distribute pressure more evenly across the hand and resist rolling under load—making them functionally superior for leashes.
Final Checklist Before First Walk
- ✅ All cord ends are heat-sealed or waxed
- ✅ Hardware is securely attached and tested under load
- ✅ Braid is free of loose or skipped stitches
- ✅ Length suits your walking style (standard: 4–6 ft)
- ✅ Reflective elements added if used at dawn/dusk
Conclusion: Craft With Purpose, Walk With Pride
Creating a dog leash with flat kumihimo techniques bridges tradition and practicality. It transforms a routine item into a meaningful object—crafted by hand, tailored to your dog’s needs, and built to endure seasons of adventure. Every braid tells a story of patience, care, and connection.


 浙公网安备
33010002000092号
浙公网安备
33010002000092号 浙B2-20120091-4
Comments
No comments yet. Why don't you start the discussion?