
In an age where digital life dominates, physical workspace clutter remains a persistent challenge. Cables, pens, sticky notes, USB drives, and earbuds often scatter across desks, creating visual noise that undermines focus and productivity. While store-bought organizers exist, they rarely match personal style or exact needs. A better solution? Craft your own custom desktop storage bag—a tailored, functional piece that combines practicality with creativity.
This guide walks you through designing and constructing a personalized storage solution using accessible materials and beginner-friendly techniques. Whether you’re new to sewing or simply enjoy DIY projects, this approach offers a sustainable, cost-effective way to declutter while adding a unique touch to your workspace.
Why Build Your Own Desktop Storage Bag?
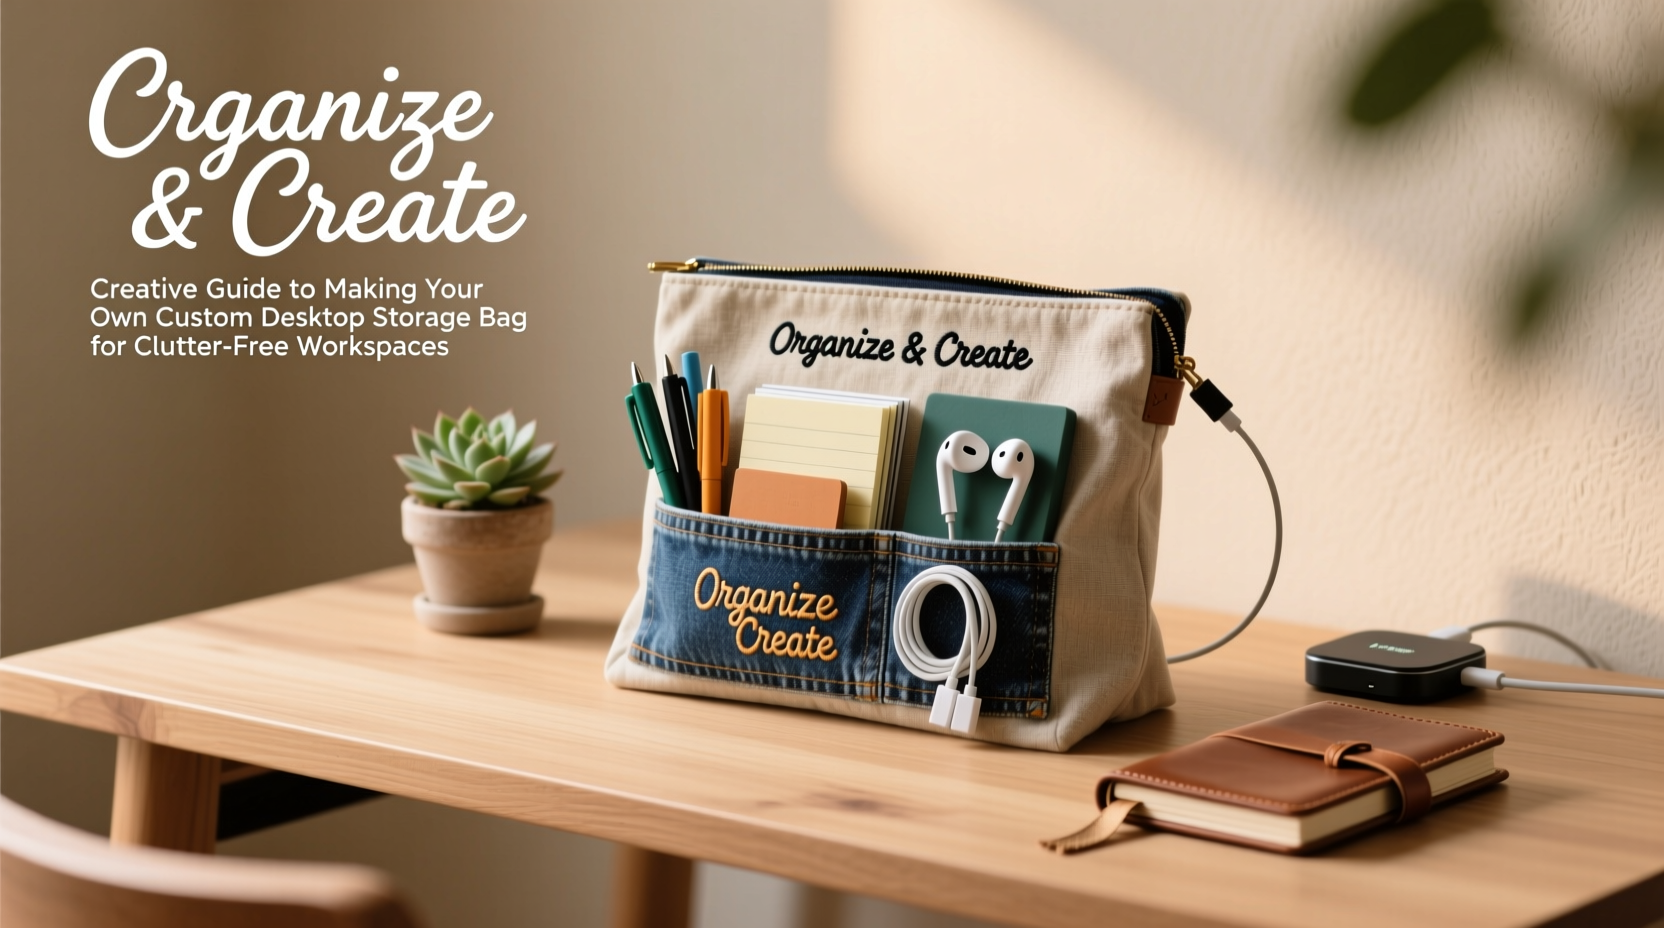
Pre-made organizers often follow one-size-fits-all designs, lacking compartments for niche items like styluses, SD cards, or wireless charging cables. Custom bags allow full control over size, layout, fabric choice, and closure type. Beyond functionality, handmade organizers reflect personality—choose patterns that energize your space or calming textures that promote focus.
Additionally, crafting your own storage reduces reliance on mass-produced plastic goods. By repurposing fabric scraps or old garments, you contribute to a circular economy while minimizing waste. The process itself can be therapeutic, offering a mindful break from screen-based tasks.
“Designing functional objects with intention transforms clutter into calm. When people make their own organizers, they’re more likely to maintain order because the item feels personal.” — Lena Torres, Industrial Designer & Workspace Consultant
Step-by-Step Guide to Building Your Custom Storage Bag
Follow this structured process to create a durable, well-designed desktop storage bag in under three hours. No advanced tools required—just basic supplies and attention to detail.
- Define Your Needs: Lay out all small desk items you want to store. Group them by category (e.g., writing tools, tech accessories, paper clips). Measure the largest group to determine minimum bag dimensions.
- Sketch a Layout: Draw a simple blueprint showing main compartment size and any internal pockets. Decide if you want zippered closures, magnetic snaps, or fold-over flaps.
- Select Materials: Choose sturdy fabric like cotton canvas, denim, or upholstery remnants. For lining, use soft cotton or felt to protect delicate items. Avoid stretchy or thin fabrics.
- Cut Fabric Pieces: Cut two identical rectangles for front and back (e.g., 9” x 6”). Cut one long strip for the base (same width as panels, height ~2–3 inches). For pockets, cut smaller rectangles based on sketch.
- Sew Internal Pockets: Attach pocket pieces to the inside of one main panel using straight stitches. Reinforce corners. You can create divided sections with vertical stitching.
- Assemble the Body: Place front and back panels right sides together. Pin the base strip between them along the bottom edge. Sew around three sides (left, bottom, right), leaving the top open.
- Box the Corners (Optional): To create depth, pinch each bottom corner diagonally, sew across ½ inch from tip, then trim excess. This gives the bag a flat base when finished.
- Add Closure: Install a zipper along the top edge, or sew on Velcro strips. For a flap design, attach a hinged fabric cover with buttons or snaps.
- Finishing Touches: Turn the bag right side out. Press edges gently with an iron. Add labels, embroidery, or fabric paint for personalization.
Material Comparison: Choosing the Right Fabric
The longevity and look of your storage bag depend heavily on material choice. Below is a comparison of common options based on durability, ease of use, and aesthetics.
| Fabric Type | Durability | Sewing Difficulty | Best For |
|---|---|---|---|
| Cotton Canvas | High | Easy | Daily-use bags, structured shapes |
| Denim (Medium Weight) | Very High | Moderate | Heavy-duty storage, vintage style |
| Felt (Wool or Felt Blend) | Medium | Very Easy | No-sew projects, soft interiors |
| Linen | Medium-High | Moderate | Minimalist, breathable designs |
| Upholstery Remnants | Very High | Moderate-Hard | Long-lasting professional setups |
Real Example: Transforming a Cluttered Home Office
Sarah, a freelance graphic designer in Portland, struggled with cable chaos and misplaced styluses. Her desk held three different organizers, none of which fit her Wacom accessories or charging blocks. After spending a Sunday afternoon measuring her tools and sketching a layout, she built a custom bag from recycled denim jeans and a scrap of red felt.
She included a deep main compartment, a narrow slit for tablets, and a Velcro-closed pocket for SD cards. The final product sat neatly beside her monitor, reducing setup time and eliminating daily searches. “It’s not just about storage,” she said. “Now my desk feels like *mine*—organized, intentional, and expressive.”
Checklist: Before You Start Sewing
- ✅ Inventory all small desk items needing storage
- ✅ Measure combined footprint of grouped items
- ✅ Sketch a rough design with pocket placements
- ✅ Gather fabric, thread, scissors, pins, and sewing machine (or needle for hand-sewing)
- ✅ Pre-wash and iron fabric to prevent shrinkage later
- ✅ Label each cut piece during assembly to avoid confusion
- ✅ Test closure mechanism before final stitching
Common Mistakes and How to Avoid Them
Even simple sewing projects can go awry without planning. Here are frequent pitfalls and how to sidestep them:
- Underestimating size: Always add ½ inch seam allowance to your measurements. It’s easier to adjust larger than rebuild too-small compartments.
- Ignoring weight distribution: If storing heavy items like power banks, reinforce the base with interfacing or double-layer fabric.
- Skipping lining: Unlined bags fray quickly and look unfinished. Lining also hides seams and adds structure.
- Poor closure choice: Magnetic snaps are sleek but weak for full bags. Zippers offer security but require precision. Test closures with weighted items before finalizing.
FAQ
Can I make this without a sewing machine?
Absolutely. Use fabric glue or fusible bonding tape (like HeatnBond) for no-sew construction. Felt works best for this method due to its non-fray properties. Just allow glued seams 24 hours to fully cure before use.
How do I clean the storage bag?
Spot clean with a damp cloth and mild detergent. If made from washable fabric, remove any stabilizers or interfacing first, then hand wash and air dry flat. Avoid machine washing unless using pre-shrunk, durable materials.
Can I scale this for laptop or tablet storage?
Yes. Increase dimensions proportionally and add padded layers using foam or batting between outer and inner fabric. Include elastic loops or neoprene bands to secure devices in place.
Final Thoughts: Design With Purpose
A clutter-free workspace isn’t achieved through generic solutions—it emerges from thoughtful, personalized design. By building your own desktop storage bag, you invest not just in organization, but in ownership of your environment. Each stitch reflects a decision to prioritize clarity, creativity, and care.
Start small. Use what you have. Iterate as needs change. Over time, your collection of handmade organizers can evolve alongside your workflow, adapting to new tools and routines. This isn’t just a craft project; it’s a step toward a more intentional way of working.


 浙公网安备
33010002000092号
浙公网安备
33010002000092号 浙B2-20120091-4
Comments
No comments yet. Why don't you start the discussion?