
In a world where smartphones are an extension of personal identity, the iPhone case has evolved from mere protection to a canvas for self-expression. With millions of identical devices in circulation, standing out starts with the details. Personalizing your iPhone case is not only a fun creative outlet but also a way to infuse personality into everyday tech. Whether you prefer minimalist elegance or bold artistic flair, there’s a method that fits your style — and most require nothing more than basic household supplies and a little imagination.
Why Personalization Matters
A custom iPhone case does more than protect your device; it reflects who you are. It can spark conversations, boost confidence, and even serve as a mood enhancer when designed with intention. According to design psychologist Dr. Lena Hartwell, “The objects we carry daily influence our self-perception. When a personal touch is added to something as frequently used as a phone, it reinforces individuality and ownership.”
Beyond psychology, personalized cases reduce the chance of mix-ups in shared environments like offices or classrooms. They also make thoughtful, low-cost gifts when tailored to someone’s interests.
“Your phone is the one item you interact with hundreds of times a day. Make it feel like yours.” — Jordan Pierce, Product Designer & Tech Lifestyle Blogger
Creative Ideas to Transform Your iPhone Case
Before diving into execution, explore some imaginative approaches that go beyond standard decals or pre-made designs:
- Photo Collage Case: Use small printed photos of loved ones, pets, or travel memories arranged in a mosaic pattern.
- Painted Artwork: Hand-paint abstract patterns, zodiac signs, or tiny landscapes using acrylics suitable for plastic or silicone surfaces.
- Washi Tape Geometry: Create sleek geometric designs or color-blocked sections using decorative washi tape.
- Embellished Glam: Glue on rhinestones, sequins, or beads for a dazzling, textured look.
- Quote Wrap: Print or hand-letter an inspiring quote, lyric, or inside joke along the edge or back panel.
- Nature-Inspired: Embed dried flowers or pressed leaves under a clear case for an organic aesthetic.
- Chalkboard Finish: Apply chalkboard paint to a plain case and write daily affirmations or doodles that change weekly.
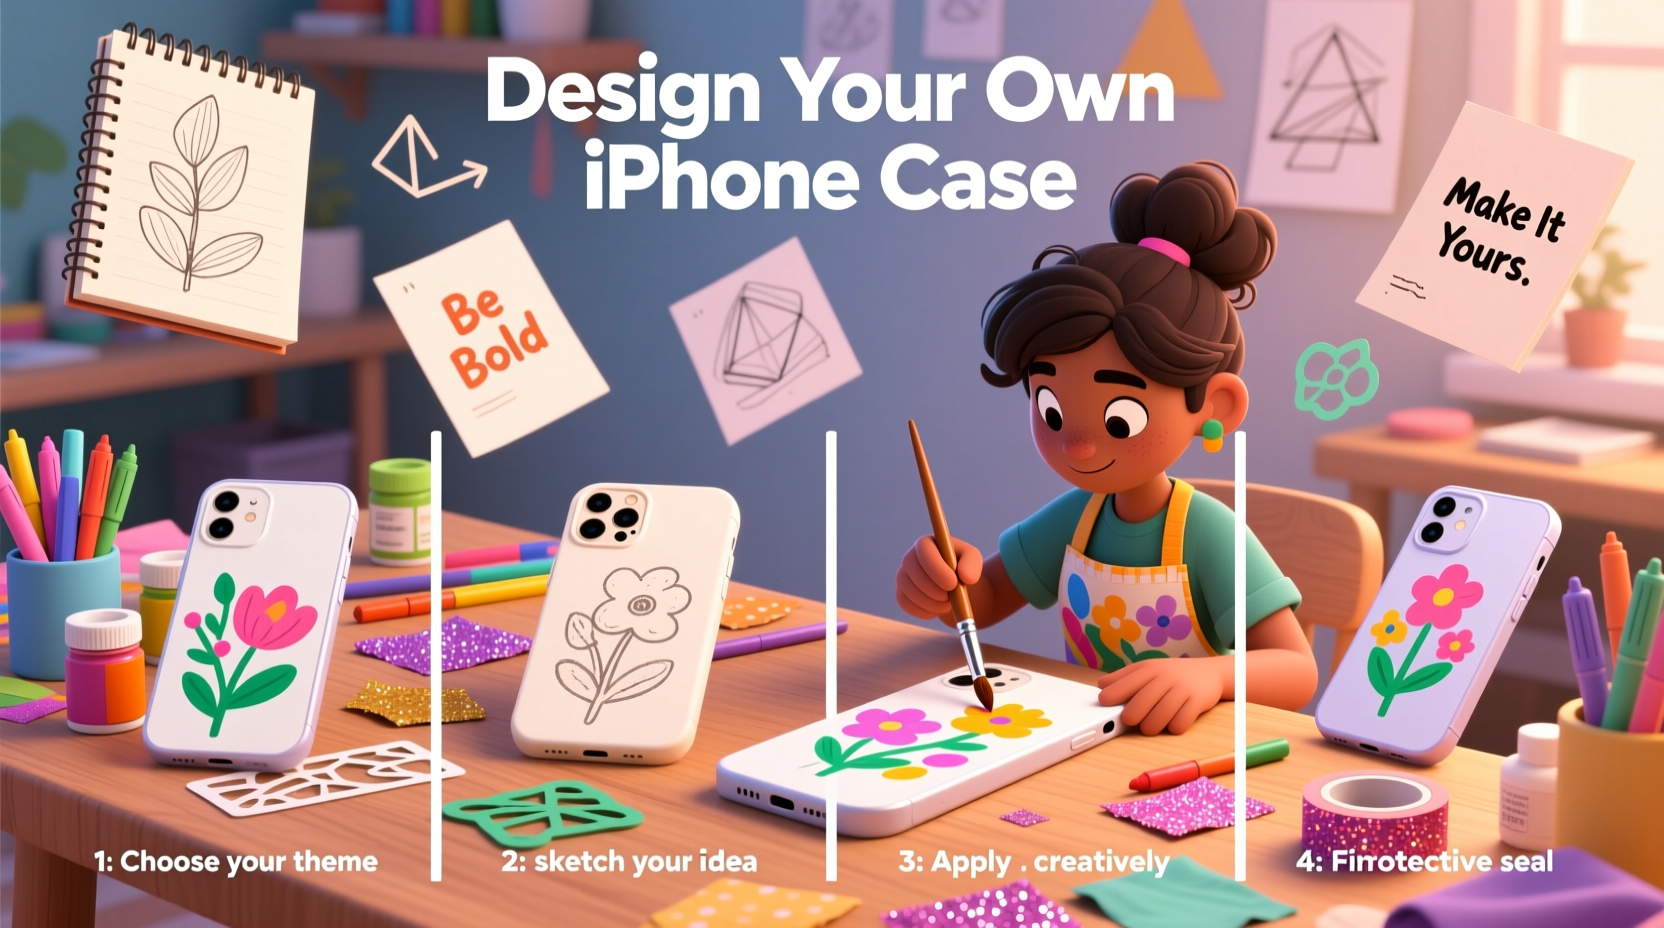
Step-by-Step Guide to Customize Your iPhone Case
Follow this detailed process to turn a plain case into a one-of-a-kind accessory. This guide works best with hard plastic or clear polycarbonate cases, though some steps adapt to silicone or TPU models.
- Gather Materials: Choose your base case (clear or solid color) and collect tools such as scissors, tweezers, glue (E6000 or Mod Podge), paintbrushes, sealant spray, and your chosen decorative elements.
- Design Planning: Sketch your idea on paper first. Consider symmetry, balance, and how buttons/camera cutouts will affect placement.
- Surface Prep: Wash the case with mild soap and water. Dry completely, then wipe with rubbing alcohol to remove oils.
- Apply Base Layer (if needed): For painted designs, apply a primer or white base coat. Let dry for at least two hours.
- Add Decorations: Depending on your method:
- For paint: Use fine brushes and layer thin coats.
- For collage: Trim images precisely and adhere with decoupage glue.
- For embellishments: Apply strong adhesive sparingly to avoid seepage.
- Dry Thoroughly: Allow 24 hours for all materials to set completely, especially glued items.
- Seal the Design: Spray with a clear acrylic sealer (matte or glossy) in a well-ventilated area. Apply 2–3 light coats, drying between each.
- Final Check: Test fit on your iPhone. Ensure ports, buttons, and camera remain accessible.
Do’s and Don’ts of DIY iPhone Case Customization
| Do’s | Don’ts |
|---|---|
| Use non-toxic, flexible adhesives that won’t crack over time | Use super glue or hot glue excessively — they can damage plastic and create lumps |
| Work in a dust-free environment to avoid particles under finishes | Ignore drying times — rushing leads to smudging or peeling |
| Test paints on a hidden area first to check compatibility | Forget about functionality — avoid blocking sensors or making the phone too bulky |
| Apply a UV-protective sealant if using photos or ink that may fade | Submerge the case in water after sealing — moisture can still penetrate micro-gaps |
Real Example: From Bland to Brand
Sophie, a freelance illustrator in Portland, grew tired of her plain black iPhone case blending into coffee shop tables and meeting rooms. She decided to transform it into a mini portfolio piece. Using a clear case, she printed miniature versions of her digital illustrations — a raccoon wearing sunglasses, a cactus with headphones — and arranged them in a comic strip layout across the back. She sealed it with matte varnish to reduce glare and prevent scratches. Within days, clients began asking about her art, leading to two commission requests. “It started as a fun project,” she said, “but now my phone literally opens doors.”
Essential Checklist Before You Begin
Customization Checklist:
- ☐ Choose a compatible case type (preferably smooth, rigid plastic)
- ☐ Clean and dry the surface thoroughly
- ☐ Gather all materials and tools in advance
- ☐ Plan your design layout (paper sketch or digital mockup)
- ☐ Work in a well-lit, ventilated space
- ☐ Allow adequate drying time between stages
- ☐ Seal the final product for durability
- ☐ Test fit and function before regular use
Frequently Asked Questions
Can I personalize a silicone case the same way as a hard plastic one?
Silicone is more porous and flexible, which makes paint and glue less likely to adhere permanently. If using silicone, opt for fabric markers or removable decals. For long-term results, a hard-shell case is recommended.
How do I remove mistakes without damaging the case?
For wet paint or glue, gently wipe with a cotton swab dipped in rubbing alcohol. Once dried, carefully peel or sand minor flaws with ultra-fine grit paper (400+), then reseal the area.
Will a customized case void my warranty or affect wireless charging?
No, personalization doesn’t affect Apple’s warranty unless internal components are altered. As long as the case isn’t overly thick (under 3mm) and uses non-metallic materials, wireless charging should work normally.
Making It Last: Maintenance Tips
A personalized case requires slightly more care than off-the-shelf versions. Avoid dropping it on rough surfaces, as embellishments can chip. Wipe clean with a microfiber cloth; never soak in water. Every few months, inspect the sealant — if colors appear faded or textures feel rough, reapply a fresh coat of protective spray.
Conclusion
Personalizing your iPhone case is more than a craft project — it’s an act of ownership in a world of mass production. With simple materials and mindful execution, you can create something that’s uniquely yours, functional, and expressive. Whether you're painting a celestial theme, embedding meaningful mementos, or showcasing your photography, the process invites creativity into daily life. Start small, experiment often, and let your phone reflect the person holding it.


 浙公网安备
33010002000092号
浙公网安备
33010002000092号 浙B2-20120091-4
Comments
No comments yet. Why don't you start the discussion?