
In a world where smartphones are an extension of our identity, the iPhone case has evolved from mere protection into a canvas for self-expression. With millions of identical cases sold each year, standing out requires creativity and personal touch. Customizing your iPhone case doesn’t require artistic mastery or expensive tools—just imagination and a few simple materials. Whether you prefer bold designs, subtle elegance, or playful themes, transforming your case into a unique accessory is easier than you think.
1. Start with the Right Base
The foundation of any great custom case is choosing the right blank. Clear silicone or hard plastic cases are ideal because they allow underlying designs to show through while offering durability. Matte-finish cases provide better adhesion for paint and glue, while glossy surfaces may require priming. Avoid textured cases if you plan to apply decals or paper-based artwork—they can create air pockets and uneven finishes.
Consider purchasing a slightly oversized clear case if you intend to layer materials beneath it. This creates a sealed, protected space for fragile elements like dried flowers or fabric swatches without compromising structural integrity.
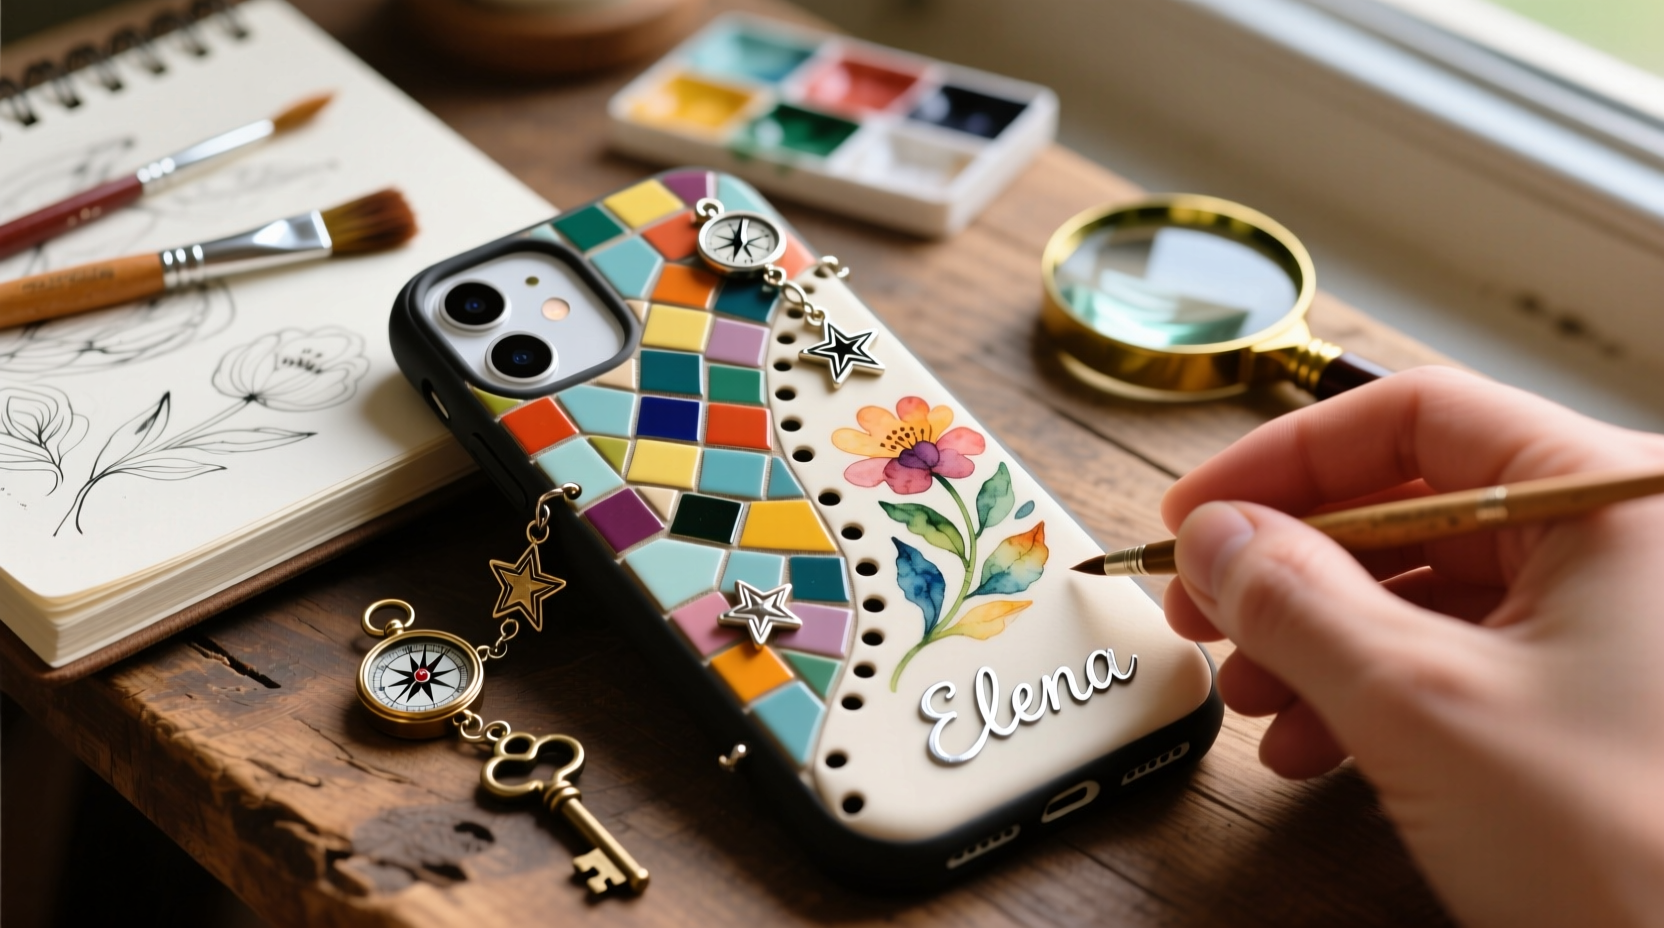
2. Paint Your Personality
Acrylic paint pens are among the most accessible tools for personalized case art. They come in vibrant colors, dry quickly, and adhere well to plastic when sealed properly. Freehand designs—such as abstract swirls, geometric patterns, or tiny illustrations—can reflect your mood or aesthetic.
For more precision, use painter’s tape to create clean lines or stencils cut from cardstock. If you're not confident in your drawing skills, lightly sketch your design with a pencil first, then trace over it with paint. Allow each layer to dry completely before adding details.
Once finished, seal your artwork with a clear matte or glossy mod podge or a specialized spray sealer. Multiple thin coats work better than one thick layer, reducing the risk of cracking or cloudiness.
“Hand-painted cases carry emotional value—they’re not just protective gear, but wearable memories.” — Lila Chen, Product Designer & DIY Artist
3. Collage with Purpose
Transform your case into a visual diary by creating a collage. Use small printed photos, magazine cutouts, ticket stubs from concerts, or handwritten notes. Arrange these on paper first, then scale them down using a home printer or photocopier to fit within the case dimensions.
Apply the collage under a clear case using double-sided tape or repositionable adhesive. Alternatively, print your collage directly onto sticker paper and trim it precisely to size. This method ensures longevity and a professional finish.
Themes elevate collages from random collections to meaningful statements. Try a travel series (mini landmarks from cities visited), a music tribute (band logos or lyrics), or seasonal changes (autumn leaves in fall, snowflakes in winter).
Step-by-Step: Creating a Memory Collage Case
- Select 3–5 small mementos (e.g., concert ticket snippet, emoji sticker, photo corner).
- Scan or photograph them and edit together in a digital layout tool.
- Print the final design on inkjet sticker paper.
- Cut precisely along the edges using a craft knife and ruler.
- Peel and apply smoothly onto a clean, flat surface inside a clear case.
- Press firmly to eliminate bubbles and close the case securely.
4. Embellish with 3D Elements
Add tactile interest with three-dimensional decorations. Small beads, rhinestones, mini pom-poms, or even LEGO® bricks (for playful charm) can be glued strategically to the back of a hard case. Use E6000 or strong craft glue for lasting hold, and avoid placing bulky items near ports or buttons.
Glitter offers sparkle without bulk. Apply glue in patterns—stars, initials, waves—and sprinkle fine glitter over it. Shake off excess and seal with a clear topcoat. For a gradient effect, start dense at one end and fade toward the other.
| Embellishment | Best For | Adhesive Tip |
|---|---|---|
| Rhinestones | Elegant accents, minimal shine | Use tweezers and dot glue |
| Fabric patches | Vintage or boho styles | Fuse with fabric glue or sew through soft cases |
| Dried flowers | Natural, earthy themes | Seal between two clear cases |
| Charms & chains | Statement backs | Attach via screw-on loops or magnetic mounts |
5. Leverage Technology and Print-on-Demand
If DIY feels daunting, digital customization services offer high-quality results. Upload your favorite photo, digital artwork, or text design to platforms like Snapcase, Skinit, or Etsy sellers who specialize in phone skins. These vinyl wraps adhere seamlessly to your device and resist scratches.
For something truly distinctive, try augmented reality (AR)-enabled cases. Some companies now produce scannable QR-style patterns embedded in the design that link to your portfolio, social media, or a personal message—turning your phone into a dynamic business card.
Mini Case Study: From Bland to Brand
Sophie, a freelance photographer in Portland, wanted her phone to reflect her brand. Instead of buying a generic floral case, she printed a miniature version of her signature black-and-white cityscape photo onto a transparent skin. She added a discreet metallic tag with her website URL using a tiny engraved label. At networking events, people noticed the detail and scanned the site immediately. Within a month, she gained three new clients—all citing the “cool phone” as their reason for starting the conversation.
Customization Checklist
- ☐ Choose a compatible base case (clear, smooth, durable)
- ☐ Gather supplies: paints, glue, scissors, sealant
- ☐ Plan your theme or message
- ☐ Test layout digitally or on paper first
- ☐ Seal all painted or glued surfaces
- ☐ Check functionality (buttons, charging port clearance)
- ☐ Evaluate comfort and pocket safety
Common Mistakes to Avoid
- Overloading the design: Too many elements make the case look cluttered and may interfere with usability.
- Skipping the sealant: Unsealed paint or paper will wear off quickly with daily use.
- Using non-flexible glue on silicone: Rigid adhesives crack when bent. Opt for flexible bonding agents.
- Blocking sensors: Avoid metallic foils or thick layers near the camera or wireless charging coil.
FAQ
Can I remove a custom design if I change my mind?
Yes, especially if applied under a removable clear case. Vinyl skins can be peeled off slowly with no residue. Painted designs are permanent unless sanded or covered, so consider reversible methods first.
Will glitter damage my phone or case?
Glitter itself won’t harm internal components, but loose particles could theoretically enter ports over time. Fully sealing the surface minimizes this risk. Avoid opening the case frequently after applying loose glitter.
How do I clean a customized case?
Use a soft, slightly damp cloth. Avoid soaking or scrubbing aggressively, especially on layered or glued areas. For disassembly-friendly designs, remove inner inserts and wipe separately.
Final Thoughts
Your iPhone case doesn’t have to be an afterthought. It’s a daily companion, a conversation starter, and a chance to showcase your individuality. From hand-painted motifs to memory-filled collages and tech-enhanced skins, the possibilities are limited only by your imagination. The best designs aren’t necessarily the flashiest—they’re the ones that feel authentic, tell a story, and bring a smile every time you pick up your phone.


 浙公网安备
33010002000092号
浙公网安备
33010002000092号 浙B2-20120091-4
Comments
No comments yet. Why don't you start the discussion?