
Borders are more than just decorative lines—they frame your content, enhance visual hierarchy, and add personality to digital designs. On Canva, the ability to create custom borders goes far beyond basic rectangles. With a few creative techniques, you can design borders that reflect your brand’s tone, elevate social media graphics, or make printables stand out. Whether you're designing invitations, flyers, or Instagram posts, mastering custom borders unlocks new levels of polish and professionalism.
Why Custom Borders Matter in Design
A well-designed border acts as a silent ambassador for your content. It guides the viewer’s eye, creates separation from surrounding elements, and adds cohesion to layouts. Unlike default frames or solid lines, custom borders allow you to incorporate textures, patterns, icons, and even animated effects (in video formats). They turn ordinary visuals into memorable pieces.
In branding, consistent use of stylized borders helps reinforce recognition. For example, a wedding planner might use delicate floral vines along invitation edges, while a tech startup could opt for sleek geometric dashes. The key is intentionality—every border should serve both aesthetic and functional purposes.
“Design details like borders are where personality lives. A thoughtful edge can transform generic content into something uniquely yours.” — Lena Torres, Digital Design Strategist
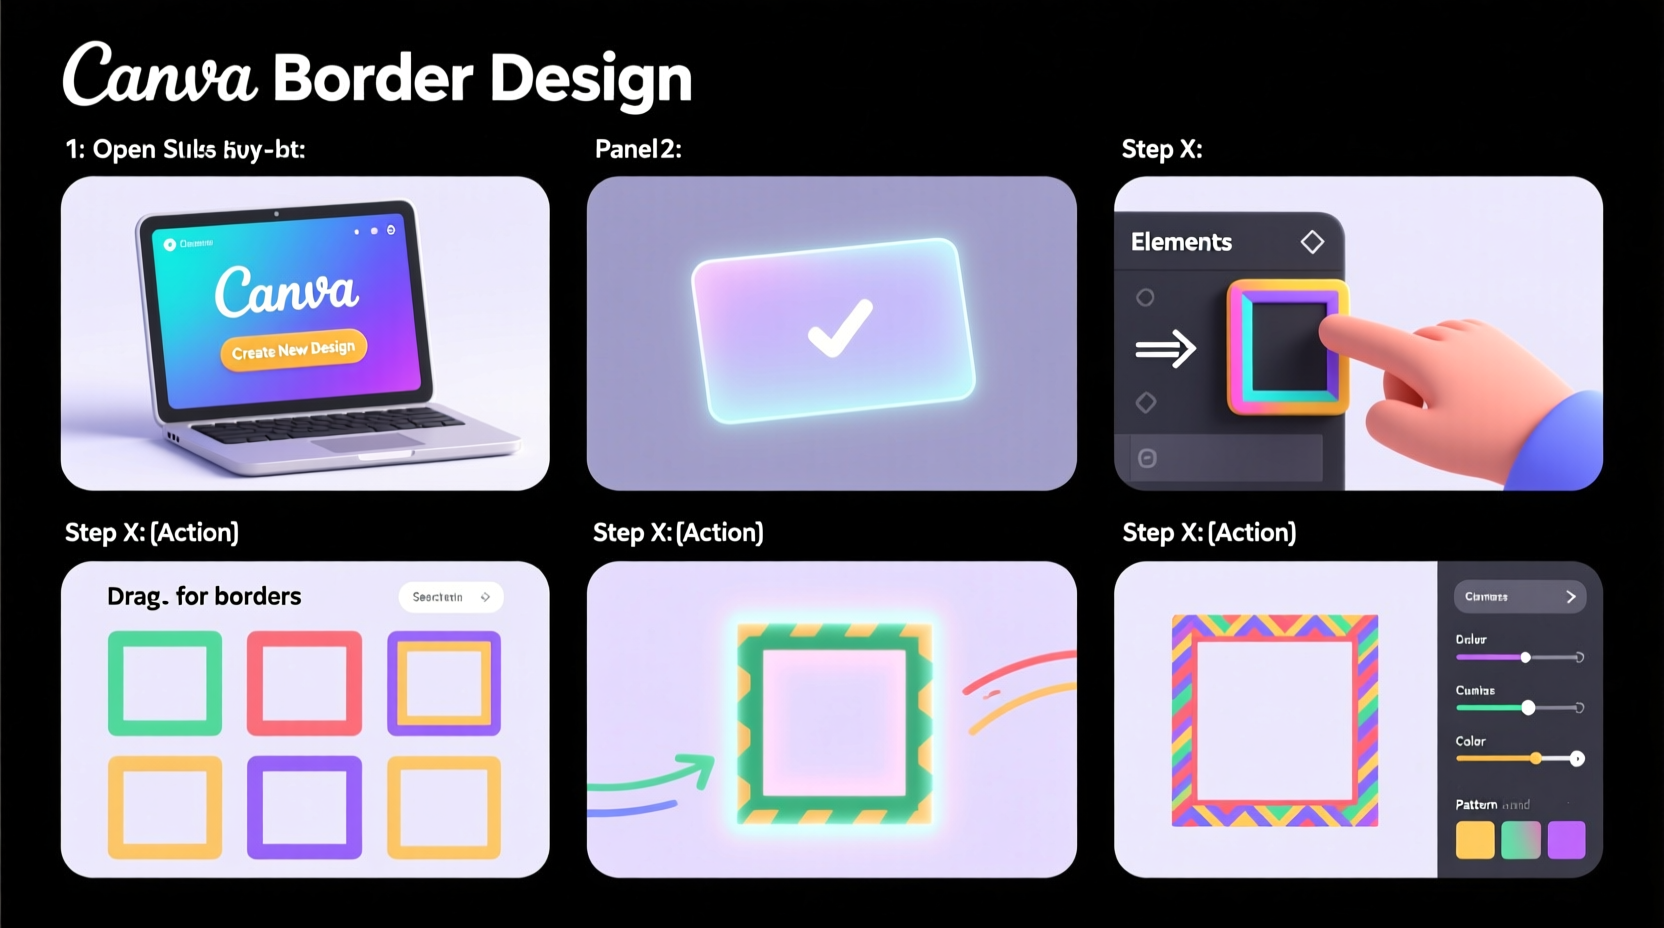
Step-by-Step Guide to Creating Custom Borders in Canva
Canva doesn’t have a dedicated “custom border” tool, but its flexible interface allows for creative workarounds. Follow these steps to build borders tailored to your vision.
- Open a New Design: Start by selecting or creating a canvas size appropriate for your project—Instagram post, flyer, business card, etc.
- Duplicate Page Elements (Optional): If applying a border around specific content, group those elements first to avoid misalignment.
- Add a Background Frame (Base Layer): Use a rectangle shape slightly larger than your main content area to act as a masking layer. Set it behind your design and color it to contrast subtly.
- Create the Border Path: Use four separate rectangles—one for each side—to form a frame. Adjust width and height to control thickness. Align them precisely using Canva’s alignment tools.
- Customize Each Side Individually: This is where creativity begins. Change colors, gradients, transparency, or duplicate shapes to create repeating patterns like dots, stripes, or zigzags.
- Incorporate Design Elements: Drag icons, lines, illustrations, or text art along the border path. Rotate, resize, and space them evenly to create a seamless effect.
- Group and Lock: Once satisfied, group all border components together and lock them in place to prevent accidental movement during editing.
Using Transparency and Overlays for Subtle Effects
For elegant, understated borders, try semi-transparent layers. Create a rectangle that extends beyond your core content, then reduce its opacity to 10–20%. Apply soft shadows or blur effects to suggest depth without overpowering the design. This technique works especially well for minimalist portfolios or editorial layouts.
Creative Border Ideas You Can Implement Today
Move beyond straight lines with these imaginative approaches that leverage Canva’s library and flexibility.
- Patterned Dashes: Replace solid lines with rows of small triangles, circles, or stars. Duplicate a single shape and use Ctrl+D (or Cmd+D) to repeat it quickly.
- Natural Motifs: Search Canva’s Elements tab for “leaf border,” “vine,” or “feather trail” to find pre-made organic frames. Customize colors to match your palette.
- Typography Borders: Type a repeated word (e.g., “love,” “style,” “hello”) and curve the text using third-party tools or arrange letters manually around the edge.
- Photo Frames with Cutouts: Layer multiple shapes to create window-like cutouts. Place photos inside and add a thin colored stroke around the outer edge for definition.
- Hand-Drawn Style: Use the Scribble tool or import hand-drawn SVGs for sketchy, personal borders ideal for journals or artisan brands.
| Border Type | Best Use Case | Time Required |
|---|---|---|
| Solid Color Stroke | Professional reports, clean layouts | 2 minutes |
| Icon Repeat (e.g., hearts, stars) | Invitations, birthday graphics | 8–10 minutes |
| Gradient Line | Social media banners, modern branding | 5 minutes |
| Illustrated Frame (floral, geometric) | Premium printables, luxury branding | 15+ minutes |
Real Example: Redesigning a Wedding Invitation
Sophie, a freelance designer, was tasked with updating a client’s wedding invitation suite. The original design felt flat despite beautiful photography. She introduced a custom border made from mirrored eucalyptus sprigs sourced from Canva’s free illustration library. By duplicating and rotating the leaves, she created a continuous greenery frame around the central text block. She then added a subtle gold stroke (using a thin rectangle with gradient fill) beneath the foliage to give it lift. The result was an elevated, cohesive look that matched the couple’s rustic-chic theme. Guests later commented on how “thoughtfully designed” the invite felt—an impression driven largely by the border detail.
Checklist: Building a High-Impact Custom Border
- ✅ Define the mood: playful, elegant, bold, minimal?
- ✅ Choose a consistent color scheme aligned with your brand
- ✅ Select a base structure (solid, dashed, illustrated)
- ✅ Use alignment and spacing tools for precision
- ✅ Test visibility on different backgrounds (light/dark)
- ✅ Group and lock final border elements
- ✅ Save template for future use
Frequently Asked Questions
Can I save my custom border as a reusable element in Canva?
Yes. After creating your border, select all components, right-click, and choose “Save as template” (available in Canva Pro). Alternatively, save it as a standalone design and copy-paste into new projects.
How do I make curved or circular borders in Canva?
While Canva lacks native curved text paths, you can simulate curved borders by manually placing small shapes (dots, dashes) along an invisible arc. Draw a large circle as a guide, place elements around its edge, then delete the guide. For advanced curves, consider importing SVG files created in vector software.
Are there copyright concerns when using Canva’s elements in borders?
No, all elements from Canva’s library are cleared for commercial use under their standard license. However, avoid trademarked symbols or logos unless properly licensed. Stick to abstract shapes, nature motifs, and generic icons for safe application.
Mastering Detail for Maximum Impact
The most memorable designs often hinge on subtle craftsmanship. A custom border may occupy only a fraction of your canvas, but its influence on perception is disproportionate. It signals attention to detail, reinforces thematic consistency, and frames your message with intention. What starts as a simple line can evolve into a signature design element—something followers begin to associate with your style.
Start small: experiment with one border type this week. Try a dotted line for a playful newsletter header or a metallic edge for a product launch graphic. As you refine your technique, you’ll find that borders become not just finishing touches, but integral parts of your creative voice.


 浙公网安备
33010002000092号
浙公网安备
33010002000092号 浙B2-20120091-4
Comments
No comments yet. Why don't you start the discussion?