
Trapped water in the ear is a common yet uncomfortable experience, especially after swimming, showering, or diving. While it often resolves on its own, lingering moisture can lead to irritation, muffled hearing, or even infections like swimmer’s ear (otitis externa). The good news is that most cases can be managed safely at home with simple, effective techniques. Understanding how to remove water from your ear promptly and correctly helps prevent complications and restores comfort quickly.
Why Water Gets Stuck in the Ear
The outer ear canal has a natural curve and slight slope that usually allows water to drain out. However, certain factors—such as narrow ear canals, excessive earwax, or the presence of earplugs—can trap moisture. When water remains, it creates a damp environment where bacteria can thrive, increasing infection risk. Recognizing the signs early—like a feeling of fullness, crackling sounds, or mild discomfort—is key to taking timely action.
Safe and Effective Home Methods to Remove Water
Most home remedies focus on altering pressure, promoting evaporation, or encouraging gravity-assisted drainage. These approaches are non-invasive and typically yield results within minutes.
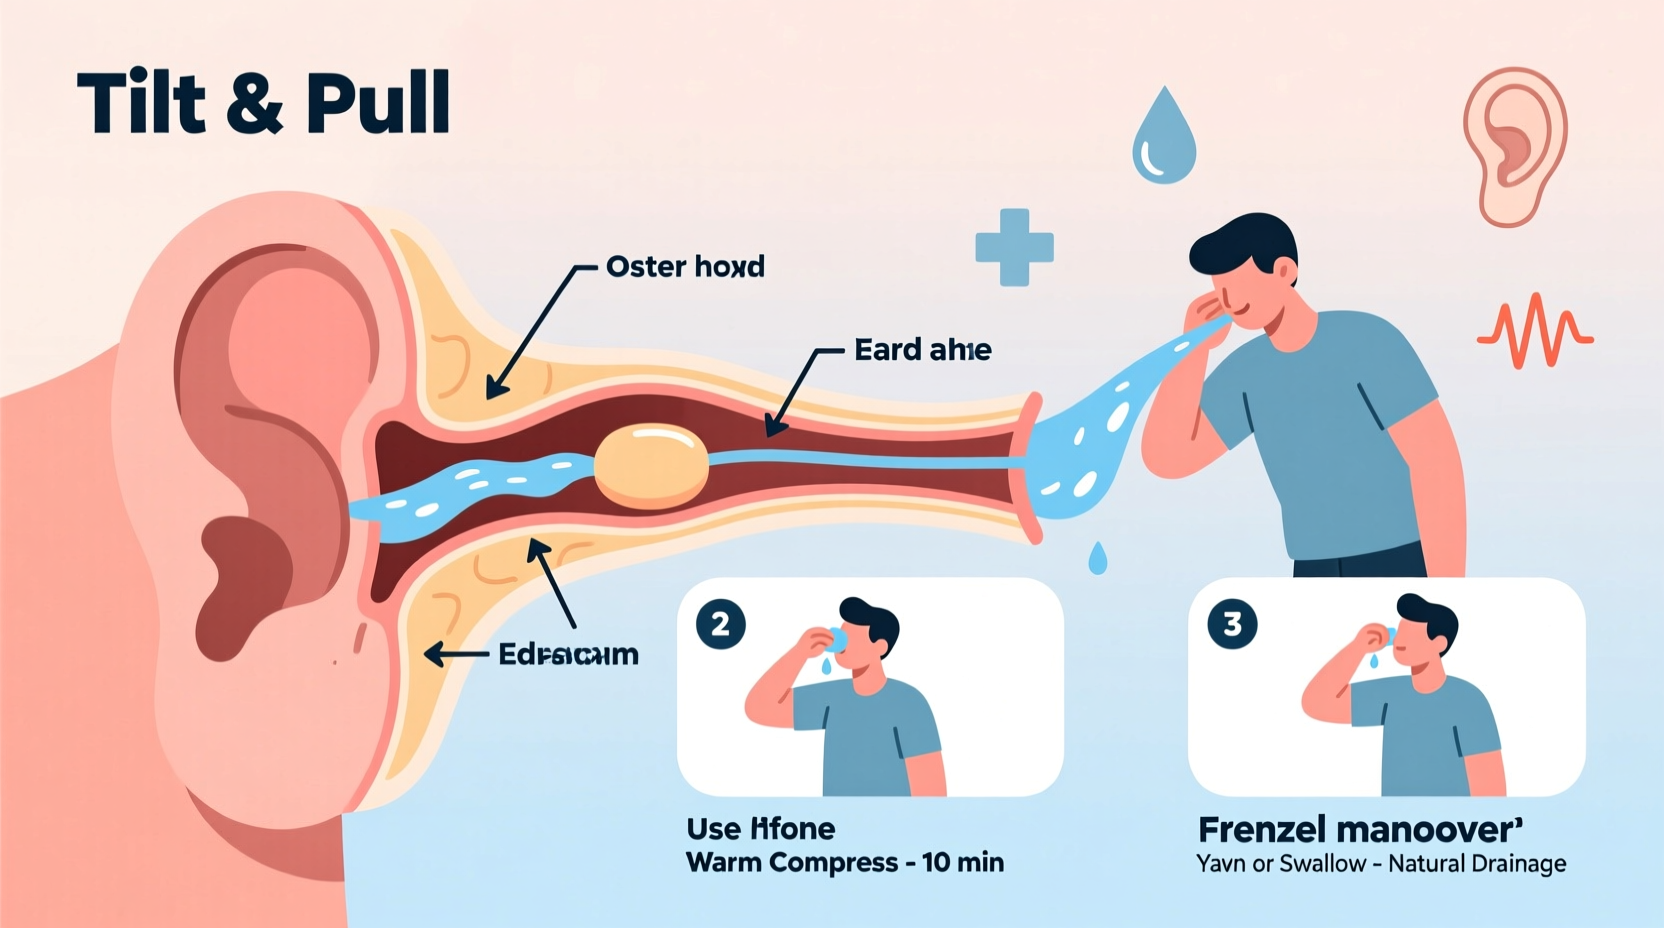
1. Gravity Drainage Technique
This is the simplest first step. Tilt your head so the affected ear faces downward. Gently pull the outer ear in different directions—upward and backward—to straighten the ear canal. Stay in this position for 30 seconds to a minute, allowing gravity to do the work.
2. Create a Vacuum with Your Hand
Cup your palm tightly over the affected ear, pressing firmly to create a seal. Then, quickly push and release your hand several times. This motion generates gentle suction that may dislodge trapped water.
3. Use Warm Air to Evaporate Moisture
A hairdryer on the lowest heat and speed setting can help evaporate water inside the ear. Hold it at least 30 cm (1 foot) away and direct the airflow toward the ear opening. Move it back and forth to avoid overheating. This method is particularly useful for children who may not tolerate other techniques.
4. Chew or Yawn to Activate Jaw Movement
Moving the jaw helps shift the Eustachian tube and change pressure in the middle ear. Chewing gum, yawning widely, or talking animatedly can assist in dislodging water from the outer canal by subtly altering ear geometry.
5. Alcohol and Vinegar Solution (for swimmers)
A mixture of equal parts white vinegar and rubbing alcohol can help dry out the ear and prevent bacterial growth. Pour about 1 teaspoon into the ear, let it sit for 30 seconds, then tilt your head to drain. The vinegar disrupts microbial activity, while alcohol promotes rapid evaporation.
“Using an alcohol-vinegar solution after swimming significantly reduces the risk of swimmer’s ear in frequent swimmers.” — Dr. Alan Foster, Otolaryngologist
Step-by-Step Guide: Removing Water from the Ear at Home
- Tilt your head to the side with the affected ear facing down.
- Gently tug on the upper part of your ear to straighten the canal.
- Apply light pressure behind the ear to help move fluid.
- Create a vacuum by cupping your hand over the ear and pumping gently.
- Chew or yawn to activate jaw muscles and shift inner pressure.
- If needed, apply a few drops of alcohol-vinegar solution and drain after 30 seconds.
- Use a hairdryer on low, held at a safe distance, for up to one minute.
Repeat steps as necessary, but avoid aggressive methods. If symptoms persist beyond 2–3 days, seek medical advice.
What Not to Do: Common Mistakes
Some well-intentioned actions can worsen the situation or damage delicate ear structures. Avoid these practices:
| Do’s | Don’ts |
|---|---|
| Tilt head to drain water | Insert cotton swabs deep into the ear |
| Use a hairdryer on low heat | Use sharp objects like bobby pins or keys |
| Apply alcohol-vinegar drops (if no perforation) | Put oil or peroxide without consulting a doctor |
| Chew gum or yawn to shift pressure | Ignore pain or worsening symptoms |
Never insert anything into the ear canal. Cotton swabs, despite their popularity, often push wax and water deeper and can cause injury.
Real Example: A Swimmer’s Quick Recovery
Lena, a competitive swimmer, frequently experienced clogged ears after practice. One evening, she noticed persistent fullness and muffled hearing in her right ear. Instead of ignoring it, she tried the gravity method—tilting her head and tugging her earlobe. No success. She then used the hand-pump vacuum technique, followed by a few drops of the alcohol-vinegar solution. After lying on her side for a minute, she felt the water drain out. Her hearing returned to normal within 10 minutes. By acting early and avoiding cotton swabs, Lena prevented an infection that had sidelined her teammates in the past.
When to See a Doctor
While most cases resolve at home, certain red flags require professional evaluation:
- Persistent pain or increasing discomfort
- Drainage that is yellow, bloody, or foul-smelling
- Fever or swelling around the ear
- Hearing loss lasting more than 48 hours
- Dizziness or ringing in the ear (tinnitus)
These symptoms may indicate an infection or a perforated eardrum. In such cases, self-treatment can be dangerous. A healthcare provider may prescribe antibiotic ear drops or perform safe irrigation.
FAQ
Can I use hydrogen peroxide to remove water from my ear?
Hydrogen peroxide is sometimes used to soften earwax, but it should not be used solely for water removal—especially if you suspect an infection or have ear tubes. It can irritate sensitive skin and increase discomfort. Consult a doctor before using any liquid solutions if you have a history of ear issues.
Is it dangerous if water stays in my ear overnight?
Occasionally, yes. Prolonged moisture increases the risk of bacterial growth, leading to swimmer’s ear. If you go to bed with water in your ear, try one of the drying methods first. If unsuccessful, monitor for pain or discharge the next day and act accordingly.
Can children use the same methods?
Yes, but with caution. For children, the warm air method (hairdryer) is safest. Avoid inserting any drops unless approved by a pediatrician. Always supervise kids during ear care routines.
Prevention Tips Checklist
Preventing water buildup is easier than treating it. Follow this checklist to minimize risk:
- ✅ Wear silicone earplugs when swimming
- ✅ Dry ears thoroughly with a towel after showers or swims
- ✅ Use a hairdryer on cool/low setting post-swim
- ✅ Apply preventive alcohol-vinegar drops after water exposure (if no history of ear problems)
- ✅ Avoid inserting cotton swabs or fingers into the ear canal
Conclusion
Removing water from your ear doesn’t require special tools or medical visits in most cases. With simple techniques like tilting, creating suction, or using a safe drying solution, relief is often just minutes away. The key is acting promptly, avoiding harmful practices, and knowing when to seek help. By understanding your ear’s anatomy and respecting its sensitivity, you can maintain comfort and prevent infections effectively.


 浙公网安备
33010002000092号
浙公网安备
33010002000092号 浙B2-20120091-4
Comments
No comments yet. Why don't you start the discussion?