
Wet shoes are more than just uncomfortable—they can lead to unpleasant odors, material degradation, and even structural damage if not dried properly. Whether your footwear got soaked in the rain, during a hike, or from an accidental spill, knowing how to dry them effectively is essential. The key is balancing speed with safety: drying too fast can warp leather, crack glue, or shrink fabrics, while drying too slowly invites mold and mildew. This guide outlines proven, home-friendly techniques that preserve your shoes’ integrity while getting them ready for wear again.
Why Proper Drying Matters
Shoes are engineered composites of fabric, foam, rubber, and sometimes leather or synthetic membranes. When water penetrates these layers, it compromises breathability, cushioning, and shape. Trapped moisture creates a breeding ground for bacteria, which leads to persistent smells. Over time, repeated improper drying weakens adhesives, especially in athletic and running shoes, reducing their lifespan significantly.
Drying shoes correctly isn’t just about convenience—it’s about protecting your investment. A well-cared-for pair can last years longer than one subjected to haphazard drying practices like placing it near a radiator or stuffing it with newspaper without rotation.
“Moisture management is critical for shoe longevity. Rapid, uneven drying causes stress fractures in materials, especially midsoles and uppers.” — Dr. Lena Patel, Footwear Materials Scientist
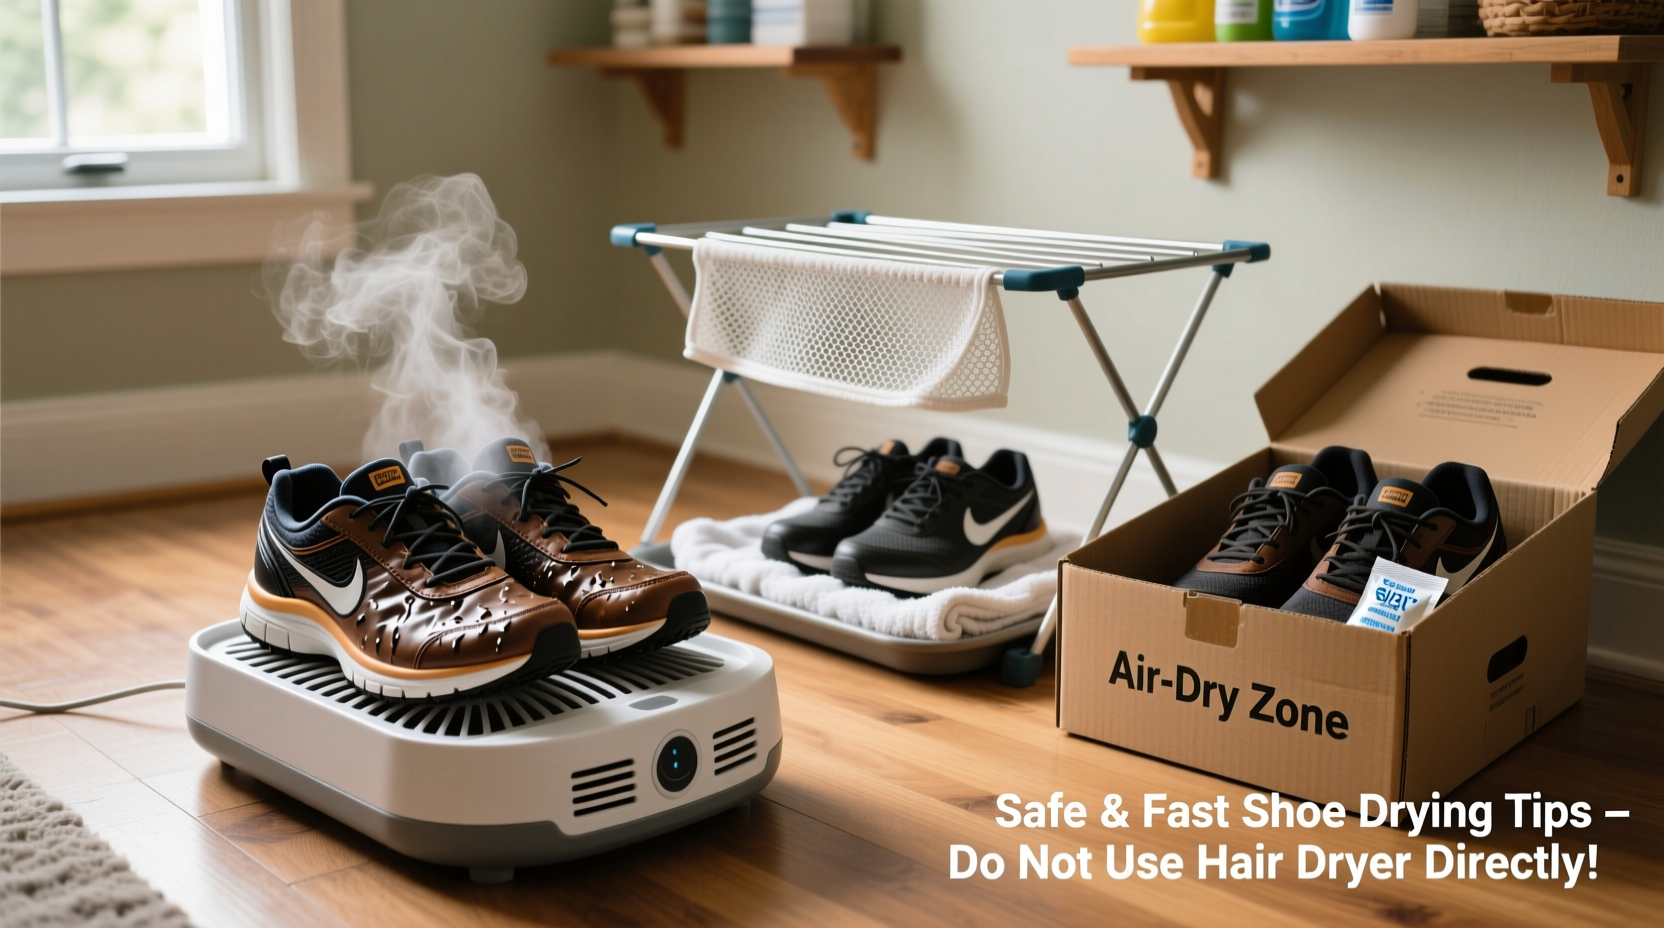
Step-by-Step Guide to Safely Dry Wet Shoes
Follow this structured approach to maximize drying efficiency while minimizing damage:
- Remove surface water immediately: Use a clean towel to blot excess moisture from the exterior. Avoid rubbing, which can push water deeper into the fabric.
- Take out the insoles and loosen laces: Remove insoles and footbeds if possible. This allows air to circulate inside the shoe and speeds up internal drying. Loosen or remove laces to open up the upper structure.
- Empty debris and dirt: Gently brush off mud or grit using a soft-bristle brush. Letting dirt dry inside can scratch linings and trap moisture.
- Use absorbent fillers: Stuff the interior with crumpled paper towels or clean, dry socks. Replace every few hours as they absorb moisture.
- Position for airflow: Place shoes in a well-ventilated area, ideally angled so water drains naturally. Never place flat on a surface where moisture can pool at the sole.
- Air-dry patiently: Allow 24–48 hours for full drying at room temperature. Resist the urge to accelerate with heat unless using controlled methods (see below).
Effective Home Drying Methods Compared
Not all drying techniques are equal. Some work faster but carry risks. Below is a comparison of common at-home methods based on effectiveness, safety, and accessibility.
| Method | Time Required | Safety Level | Best For |
|---|---|---|---|
| Natural Air Drying | 24–48 hours | ★★★★★ | All materials, especially leather and suede |
| Paper Towel or Newspaper Stuffing | 12–24 hours | ★★★★☆ | Casual sneakers, canvas shoes |
| Fan-Assisted Drying | 8–12 hours | ★★★★☆ | Running shoes, mesh uppers |
| Shoe Drying Rack with Heat Function | 4–6 hours | ★★★☆☆ | Winter boots, multiple pairs |
| Radiator or Direct Heat | 3–5 hours | ★☆☆☆☆ | Emergency only – high risk of damage |
Advanced Techniques for Faster, Safer Drying
Beyond basic air drying, several smart household strategies can accelerate the process without harming your shoes.
Use a Fan Strategically
Place your shoes 1–2 feet in front of a box fan or oscillating fan. Ensure airflow enters the shoe opening. Combine this with internal stuffing (paper or dry cloths) to wick moisture outward. This method reduces drying time by up to 50% compared to passive air drying.
Try the Rice Bag Trick (Indirectly)
While putting shoes directly in rice is inefficient, you can use uncooked rice as a secondary absorber. Fill a breathable cloth bag with rice and place it inside the shoe after initial towel-drying. Rice helps pull residual humidity from liners and midsoles over 8–12 hours.
Invest in a Dedicated Shoe Dryer
Compact electric shoe dryers gently warm the interior with low-heat airflow (typically under 40°C / 104°F), preventing warping. These devices are ideal for athletes, outdoor workers, or anyone frequently dealing with wet footwear. Models with UV-C features also help sanitize odor-causing bacteria.
Real Example: Hiker’s Rainy Trail Recovery
Mark, an avid weekend hiker in the Pacific Northwest, returned from a trail soaked after unexpected downpours. His waterproof hiking boots were drenched inside due to stream crossings and sweat buildup. Instead of placing them near his garage heater—a habit that previously cracked the heel counters—he followed a careful protocol:
- He removed the insoles and laces immediately.
- Stuffed each boot with rolled microfiber towels.
- Set them in front of a ceiling fan in his laundry room.
- Replaced the towels twice over 18 hours.
By the next morning, the boots were dry, retained their shape, and showed no signs of odor. Mark noted that this method preserved the breathability of the Gore-Tex lining, which had degraded in past attempts using direct heat.
Checklist: Safe Shoe Drying at Home
Use this actionable checklist the next time your shoes get wet:
- ☐ Blot exterior with a dry towel
- ☐ Remove insoles and laces
- ☐ Brush off mud or debris
- ☐ Stuff with paper towels or clean cloths
- ☐ Place in a ventilated area, away from direct sunlight
- ☐ Use a fan to increase airflow (optional)
- ☐ Replace stuffing every 3–4 hours
- ☐ Wait 24+ hours before wearing
- ☐ Condition leather afterward to restore moisture balance
Common Mistakes That Damage Shoes During Drying
Avoid these frequent errors that compromise shoe quality:
- Using direct heat sources: Radiators, space heaters, or ovens distort shape and weaken bonding agents.
- Leaving shoes in plastic bags: Traps moisture and encourages mold growth.
- Skipping insole removal: Insoles hold the most moisture and take longest to dry.
- Putting wet shoes back in storage: Leads to musty odors and material breakdown over time.
FAQ
Can I put my shoes in the dryer?
No. Tumble dryers generate excessive heat and mechanical stress that can break down glues, warp soles, and ruin cushioning. Even “air-only” cycles create too much agitation for most footwear.
How do I prevent odors after drying?
After drying, sprinkle a small amount of baking soda inside and let it sit overnight to neutralize lingering smells. For stronger cases, use specialized shoe deodorizing sprays with antimicrobial properties.
Are there materials that shouldn’t be air-dried?
All shoes can be air-dried safely, but delicate materials like suede or nubuck require extra care. Avoid soaking these; instead, use a suede brush and eraser first, then dry at room temperature. Never apply heat or liquid cleaners directly.
Final Tips for Long-Term Shoe Care
Drying is just one part of responsible shoe maintenance. To extend the life of your footwear:
- Apply waterproof sprays regularly on non-waterproof shoes.
- Rotate between multiple pairs to allow adequate drying time.
- Store shoes in a cool, dry closet with good airflow.
- Use cedar shoe trees for leather shoes to absorb moisture and maintain shape.
“Letting shoes dry slowly and evenly is the single best thing you can do for durability.” — Carlos Mendez, Professional Cobbler with 22 years of experience
Conclusion
Drying wet shoes doesn’t have to mean choosing between speed and safety. With the right techniques—like strategic stuffing, fan-assisted airflow, and patience—you can restore your footwear efficiently while preserving its structure and comfort. Avoid shortcuts involving high heat, and always prioritize even, gradual drying. Your shoes will thank you with longer performance, better fit, and fresher smell.


 浙公网安备
33010002000092号
浙公网安备
33010002000092号 浙B2-20120091-4
Comments
No comments yet. Why don't you start the discussion?