
Car stickers—whether promotional decals, window graphics, or temporary identifiers—are often designed to be \"traceless,\" meaning they’re meant to come off cleanly. In practice, however, adhesive residue, environmental exposure, and improper removal techniques can leave behind stubborn marks or even damage the paint. Removing these stickers safely requires patience, the right tools, and a clear understanding of how different materials react to heat, solvents, and mechanical pressure.
Done correctly, sticker removal should leave your vehicle looking as pristine as before application. Done poorly, it can result in dull spots, peeling clear coat, or permanent staining. This guide provides tested, professional-grade methods that preserve your car’s finish while eliminating every trace of adhesive.
Understanding Traceless Stickers and Adhesive Behavior
The term “traceless” refers to stickers engineered with low-tack adhesives that allow for clean removal after short to medium-term use. These are commonly used for dealership promotions, rental vehicles, or time-limited branding. Despite their design, several factors can compromise easy removal:
- Exposure to UV rays: Prolonged sun exposure hardens adhesive, making it more aggressive.
- Temperature fluctuations: Repeated expansion and contraction weaken bond integrity but may also bake residue into micro-pores in the paint.
- Dirt and grime buildup: Contaminants trapped under the sticker create a barrier that complicates clean peeling.
As automotive paint systems have evolved—especially with modern clear coats—so too must our approach to maintenance and detail work. Aggressive scraping or chemical misuse can strip protective layers just as easily as physical abrasion.
“Modern clear coats are durable but not indestructible. The key is using chemistry and heat synergistically, not forcefully.” — Daniel Reeves, Automotive Detailing Specialist with 18 years in OEM paint protection
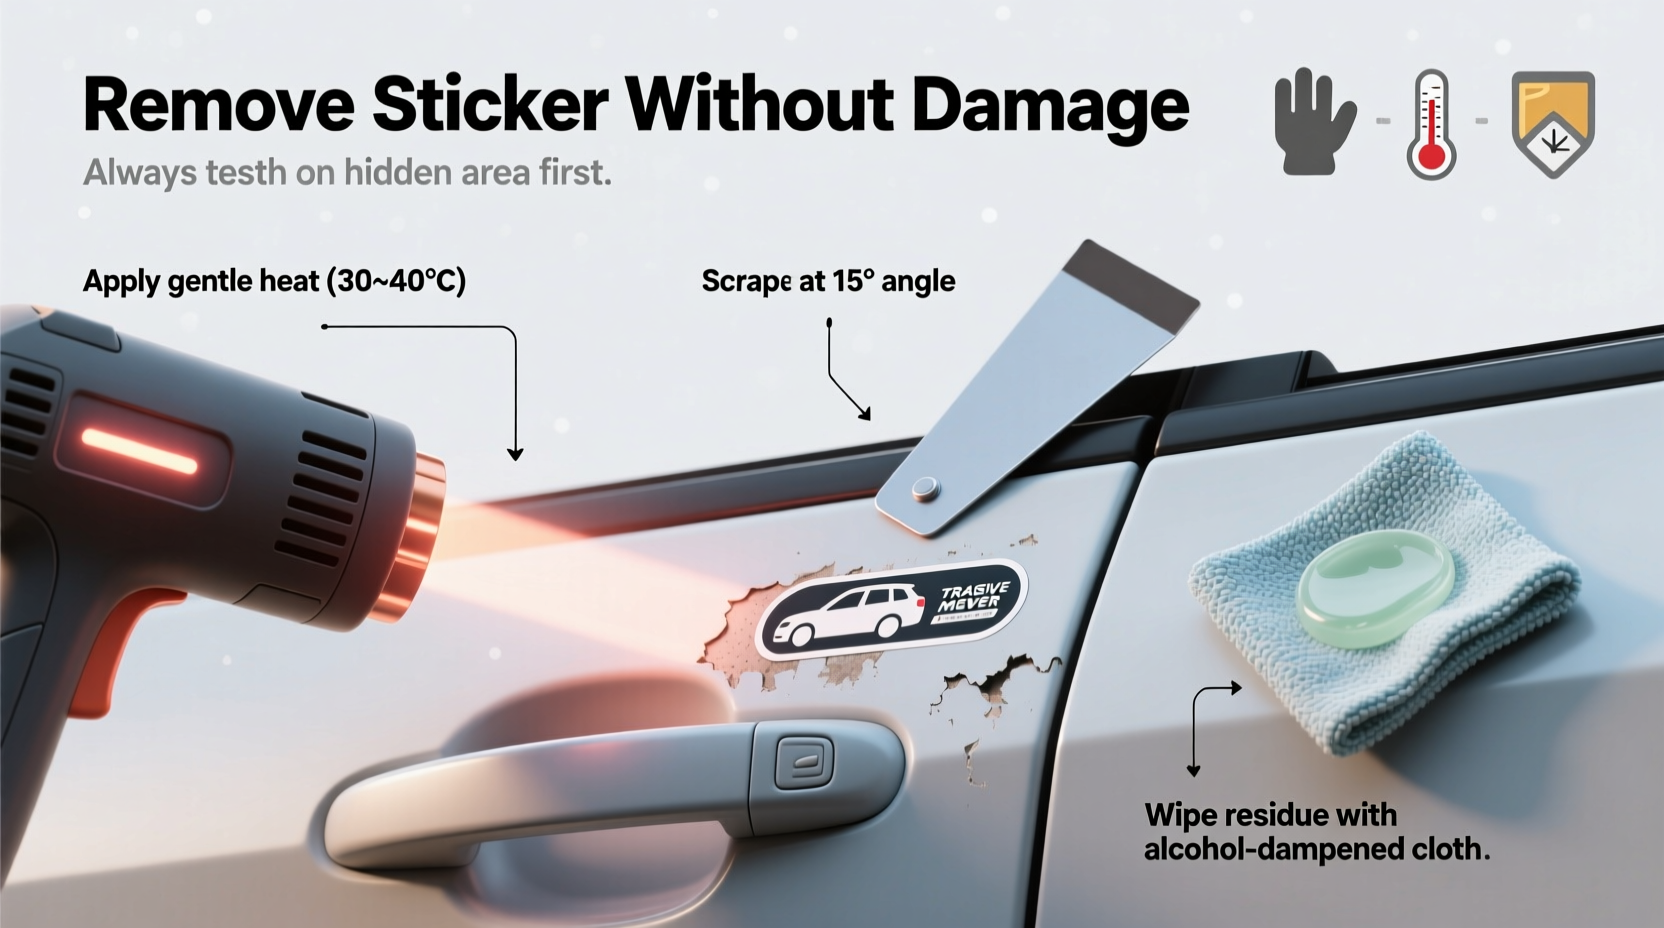
Step-by-Step Guide: Safe Removal Process
Follow this methodical sequence to ensure complete sticker and residue removal without harming your vehicle’s surface.
- Wash the area: Clean the sticker and surrounding paint with mild car shampoo and water. Remove surface dirt to prevent scratching during removal.
- Apply heat gently: Use a household hairdryer on medium heat, holding it 3–4 inches from the surface. Warm the sticker for 30–60 seconds to soften the adhesive.
- Lift an edge carefully: Use a plastic razor blade or guitar pick to lift one corner. Avoid metal scrapers unless covered with tape to prevent marring.
- Peel slowly at a 90-degree angle: Pull the sticker back over itself while maintaining heat. This minimizes stretching and reduces the chance of tearing.
- Treat residual adhesive: Apply a dedicated adhesive remover (e.g., 3M Adhesive Remover or Isopropyl Alcohol 70%) with a microfiber cloth. Let sit for 1–2 minutes before wiping.
- Final wash and polish: Re-wash the area and apply a quick-detail spray or light wax to restore gloss and protect the surface.
Recommended Tools and Chemicals
Using the correct products significantly reduces risk. Below is a comparison of common solutions and their suitability for painted surfaces.
| Product | Suitable for Paint? | Effectiveness | Notes |
|---|---|---|---|
| Isopropyl Alcohol (70%) | Yes | Moderate | Safer than stronger solvents; ideal for light residue. |
| 3M Adhesive Remover | Yes (when used properly) | High | OEM-recommended; evaporates cleanly without residue. |
| Goo Gone (Original) | Cautiously | High | Contains citrus oils that may degrade wax; always follow with polish. |
| Acetone | No | Very High | Will damage clear coat; strictly avoid on painted areas. |
| WD-40 | Conditionally | Moderate | Can loosen adhesive but leaves oily film; requires thorough post-cleaning. |
Always test any solvent on a small, inconspicuous area first—such as behind a door or near the wheel well—to verify compatibility with your paint type.
Real Example: Rental Car Decal Removal Gone Right
A 2023 Toyota Camry returned from a six-month rental program had two large magnetic-style side decals labeled “Available Now – See Agent.” Though marketed as removable, the vinyl had bonded tightly due to summer sun exposure in Arizona. A technician at a certified detailing center followed the heat-and-peel method using a variable-heat blow gun set to 150°F (65°C), lifting edges with a Teflon-edged scraper.
After full removal, faint haze remained. He applied 3M Citrus Base Cleaner with a folded microfiber towel, working in small circles. Within three minutes, the residue lifted completely. The panel was then clayed and lightly waxed. Post-treatment inspection under direct sunlight showed no discoloration, swirl marks, or texture changes—proof that controlled methodology trumps brute force.
Common Mistakes to Avoid
- Rushing the process: Impatience leads to tearing stickers and spreading adhesive.
- Using box-cutters or metal razors directly on paint: Even stainless steel can scratch soft clear coats.
- Over-saturating with solvents: Pooling chemicals can seep under trim or rubber seals, causing long-term degradation.
- Skipping final decontamination: Leftover oils attract dust and reduce wax adhesion.
Checklist: Traceless Sticker Removal Protocol
Use this checklist before, during, and after removal to ensure optimal results:
- ✅ Wash and dry the affected panel
- ✅ Gather tools: hairdryer, plastic scraper, microfiber cloths, adhesive remover
- ✅ Work in shaded area, ideally between 60–80°F (15–27°C)
- ✅ Heat sticker evenly for 30–60 seconds
- ✅ Lift edge and peel slowly upward
- ✅ Apply adhesive remover to residue only
- ✅ Wipe with clean microfiber using circular motion
- ✅ Final wash, dry, and apply protective coating
Frequently Asked Questions
Can I use a steam cleaner to remove car stickers?
Yes, but with caution. Low-pressure steam can effectively soften adhesive, but high heat and moisture may penetrate seams or electrical components if used near lights or sensors. Best reserved for flat body panels away from electronics.
Will rubbing alcohol damage my car’s wax?
It may strip some natural waxes, but synthetic sealants typically withstand moderate IPA exposure. Always re-wax or seal the area after extensive cleaning to maintain protection.
What if the sticker tears during removal?
If fragments remain, reapply heat to the affected section and continue peeling. For tiny remnants, dab a cotton swab with adhesive remover and gently roll it over the spot—do not scrub.
Protect Your Finish, Preserve Your Investment
Your car’s paint isn’t just cosmetic—it’s a layered defense system against corrosion, UV damage, and environmental contaminants. Every interaction, including sticker removal, should prioritize preservation over speed. By combining gentle heat, appropriate solvents, and non-abrasive tools, you maintain both appearance and value.
Whether you're removing a dealership decal, a forgotten bumper sticker, or a temporary tag, taking the time to do it right pays off in long-term finish health. Don’t let a five-minute job become a permanent flaw.


 浙公网安备
33010002000092号
浙公网安备
33010002000092号 浙B2-20120091-4
Comments
No comments yet. Why don't you start the discussion?