
Wax buildup on wood floors can create a dull, cloudy appearance over time. While wax once served as a popular protective finish for hardwoods, modern finishes like polyurethane have largely replaced it due to maintenance challenges. If your wood floor has accumulated layers of old wax—either from repeated applications or improper cleaning—it’s essential to remove it carefully. Done incorrectly, wax removal can damage the wood, strip its natural color, or compromise the underlying finish. The key is using gentle, controlled techniques that dissolve or lift wax without harming the surface.
Whether you're preparing to refinish your floors, restore their original luster, or switch to a different type of finish, this guide provides proven, non-damaging methods to safely eliminate wax buildup. From household items to specialized products, each approach is designed to preserve the integrity of your hardwood while delivering clean, revitalized results.
Understanding Wax Buildup on Wood Floors
Wax was commonly used in the early to mid-20th century as a protective coating for hardwood floors. It provided a warm sheen and allowed for spot repairs. However, wax is soft and porous, making it prone to attracting dirt, grime, and additional wax layers with each reapplication. Over time, this leads to a thick, sticky film that obscures the wood grain and becomes increasingly difficult to clean with standard mopping.
The first step in removal is identifying whether your floor is actually waxed. A simple test: press your fingernail into an inconspicuous area. If it leaves a slight indentation and feels slightly tacky, it's likely waxed. Another clue is a milky or hazy appearance when water is spilled and wiped away. Modern factory-finished floors typically use aluminum oxide or polyurethane coatings, which are much harder and don’t exhibit these traits.
“Removing wax from antique or historically finished wood floors requires patience and precision. Aggressive solvents can strip not just the wax but also decades of patina.” — Daniel Reeves, Heritage Floor Restoration Specialist
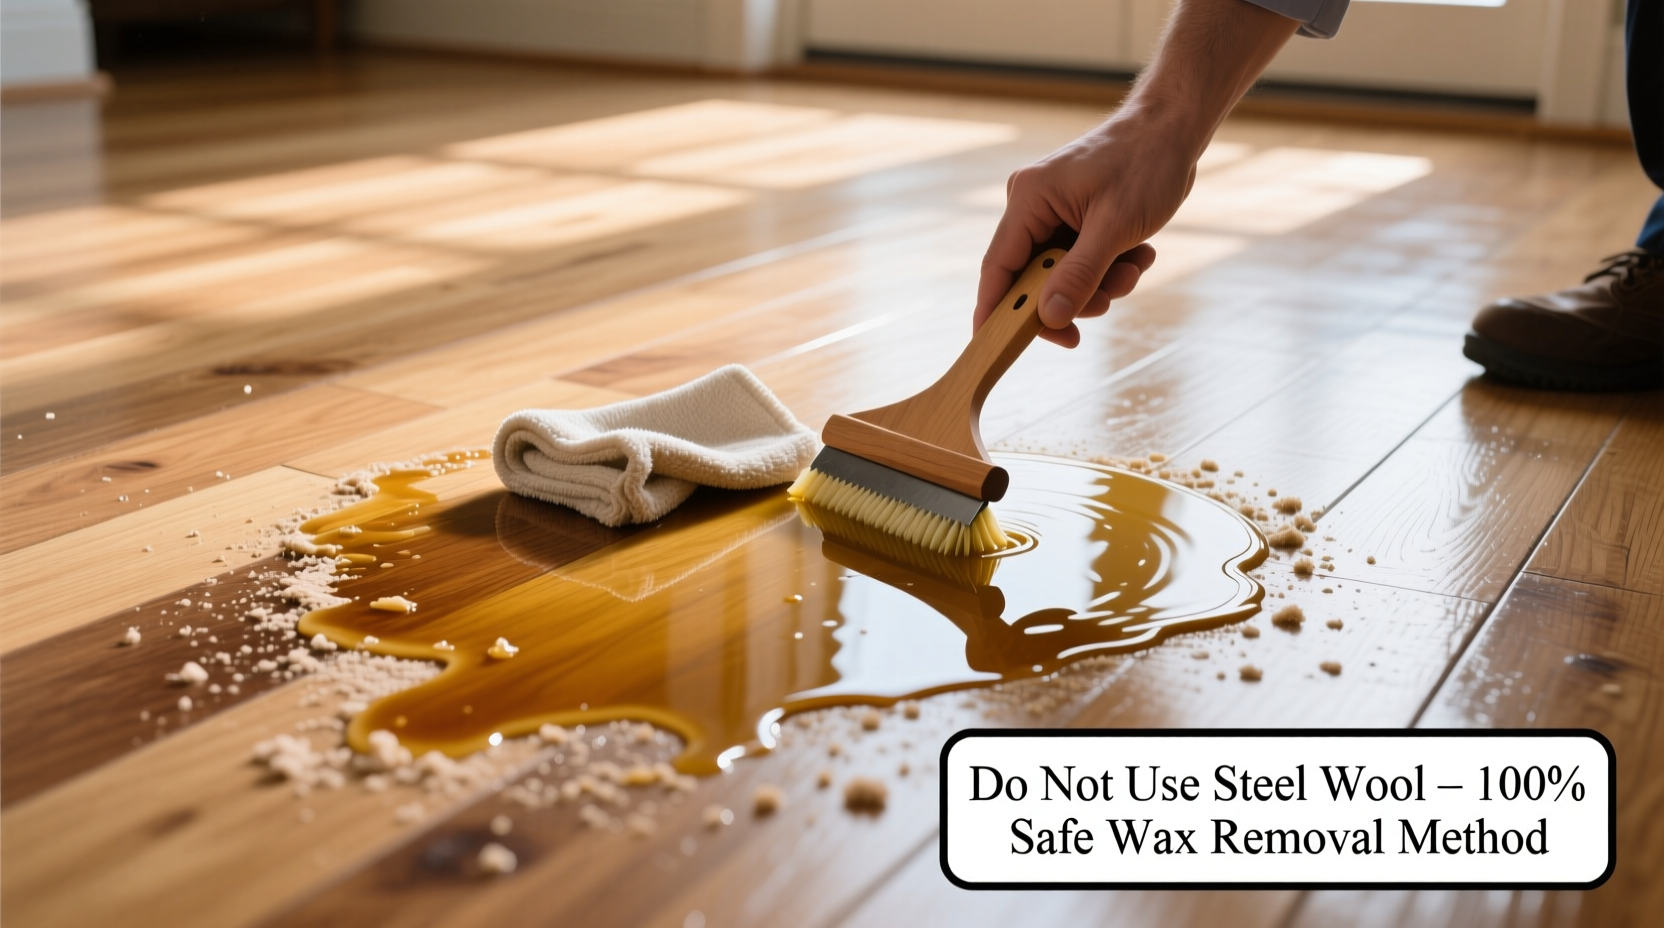
Step-by-Step Guide: Safe Wax Removal Techniques
Below is a detailed sequence of methods, starting with the gentlest options and progressing only if necessary. Always begin in a small, hidden area to test for adverse reactions.
- Clear the Area: Remove furniture, rugs, and baseboard covers to access the full surface.
- Dust Thoroughly: Use a microfiber mop or cloth to eliminate loose debris. Any grit left behind can scratch during cleaning.
- Choose Your Method: Select one of the safe approaches outlined below.
- Test First: Apply your chosen solution to a 6x6 inch patch behind a door or closet.
- Work in Sections: Never flood the floor. Apply solutions sparingly and wipe immediately.
- Rinse and Dry: After treatment, neutralize residue with a damp (not wet) cloth and dry completely with a clean towel.
Method 1: Vinegar and Warm Water Solution
A mild, eco-friendly option involves mixing one cup of white vinegar with one gallon of warm (not hot) water. Dip a microfiber mop or soft cloth into the solution, wring thoroughly, and gently scrub the floor in the direction of the grain. The acidity in vinegar helps break down wax without harsh chemicals.
Method 2: Commercial Wax Stripper (For Heavy Buildup)
If home remedies fail, consider a wood-safe wax remover such as Mop & Glo Floor Stripper or Minwax Antique Refinisher. Follow label instructions precisely. Apply with a sponge or applicator pad, let sit for the recommended time (usually 5–10 minutes), then wipe off with a lint-free cloth. Avoid letting the product dry on the surface.
After stripping, wash the floor with a mixture of water and a few drops of dish soap to neutralize any chemical residue. Rinse and dry immediately.
Method 3: Iron and Paper Bag Technique (Spot Treatment)
For localized wax spills—like from a candle—use heat to lift the wax. Place a brown paper bag or several layers of paper towels over the spot. Set an iron to low (no steam) and gently pass it over the paper. The heat melts the wax, which is absorbed by the paper. Repeat with fresh paper until no more wax transfers.
This method avoids liquid exposure and is ideal for preserving surrounding areas.
Do’s and Don’ts of Wax Removal
| Do | Don't |
|---|---|
| Test any solution in an inconspicuous area first | Use ammonia, bleach, or abrasive cleaners |
| Work in small sections with immediate drying | Flood the floor with liquid |
| Use soft cloths or microfiber pads | Scrub with steel wool or scouring pads |
| Allow proper ventilation when using chemical strippers | Leave stripper on longer than instructed |
| Follow up with a wood-safe cleaner after removal | Walk on the floor until it’s completely dry |
Real Example: Restoring a 1940s Oak Floor
A homeowner in Portland, Oregon, inherited a 1940s bungalow with heavily waxed oak floors. Years of layered paste wax had turned the surface yellow and sticky. They began with the vinegar solution, spending two weekends gently working room by room. After three passes, the haze diminished but stubborn patches remained near entryways.
They switched to a commercial wax stripper, applying it with a lamb’s wool applicator and removing it with terry cloth rags. The entire process took six days, including drying time between stages. Post-cleanup, they applied a thin coat of hardwax oil to protect the wood while maintaining a natural look. The result: a floor that looked decades younger, with rich grain patterns restored—all without sanding or refinishing.
Checklist: Preparing for Wax Removal
- ✅ Confirm the floor is wax-finished (nail test, water test)
- ✅ Remove all furniture and rugs
- ✅ Gather supplies: microfiber cloths, buckets, vinegar or stripper, paper bags, iron (if needed)
- ✅ Ventilate the room (open windows, use fans)
- ✅ Test your method on a hidden section
- ✅ Plan for at least 2–3 days, depending on floor size
- ✅ Have a dry, absorbent towel ready for immediate drying
FAQ
Can I use a steam mop to remove wax from wood floors?
No. Steam mops introduce excessive moisture and heat, which can warp wood, raise the grain, and damage adhesives in engineered flooring. Even “safe for wood” models should be avoided on waxed surfaces, as steam may push wax deeper into pores or cause clouding.
Will vinegar damage my wood floor?
When diluted properly (1:16 ratio with water) and used occasionally, vinegar is generally safe for waxed wood. However, frequent use or higher concentrations can gradually degrade the wood’s finish or cause swelling. Always dry the floor promptly after use.
What should I do after removing all the wax?
Once wax is fully removed and the floor is clean and dry, consider applying a modern wood floor finish such as water-based polyurethane or a penetrating oil. This will protect the wood and reduce future maintenance. Avoid re-waxing unless you’re committed to regular upkeep.
Conclusion
Removing wax from wood floors doesn’t require drastic measures or expensive equipment. With careful preparation, the right tools, and a methodical approach, you can restore your floor’s beauty without risking structural harm. Whether you opt for a natural vinegar solution or a targeted commercial product, the priority remains the same: preserve the wood while eliminating buildup.


 浙公网安备
33010002000092号
浙公网安备
33010002000092号 浙B2-20120091-4
Comments
No comments yet. Why don't you start the discussion?