
Capturing what’s displayed on your computer screen is a routine task for many—whether you're troubleshooting an error, sharing instructions, or preserving digital content. While taking a screenshot may seem straightforward, knowing the right method for your specific need can save time and improve clarity. From quick keyboard shortcuts to advanced annotation tools, mastering the art of screen capture enhances productivity across personal and professional environments.
This guide explores every practical way to take a screenshot on a PC, covering native Windows features, third-party utilities, and workflow optimizations that ensure you always get the result you want—without unnecessary effort.
Understanding Screenshot Types and Use Cases
Not all screenshots are created equal. The method you choose should align with your intended use:
- Full-screen capture: Best for showing everything visible on one monitor.
- Active window only: Ideal when documenting a specific application without distractions.
- Custom region selection: Perfect for highlighting details like error messages or UI elements.
- Delayed capture: Useful for capturing context menus or tooltips that disappear on click.
Selecting the appropriate type ensures clarity and relevance. For example, sending a full desktop image to support staff might include sensitive data, whereas a cropped region focusing only on the issue keeps communication secure and efficient.
Native Windows Tools for Taking Screenshots
Modern versions of Windows come equipped with several built-in options for screen capture, eliminating the need for external software in most cases.
Using Keyboard Shortcuts
The fastest way to capture your screen relies on simple key combinations:
| Shortcut | Action | Output Location |
|---|---|---|
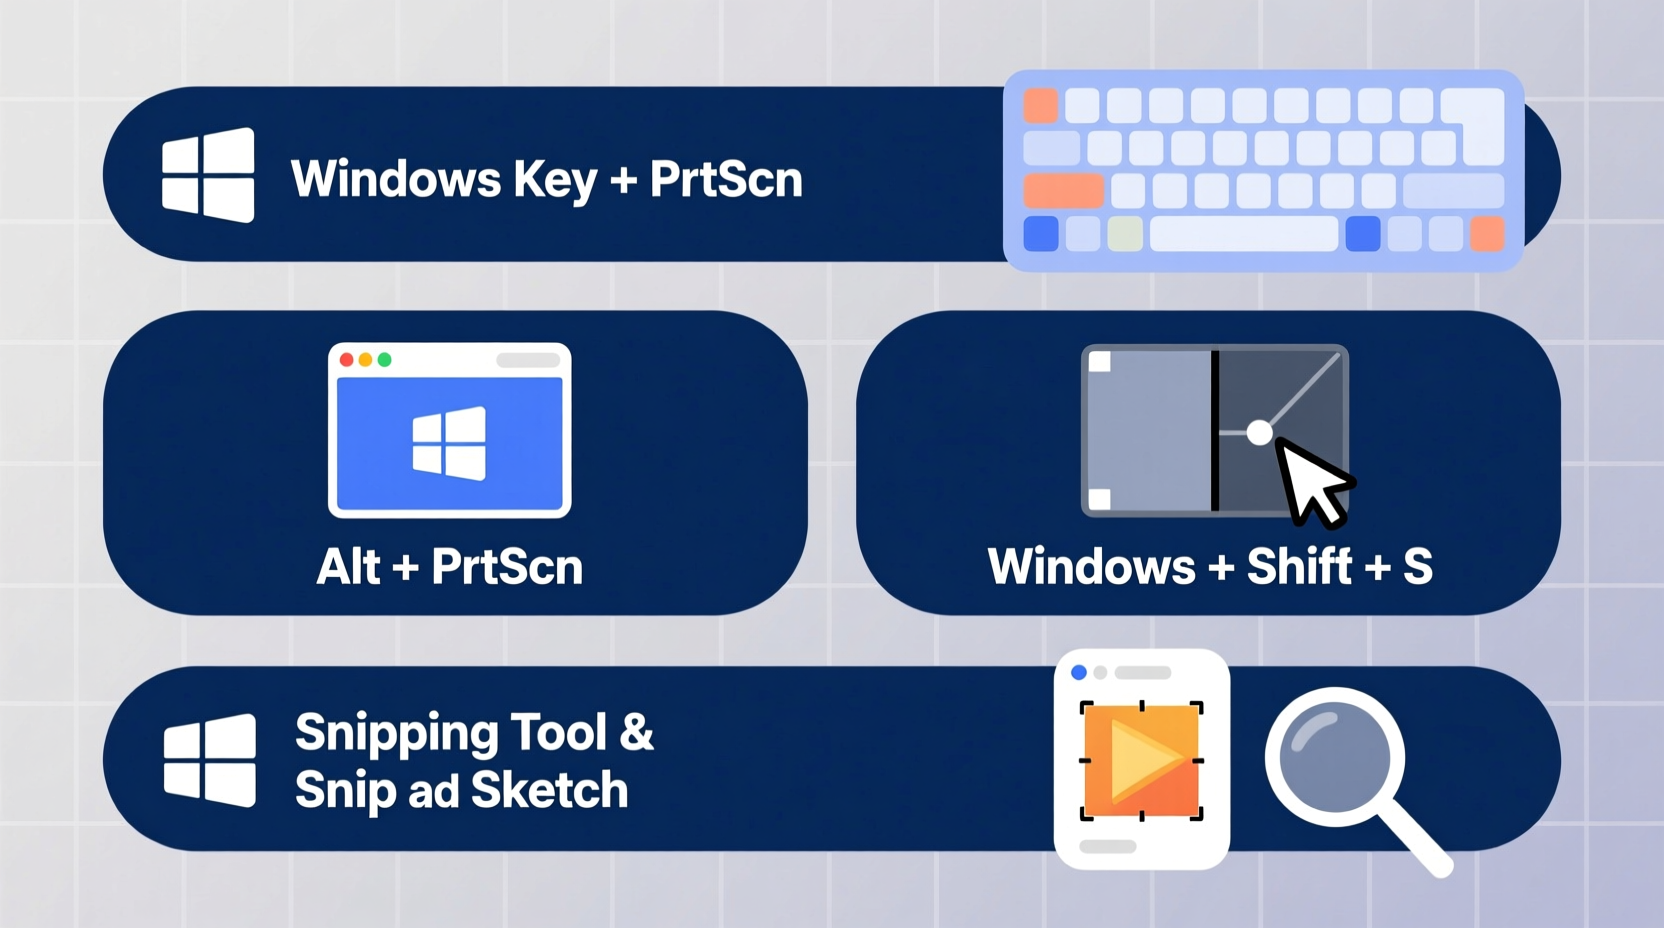
| Print Screen (PrtScn) | Copies entire screen to clipboard | Manual paste into app (e.g., Paint, Word) |
| Alt + PrtScn | Captures active window only | Copied to clipboard |
| Win + PrtScn | Takes full-screen screenshot and saves it automatically | Saved in Images > Screenshots folder |
| Win + Shift + S | Opens Snip & Sketch tool for selective capture | Copied to clipboard; appears in notification |
These shortcuts work instantly and require no setup. Pressing Win + Shift + S, for instance, dims the screen and allows you to drag-select any rectangular area, making it ideal for precise captures during presentations or documentation.
Snipping Tool and Snip & Sketch
Windows 10 and 11 include both the classic Snipping Tool and its modern counterpart, Snip & Sketch. Both allow delayed captures—useful for grabbing dropdown menus or hover states.
- Open Start menu and search for “Snipping Tool” or “Snip & Sketch.”
- Click “New” and select mode: freeform, rectangular, window, or full-screen.
- Set a delay (up to 5 seconds) if needed.
- Capture, then annotate using pen, highlighter, or eraser tools.
- Save directly or copy to clipboard.
This flexibility makes these tools valuable for creating tutorials or reporting bugs where annotations add context.
Advanced Methods Using Third-Party Software
While Windows provides robust native tools, third-party applications offer enhanced functionality for frequent users.
Popular Free Tools
- Greenshot: Lightweight open-source tool with customizable hotkeys, OCR support, and direct export to email or printers.
- ShareX: Feature-rich and highly configurable; supports screen recording, automatic uploads, and blur effects for privacy.
- Lightshot: Simple interface with instant sharing via cloud link—ideal for quick collaboration.
For professionals who regularly create documentation or conduct remote support, these tools streamline workflows by automating repetitive steps like saving, uploading, or redacting.
Mini Case Study: Resolving a Software Bug Report
A junior developer at a mid-sized tech firm struggled to communicate recurring UI glitches to the QA team. Initial reports included vague descriptions like “button disappears after login,” leading to delays. After adopting Win + Shift + S combined with annotated screenshots using Snip & Sketch, the clarity improved dramatically. By circling the missing element and adding a text note about browser version, the bug was resolved within hours instead of days. This small change in communication method significantly reduced back-and-forth and accelerated debugging cycles.
“Clear visuals reduce ambiguity more than paragraphs of text ever could.” — Lena Torres, Senior UX Engineer at NexaSoft
Best Practices and Workflow Optimization
To maximize efficiency and maintain consistency, follow these proven strategies:
Checklist: Optimal Screenshot Workflow
- ✅ Clear unnecessary windows or notifications before capture.
- ✅ Use Win + Shift + S for targeted selections.
- ✅ Annotate with arrows, highlights, or text to guide attention.
- ✅ Crop excess space to focus on the subject.
- ✅ Save in PNG format for sharpness, especially with text or code.
- ✅ Name files descriptively (e.g., \"Login_Error_Chrome_v118.png\").
- ✅ Organize screenshots in dedicated project folders.
Establishing a repeatable process minimizes post-capture editing and ensures others understand the context immediately.
Avoiding Common Pitfalls
Even experienced users fall into traps that compromise usability:
| Do’s | Don’ts |
|---|---|
| Use dark mode or high contrast when capturing code samples for readability. | Avoid including personal data like passwords, emails, or financial info. |
| Resize large images before attaching to emails to reduce load time. | Don’t rely solely on clipboard—save important captures immediately. |
| Leverage delay timers to capture transient UI states. | Never assume recipients know what part of the image matters—annotate. |
One overlooked habit is failing to verify the screenshot actually shows the intended content. A quick preview prevents embarrassing omissions or misalignments.
Frequently Asked Questions
How do I take a screenshot of a dual-monitor setup?
Pressing PrtScn captures both screens as a single image, spanning their combined resolution. If you only want one monitor, use Win + Shift + S and manually select the area from the desired display.
Where does Windows save my screenshots?
If you press Win + PrtScn, screenshots are saved in C:\\Users\\[YourName]\\Pictures\\Screenshots. Other methods (like PrtScn alone) only copy to clipboard—you must paste them into an editor to save.
Can I schedule automatic screenshots?
Windows doesn’t support scheduled captures natively, but tools like ShareX or AutoHotkey scripts can automate timed snapshots. These are useful for monitoring long-running processes or tracking changes over time.
Mastery Through Consistency
Taking effective screenshots isn’t just about pressing keys—it’s about communicating clearly and efficiently. Whether you’re guiding a colleague through a complex interface or archiving digital evidence, the right technique transforms confusion into clarity. By integrating keyboard shortcuts, leveraging annotation tools, and following best practices, you turn a basic function into a powerful communication asset.


 浙公网安备
33010002000092号
浙公网安备
33010002000092号 浙B2-20120091-4
Comments
No comments yet. Why don't you start the discussion?